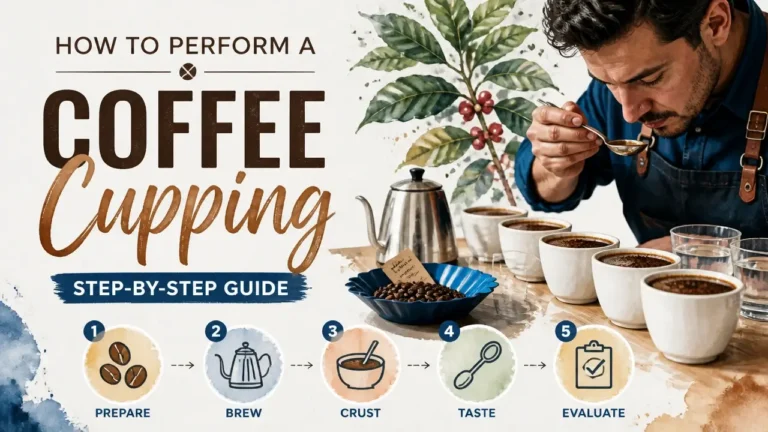

Serious coffee cupping isn’t a ritual – it’s a controlled sensory experiment. You hold every variable constant so the only thing left to compare is the coffee itself. Get the ratio wrong, taste too hot, or skip the blind protocol, and you’ll spend an hour evaluating your water quality and your own expectations instead of the beans.
The good news: the core method is simple enough to run on a kitchen counter. This guide walks through each step in sequence – gear, grinding, fragrance, extraction, crust break, skimming, the slurp, and scoring – so you finish your first session with notes you can actually trust.
Key Takeaways on How to Perform Coffee Cupping
- Use 8.25 g of coffee per 150 ml of water at 93 °C – measure by weight, never by volume.
- Grind immediately before cupping and prime your grinder with 1-3 g of the next coffee to prevent cross-contamination between samples.
- A thick crust after pouring signals fresh coffee; a thin or absent crust means the beans have off-gassed and are too stale to evaluate accurately.
- Slurping aerosolizes the coffee across your entire palate simultaneously – the noise is the mechanism, not a courtesy violation.
- Taste each coffee at multiple temperatures; acidity sharpens as the cup cools, and sweetness often only emerges below 55 °C.
- Blind cupping removes expectation bias more reliably than any equipment upgrade – randomize cup codes before you taste, reveal them only after scoring.
Equipment and Preparation: Set Up Before You Smell Anything
The right cupping equipment isn’t just about accuracy – it’s about removing the variables that would otherwise explain away every difference you taste. Before your nose gets anywhere near dry grounds, you need a setup that holds water temperature, dose, grind size, and sample freshness constant across every cup in the session.
SCA Technical Officer Mario Fernández describes the industry’s current direction as a shift toward assessments that are data-rich and multidimensional – built on years of collaboration with sensory scientists and early adopters. The new SCA standards, he notes, set a benchmark that equips the industry with deeper insights into coffee quality by aligning cupping practices with modern sensory science.
What that means for you at home: the protocol exists for a reason. Every specification – the ratio, the temperature, the steep time – is an engineering decision, not a tradition. Follow the structure, and your results will be honest. Skip pieces of it, and you’ll be tasting noise.
Essential Toolkit, Ratios, and Sample Selection for Home Cupping
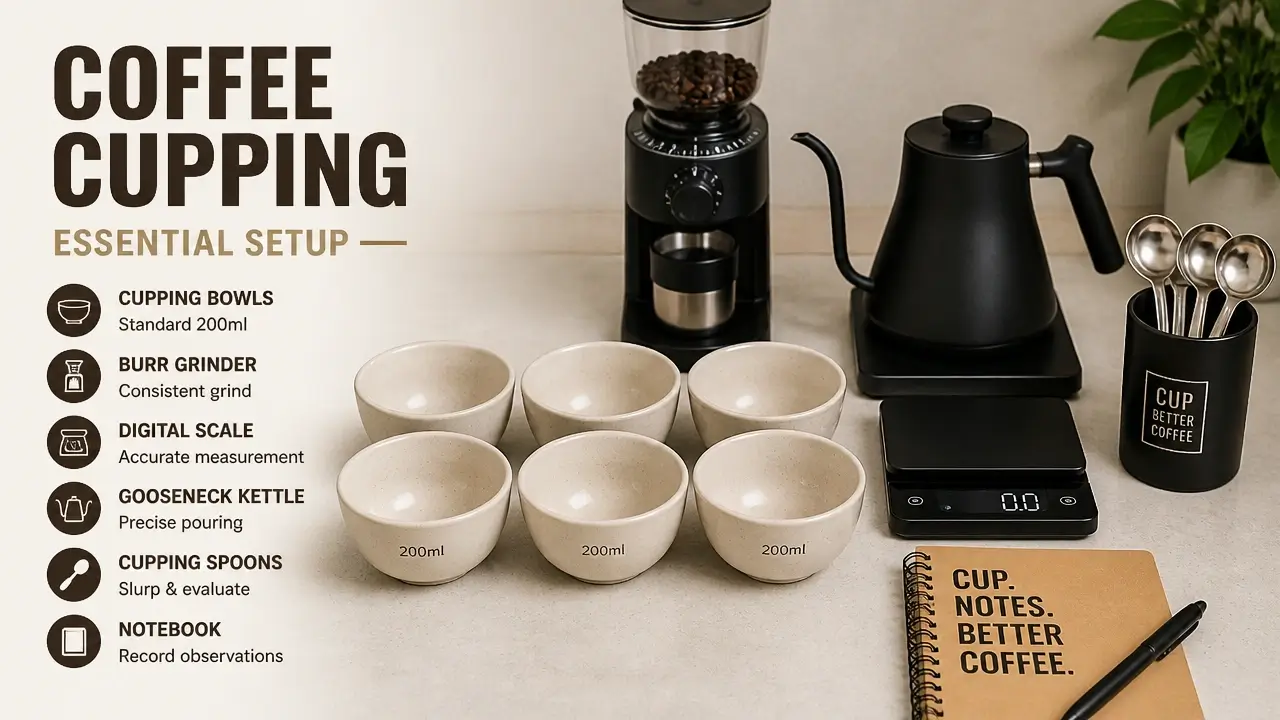
The essential cupping toolkit comes down to seven items: a burr grinder, a digital scale that reads to 0.1 g, six to eight identical ceramic bowls or mugs (160-200 ml capacity), a kettle (gooseneck preferred but not required), a timer, deep cupping spoons, and a cupping form or notebook. Add a rinse cup per spoon and a spit cup if you plan to evaluate multiple sessions back-to-back.
The coffee-to-water ratio is 8.25 g per 150 ml, or 11-12 g per 200 ml. Water temperature: 93 °C (200 °F). Always measure by weight. Volume measurements for coffee are too imprecise – density varies by roast level, and a tablespoon of a light roast and a tablespoon of a dark roast are not the same dose.
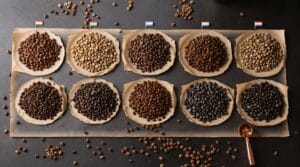
For sample selection, pick coffees at the same roast level – ideally light to medium – roasted within the past two weeks and stored in airtight containers. When all coffees in a session share a similar roast profile, origin differences become the signal. Roast-level differences become the noise that drowns that signal out.
Water chemistry matters more than most home guides admit. The SCA recommends total dissolved solids around 150 ppm, alkalinity 40-75 ppm, hardness 17-85 ppm, and pH 6.5-7.5. If two cups in the same session use different water sources – say, softened tap water in one and filtered water in another – that difference alone can produce flavor variation that has nothing to do with the coffee. Use the same water source for every cup. If your tap water is heavily chlorinated or very hard, use filtered or bottled spring water, and stay consistent across all cups.
The full pro kit runs $200-500. That’s a real barrier. But here’s a legitimate entry point before you commit to that: use identical kitchen mugs instead of ceramic cupping bowls, ask a local roaster to pre-grind your samples (they’ll go stale faster, but the session is still educational), mark a permanent-marker line on a mug at 150 ml for water volume, and use your phone as a timer. Think of this as the Gateway Protocol – a no-shame starting point that teaches you the sensory framework while you decide whether the gear investment makes sense.
Grinding Technique and Cleanliness Protocol
Grinding technique is where sessions quietly fall apart. Weigh each sample to your chosen dose – say, 11 g per cup – and grind immediately before cupping. Target a medium-coarse grind, similar to French press: think kosher-salt or sea-salt texture. Finer than that, and you’ll over-extract; coarser, and you’ll under-extract. Both outcomes flatten the differences between coffees.
Clean the grinder between every sample. Pre-warm all cups with hot water and dump it before adding grounds. Keep spoons in a cup of clean hot water between uses. Clear the work surface of anything with a competing smell – soap residue, last night’s garlic, a scented candle.
Here’s the part most guides skip: grinder priming. Every grinder retains some coffee inside the burr chamber after grinding. That retained coffee means the first few grams of your next sample are actually a mixture of the previous coffee and the new one. To fix this, run a small dose of the next coffee through the grinder and discard it before grinding the actual sample. For most home conical-burr grinders like the Baratza Encore, 1-2 g is enough. For flat-burr home grinders like the Fellow Ode, use 2-3 g.
The simplest way to find your exact retention: weigh what you put in, then weigh what comes out. The difference is your retention number. That’s your prime dose going forward. Skip this step, and two different coffees will taste artificially similar – not because they are similar, but because you’ve been blending them.
Step 1: Inhale the Dry Fragrance
Dry fragrance is the first active sensory step, and it sets a baseline you’ll spend the rest of the session either confirming or overturning. This is the scent of volatile compounds before any water touches the grounds. It’s often sweeter, more floral, or nuttier than what the brewed coffee delivers – because heat and water extract different compounds than air alone.
The distinction matters: fragrance is dry grounds; aroma is wet. They’re related but not the same, and training yourself to separate them sharpens your palate faster than almost any other habit.
Immediately after grinding each sample, place the dry grounds in the bowl. Bring your nose close to the surface and inhale gently with your mouth slightly open. This is orthonasal smelling – drawing scent molecules directly through the nostrils. Go cup-by-cup in the same order you’ll taste them later. Consistency in the sequence matters because your sensory memory is building a comparison across the session.
Write down your first impressions without editing them. Fruit, chocolate, dried herbs, earth, bread, tobacco – whatever registers, note it. There are no wrong answers at this stage. If all the coffees smell nearly identical in the dry phase, note that too. Dry fragrance can be subtle, especially at lighter roasts, and the differences often amplify sharply once hot water hits.
One practical note: do this step dry, before any water touches the grounds. Steam from nearby cups can alter the volatile release and muddy your baseline. Keep the kettle away from the bowls until you’re ready to pour.
This step is also where the SCAA cupping protocol draws its first formal evaluation line – fragrance and aroma together constitute one of the ten scored attributes, and your dry-fragrance notes feed directly into that score.
Step 2: Pour, Steep, and Begin Extraction
Pour and steep technique is where the chemistry starts, and the margin for error is narrower than it looks. Two variables control everything: water temperature and steep time. Get either one wrong, and you’ve changed the extraction, not just the ritual.
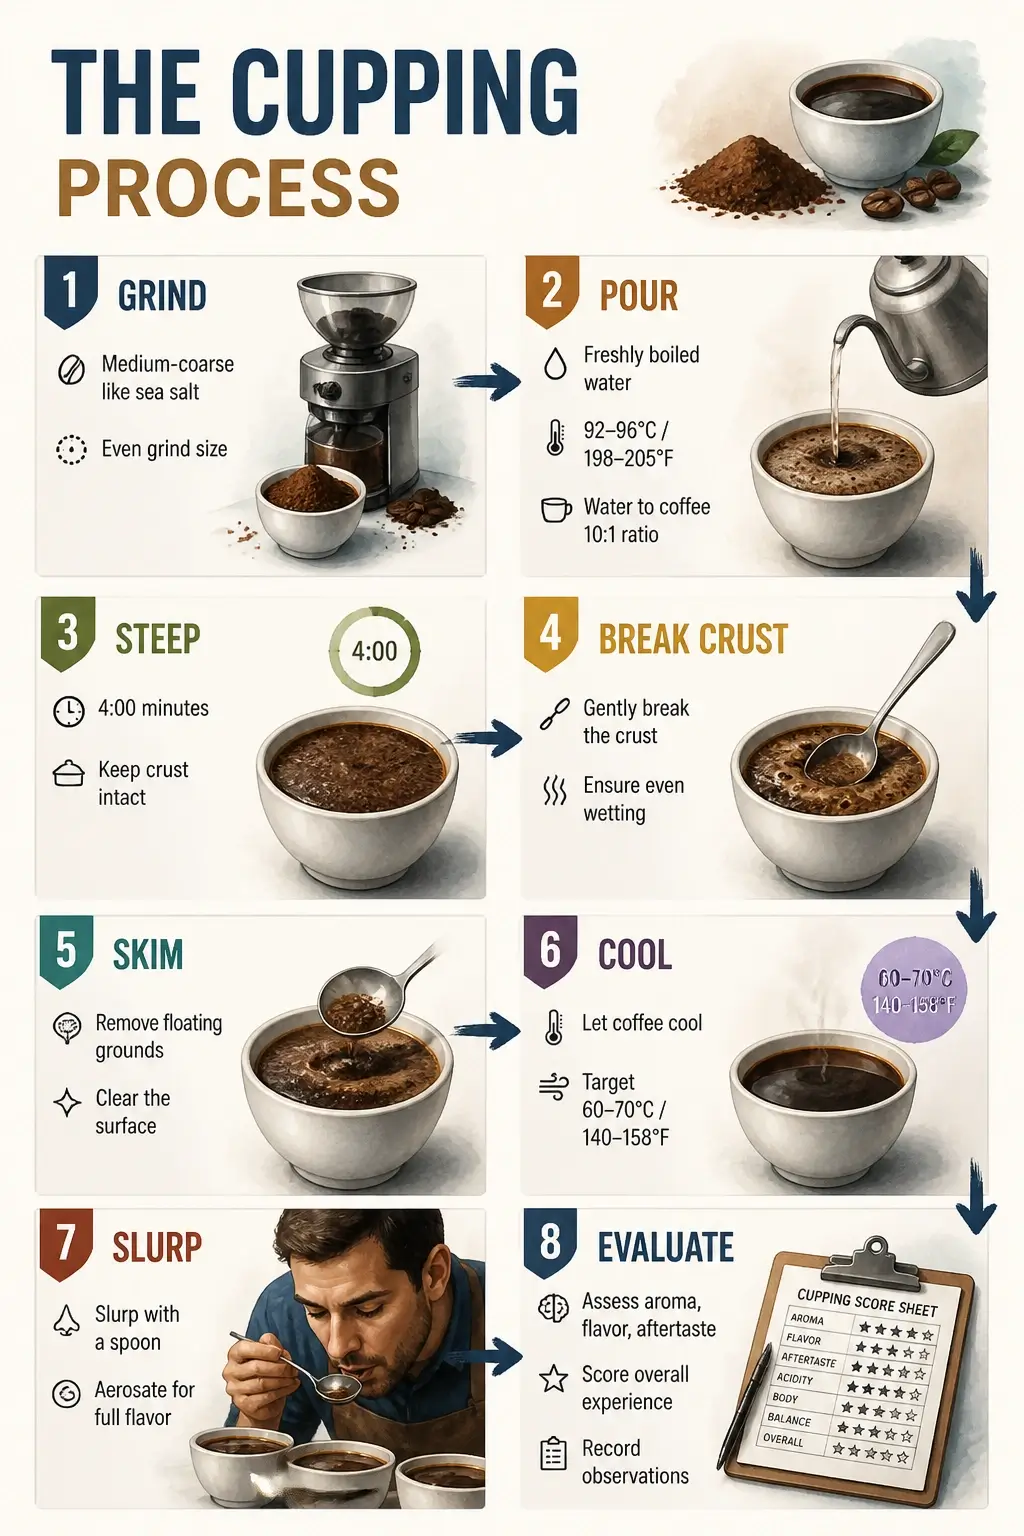
Start your timer, then pour 93 °C water steadily over the grounds until the bowl reaches its target volume. Make sure all grounds are saturated – pour in a slow spiral if needed, but don’t stir. All cups should receive water in the same order and at roughly the same pace so that steep time stays consistent across samples. A 30-second delay between the first and last cup means the first cup has been steeping longer. That gap compounds over 4 minutes.
Set the timer for 4 minutes and don’t touch the cups. During this window, a thick crust of grounds and foam will rise to the surface. A dense, well-formed crust is a quality signal: fresh coffee still holds CO₂ from the roasting process, and hot water drives that gas out rapidly, lifting the grounds upward. Stale beans have already off-gassed. Their crust is thin or absent.
The temperature and steep time aren’t arbitrary. Here’s why they work:
93 °C is hot enough to extract desirable chlorogenic acids (the compounds behind pleasant acidity) and sugars, while staying below the threshold where excessive bitter compounds leach into the cup. Boiling water over-extracts and masks the origin nuance you’re trying to evaluate. Cooler water leaves the coffee flat and incomplete.
The 4-minute window maps onto fresh coffee’s CO₂ release curve. Gas escapes rapidly in the first two minutes, then slows to a plateau around three to four minutes. By minute four, the grounds are fully wetted and most of the gas has escaped, creating a stable extraction environment. Extending to five or more minutes risks stewing the grounds and dulling the acidity that makes origin differences readable.
Step 3: Break the Crust and Capture Wet Aroma
Crust breaking is the most aromatic moment in the entire session. At exactly the 4-minute mark, pick up a spoon, lower it into the crust, and push the grounds away with three slow back-and-forth motions. As you do this, lean your nose directly over the bowl. The volatile burst that escapes in those first seconds is intense and brief. You need your nose in the bowl to catch it.
This is wet aroma – and it tells a different story than dry fragrance. Where dry fragrance favors floral and sweet top notes, wet aroma carries deeper cues about origin, processing method, and roast. Berries, stone fruit, caramel, baking spice, tobacco, or toastiness – notice whether what you smell now matches, amplifies, or contradicts what you noted in the dry phase. A coffee that smelled floral dry but smells fermented wet is telling you something important about its processing.
Break the crust of each bowl in the same order as the pour. Rinse the spoon in your hot-water rinse cup between different coffees to avoid carrying one coffee’s aromatics into the next bowl’s evaluation.
The crust break is also a quality-control checkpoint. A thin or absent crust means the coffee is stale. A dusty or papery smell means the roast is old. A sharp, fermented, or vinegar-like smell at this stage is a defect flag – not a processing characteristic.
After breaking all the crusts, set the spoon down and let the bowls rest for a moment. The grounds will begin to settle. That’s your cue to move to skimming.
Watch the video below for a practical demonstration of the full cupping process, including the crust break technique:
Step 4: Skim and Let the Coffee Cool
Skimming and cooling is the calm between the drama of the crust break and the precision of tasting. Using two spoons – or one spoon and a steady hand – skim the remaining floating grounds and foam from the surface of each bowl. Work gently. The goal is a clean surface with minimal disturbance to the liquid below. Rinse spoons between samples.
After skimming, step back. Let the coffee cool for 10-15 minutes from the time of the pour, until it reaches a sipping temperature around 60-70 °C. A practical test: if you can hold the bottom of the bowl comfortably for two or three seconds, the temperature is probably right. Tasting too early – above 70 °C – burns the tongue and suppresses the acidity and sweetness you’re trying to evaluate. The heat muffles exactly the signals you need.
Use this window productively. Reset your notebook to a clean scoring row for each coffee. Rinse your spoons in fresh hot water. Review your dry-fragrance and wet-aroma notes so you have a hypothesis ready for the taste phase. Mental preparation isn’t ceremonial – it keeps you from being surprised into vague descriptions when the tasting starts.
One important reminder: you’ll taste each coffee multiple times as it cools further. The first taste at around 60-70 °C is an opening snapshot. Acidity often becomes more pronounced as the coffee drops toward room temperature. Body can feel thinner at the same stage. Sweetness tends to emerge more clearly in the 45-55 °C range. Plan to return to each bowl at least twice.
Step 5: Slurp to Unlock Flavor
Slurping is the mechanical core of coffee cupping, and the loud noise is not a side effect – it’s the point. Here’s what’s actually happening: when you slurp, you draw air into your mouth alongside the coffee, atomizing the liquid into fine droplets. That spray coats your entire palate simultaneously – tongue, cheeks, roof of the mouth, back of the throat – and the aerosolized droplets release volatile aromatic compounds that travel up the retronasal passage to your olfactory receptors. A quiet sip hits maybe a third of your taste-receptor surface. A hard slurp hits all of it at once.
The mechanics: dip the cupping spoon just below the surface and fill it about two-thirds full. Bring it to your lips without touching them to the spoon – or use a separate spoon per person if you’re cupping in a group. Then slurp forcefully and quickly.
Hold the coffee in your mouth for one to two seconds. Notice what registers and where:
- Acidity tingles the sides of the tongue – think citrus sparkle or malic brightness
- Sweetness hits the tip of the tongue first
- Body is the weight and texture – watery vs. syrupy, light vs. full
- Flavor notes arrive as the coffee coats the back of the palate
Spit into your cup if you’re evaluating multiple sessions. Cupping is evaluation, not consumption. Swallowing 12 cups of coffee defeats the purpose and overloads your palate.
Taste each coffee at least twice. The first pass gives you quick impressions. The second pass – after the coffee has cooled another five to ten minutes – often reveals more delicate flavors that were masked by heat. Revisit each bowl in the same order. Take a sip of water or rinse your spoon between samples to prevent palate fatigue from collapsing your ability to distinguish the later cups.
Step 6: Evaluate and Score with Confidence
Cupping evaluation is where impressions become data. The ten attributes used in professional cupping give you a repeatable framework, and each one isolates a specific dimension of the coffee so your overall score reflects what’s actually in the cup rather than a general feeling.
Here are the ten attributes with working definitions for non-professional tasters:
| Attribute | What You’re Measuring |
|---|---|
| Fragrance/Aroma | Dry and wet scent intensity and quality |
| Flavor | The overall taste impression at mid-palate |
| Acidity | Pleasant brightness – citrus sparkle, not sourness |
| Body | Weight and texture in the mouth |
| Aftertaste | How long and how pleasantly the flavor lingers |
| Sweetness | Natural sugar expression – caramel, fruit, honey |
| Balance | Whether the attributes complement or compete |
| Uniformity | Consistency across multiple cups of the same coffee |
| Clean Cup | Absence of defects or off-flavors |
| Overall | Your holistic impression, separate from the sum |
For scoring, use a 1-10 numeric scale for each attribute, or a simpler qualitative tier – low, medium, high – if you’re starting out. A printed cupping form or a notebook with rows for attributes and columns for each coffee keeps everything organized. You can download the official SCAA cupping form if you want to work with the industry-standard template.
Taste at multiple temperatures. At 8-10 minutes from pour, the coffee is warm – you’ll catch body and initial flavor. At 15-16 minutes, flavors sharpen and acidity often opens up. Near room temperature, sweetness and aftertaste become the dominant signals. Record notes at each stage rather than averaging them after the fact.
For your overall score: don’t average the numbers. The overall should reflect the most distinctive sensory experience the coffee delivered. A coffee with exceptional acidity and a clean, lingering aftertaste might score an overall higher than its attribute average suggests. That’s the point – the overall captures what the numbers miss.
The Blind Cupping Upgrade
Even a perfect scoring sheet can’t protect you from expectation bias. A Kenya sample labeled “Ethiopia” will attract floral and berry descriptors regardless of what it actually tastes like. The label does the tasting. Your palate just confirms it.
The fix is simple: have a partner assign each cup a random three-digit code on a sticky note placed under the bowl, or generate codes yourself with a random number generator and seal the key in an envelope before you start. Taste and score every attribute using only the code number as your reference. After all evaluations are complete, flip the bowls, reveal the codes, and match them to your key.
Call this the Honesty Protocol. It’s optional. But the first time a coffee you expected to love scores mediocre, and a coffee you’d never heard of scores at the top of your sheet – that’s the moment home cupping becomes a genuine skill rather than a confirmation exercise.
Troubleshooting: Where Home Cupping Goes Wrong
Cupping troubleshooting comes down to three recurring failures. Each one has a mechanical cause, and once you understand the mechanism, the fix is obvious.
Diagnosing and Fixing Common Cupping Failures
No crust forming. The most common cause is stale coffee. Fresh coffee still holds CO₂ from the roasting process; when hot water hits, that gas rushes out and lifts the grounds into a crust. Old coffee has already off-gassed, so there’s nothing to lift. Check your roast date – the coffee should be within two weeks of roast. If the roast date is fine but the crust is still weak, your grind size is probably too fine. Fine grounds release their CO₂ too quickly before the crust can stabilize, and they also compact under the water rather than rising. Aim for kosher-salt texture. If the problem persists, drop your water temperature slightly – over-aggressive heat can collapse the crust before it forms.
All coffees taste the same. You’re probably tasting too hot. Taste receptors are less sensitive above 70 °C, which suppresses the delicate acidic and aromatic differences between origins. Wait until the coffee is comfortably warm before drawing conclusions – at least 10 minutes from pour. A second cause: you may not have a reference point. Cup at least one coffee you know well alongside unfamiliar samples. A known anchor makes the differences in the unknown coffees far more readable.
Pervasive bitterness across all cups. Water temperature is the most likely culprit. Chlorogenic acid lactones – the compounds responsible for sharp, harsh bitterness – degrade primarily above 96 °C. Staying at 93 °C avoids that degradation pathway. Let fully boiled water rest for 30-45 seconds before pouring. Also check your steep time: anything beyond 4 minutes risks stewing the grounds and amplifying bitter extraction. If bitterness persists after correcting temperature and timing, reduce your dose slightly to 10.5-11 g per 200 ml. Less coffee, same water – lower extraction intensity.
Signs You Are Cupping Correctly and the Path Forward
Three indicators tell you the session worked:
First, you can identify clear, distinct flavor differences between at least two coffees without prompting. Not “this one tastes better” – specific differences. Brighter acidity in one, heavier body in another, a floral top note in a third.
Second, your notes include specific descriptors – fruity, nutty, floral, chocolatey, herbaceous – that you could reproduce if you tasted the same coffee again next week. Vague impressions (“pleasant,” “smooth”) don’t build a skill. Specific ones do.
Third, when you run the blind protocol, your evaluations either confirm your expectations or genuinely surprise you. That surprise is important. It proves you’re tasting the coffee, not the label. The surprise is the signal that your palate is working independently of your assumptions.
Cupping sharpens with repetition. The first session is disorienting. The fifth session is where patterns start to emerge. By the tenth, you’ll recognize acidity signatures by origin, processing artifacts by smell, and roast level by body. Today’s confusion becomes next month’s baseline.
Frequently Asked Questions About How to Perform Coffee Cupping
How is coffee cupping different from just tasting brewed coffee?
Cupping holds every brewing variable constant – dose, grind size, water temperature, steep time – so the only thing changing between cups is the coffee itself. Regular brewing introduces too many variables to isolate origin or roast characteristics reliably.
What’s a good cupping score for coffee?
On the SCA’s 100-point scale, scores above 80 qualify a coffee as specialty grade. Scores in the 85-89 range indicate excellent quality with distinct origin character. Anything above 90 is considered exceptional and relatively rare. For home cupping on a 1-10 per attribute scale, don’t chase a target number – chase consistency in your own scoring across sessions.
Can I cup espresso roasts, or does cupping only work for light roasts?
You can cup any roast level, but cupping was designed to evaluate origin character, which light and medium roasts express most clearly. Dark roasts tend to express roast character over origin character, so the differences between coffees narrow significantly. Cupping dark roasts is still useful for comparing within that roast level, just not for origin analysis.
Why do professional cuppers spit the coffee instead of swallowing?
It’s purely practical. Evaluating eight to twelve cups in a session means consuming a significant caffeine dose if you swallow. Spitting lets you evaluate more coffees without sensory fatigue or physiological interference affecting your later assessments.
How often should I replace my water during a cupping session?
Rinse your spoons in fresh hot water between every different coffee. Replace the rinse water entirely if it becomes visibly cloudy or picks up a coffee smell – contaminated rinse water transfers flavor between cups and defeats the purpose of rinsing.
Does the origin of the coffee change how I should evaluate it?
The evaluation framework stays the same regardless of origin, but your expectations should flex. A natural-processed Ethiopian will likely show intense fruit and fermentation notes; a washed Guatemalan will likely show cleaner acidity and chocolate. Knowing the origin helps you know what to look for – but the blind protocol keeps that knowledge from doing the tasting for you.
How many coffees should I cup in a single session?
Three to six coffees is the practical range for home cupping. Below three, you don’t have enough contrast to build comparison. Above six, palate fatigue starts compressing your ability to distinguish later cups, especially if you’re still developing your tasting vocabulary.
What’s the fastest way to actually improve at cupping?
Cup the same coffee twice in the same session without knowing which cup is which. If your notes match, your palate is consistent. If they diverge significantly, your evaluation is being driven by factors other than the coffee – position in the lineup, temperature drift, or fatigue. Consistency is the skill; everything else follows from it.
References
- SCA Officially Adopts New Cupping Forms and Standards | dailycoffeenews.com
- SCAA Cupping Protocol: Official Standards and Procedures | coffeefactz.com
- The SCAA Cupping Form Explained: Scoring Categories and Guidelines | coffeefactz.com