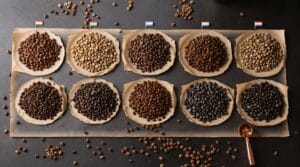

Reliable coffee cupping defect detection depends on a chain of controlled variables, not just a trained palate. Get the water mineral content wrong, grind too early, or stop tasting before the cup cools to 38°C, and real defects disappear into the noise of bad procedure.
This protocol walks through every stage of a professional cupping session, from the equipment on the table to the calibration drills that keep your scores honest across sessions. The SCA framework provides the structure. Understanding why each step works is what makes it stick.
Key Takeaways on Coffee Cupping Defect Detection
- Water between 125–175 ppm TDS is not optional; mineral content directly controls extraction yield and how clearly defects register on the palate.
- Dry fragrance evaluation has a hard 15-minute chemical boundary; volatile aromatics dissipate fast enough to make later grinding a different experiment.
- Three controlled crust-break pushes capture a fuller aromatic gradient than one aggressive stroke, because the volatile profile releases in layers.
- Defects like phenol, rio-y iodine, and ferment amplify as cups cool to 38°C; stopping tasting at 55°C misses the most diagnostically useful temperature range.
- A partial bean defect only counts as a full SCA defect when visible damage covers more than one-third of the bean surface; ignoring this threshold disqualifies specialty-grade lots unnecessarily.
- A 79.5 vs. 80.0 cupping score determines whether a producer receives the specialty premium, making calibration an economic and ethical obligation, not just a technical one.
The Unspoken Prerequisites: Equipment, Water, and Environment
Before a single gram of coffee hits the scale, the conditions around the table are already shaping your results. Most online cupping guides jump straight into the protocol, assuming you’ve assembled a professional setup. The reality is that every variable in this section is an invisible source of false positives and missed defects.
Here’s what you need on the table, specified precisely:
- Cupping bowls: 5–6 identical bowls per sample, 200–240 ml capacity, ceramic or tempered glass
- Cupping spoons: 4–5 ml, non-reactive metal (typically stainless steel)
- Digital scale: 0.1 g resolution minimum
- Burr grinder: capable of a medium-coarse grind (~850 µm), with minimal fines generation
- Thermometer: instant-read, ±0.5°C accuracy
- Timer: dedicated, not your phone screen
- Hot water kettle or dispenser: capable of holding 93°C
- Spittoons: one per taster
- Clean towels: neutral, unscented
- Blank SCA cupping forms: one per sample per taster
The coffee-to-water ratio is fixed: 8.25 g of whole bean coffee per 150 ml of water. Grind each bowl’s dose separately, immediately before brewing. Pre-grinding and holding is not an option here; it’s a different experiment.
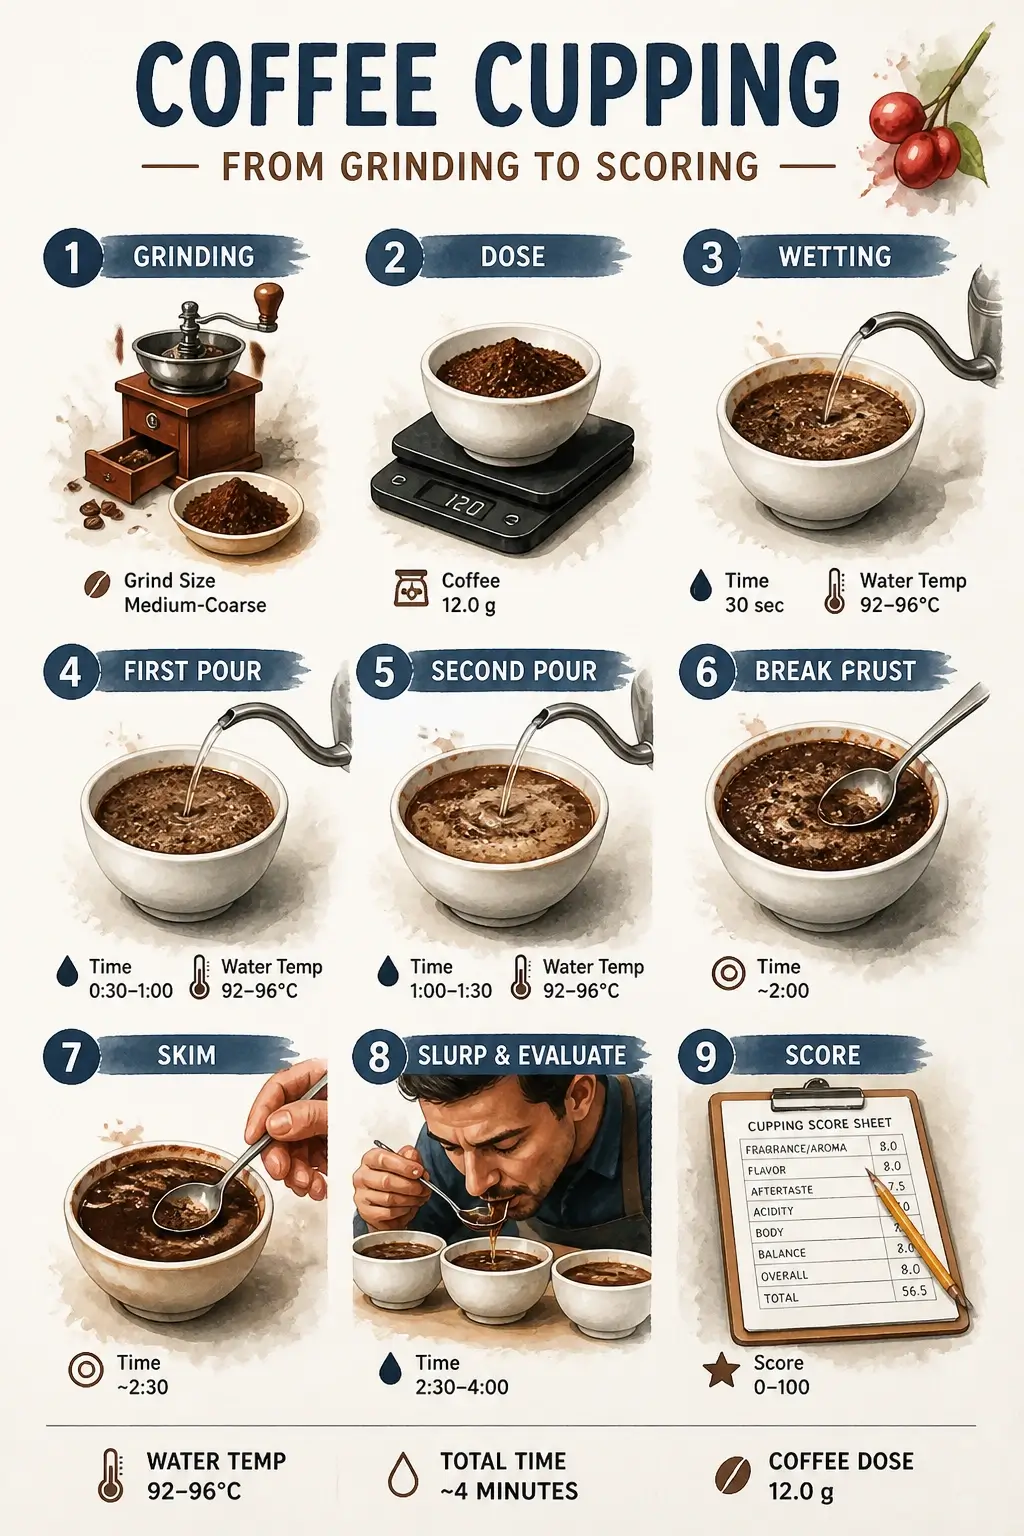
Water chemistry is where most guides go completely silent. The mineral content of your brew water directly controls extraction yield and the sensitivity of your taste transduction. Brew water should sit between 125–175 ppm total dissolved solids (TDS), free of off-odors, chlorine, or any treatment chemicals. Bring it to 93°C and pour immediately. Letting it sit and cool even two degrees changes the extraction dynamic in every bowl.
The room itself is part of the instrument. Work in a space that is:
- Well-ventilated but odor-neutral: no perfume, cleaning agents, food smells, or scented candles within range
- Quietly lit: neutral lighting, nothing that distorts visual assessment of brew color
- Stable in temperature: ambient 20–22°C so every cup cools at the same rate across the table
That last point matters more than it sounds. If one end of your table sits near a heat vent and the other near a window, cups at different positions will hit your tasting temperature windows at different times. Your multi-temperature tasting protocol becomes meaningless.
Finally, coffee samples must be roasted within 24 hours of cupping, brought to the Agtron 55–60 light-medium roast standard, and cooled completely before grinding. Residual heat from roasting continues chemical reactions in the bean. Cupping a warm-from-the-roaster sample is not a defect detection session; it’s a snapshot of an incomplete process.
“The defects vary subtly at different concentrations and even temperatures, meaning that it’s important to build a ‘character profile’ for each of the key defects.” – Samo Smrke, Acting Head of the Coffee Excellence Center
Building that character profile begins with controlled conditions. Smrke’s point cuts directly at why setup discipline matters: defects don’t announce themselves uniformly. A phenolic taint at 70°C smells different from the same compound at 38°C. If your cups are cooling at inconsistent rates because the room is 26°C on one side and 18°C on the other, you’re chasing a moving target.
“The SCA cupping methodology is subjective because it’s about assigning value to the coffee. The lexicon and sensory descriptiveness of the Flavor Wheel are not.” – Peter Giuliano, Chief Research Officer of the Specialty Coffee Association
This distinction from Giuliano is worth internalizing before you touch a spoon. The descriptive language you use to identify a defect should be as precise and repeatable as possible. The value judgment about how much that defect matters to a final score is where human interpretation enters. Keep those two functions separate in your mind from the first session.
Step 1: Grind and Assess the Dry Fragrance Within the 15-Minute Window
Dry fragrance evaluation is a chemical race, and you are already behind the moment the grinder stops. Coffee grounds begin losing volatile aromatic compounds within seconds of grinding. The window for meaningful dry fragrance assessment is 15 minutes maximum. After that, the lightest, most reactive aromatics have already dissipated, and what you’re smelling is a truncated version of the coffee’s actual profile.
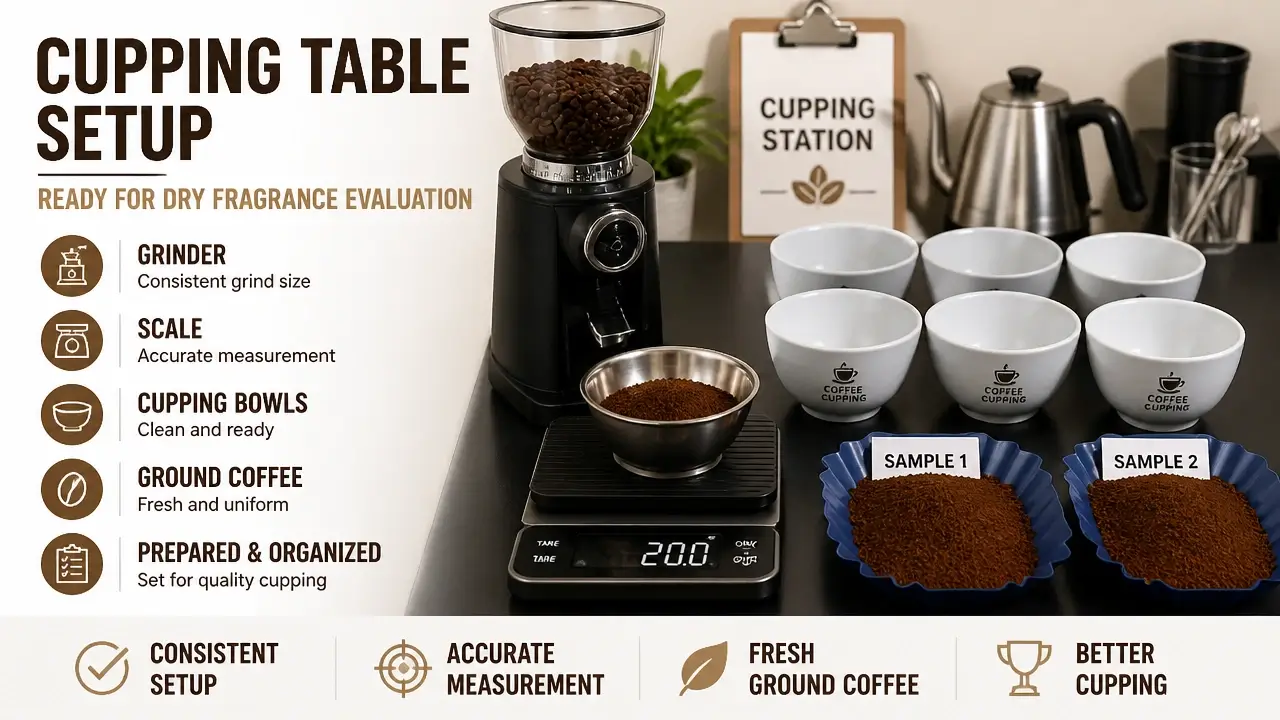
Set your grinder to a medium-coarse setting that passes approximately 70–75% of particles through a #20 U.S. Standard sieve (approximately 850 µm). Before grinding your first sample, run a small amount of that same coffee through the grinder and discard it. This purges residual grounds from any previous session that would contaminate your aromatic baseline.
Grind each bowl’s 8.25 g dose separately. Place the grounds in the bowl. Move immediately to assessment.
The technique: lean in close to the bowl’s rim, inhale gently through the nose, and repeat two to three times with a few seconds between each inhale. You are not smelling for pleasantness. You are building a benchmark: the aromatic fingerprint of this coffee before water changes it. Note the intensity (strong, moderate, faint), the character (floral, fruity, nutty, earthy), and any off-notes.
Defects can appear here. Phenol shows up as a medicinal, rubbery, or antiseptic note even in dry grounds. Rio-y taints carry an iodine-like or chemical character. Musty or baggy notes suggest mold or prolonged moisture exposure in storage. If you catch something at this stage, flag it immediately on your SCA cupping form and watch for it to intensify or clarify after the pour.
The dry fragrance is not a preliminary formality. It’s the first data point in a comparison sequence. Everything you detect at the break and during tasting gets evaluated against what you found here. That comparison structure is how you distinguish a defect that was present from origin from one introduced by roasting or water chemistry. Understanding how these sensory markers connect to their agricultural origins is part of what specialty coffee grading standards formalize, and knowing that system gives your fragrance notes a precise vocabulary before the pour.
Step 2: Pour and Steep – Locking in the Extraction
Consistent extraction is the non-negotiable foundation of defect detection. If each bowl extracts differently, you can’t tell whether a sensory variation is a defect in the coffee or a product of your pour.
Verify your water temperature with the thermometer: 93°C exactly. Not approximately. Not “just off boiling,” which can mean anything between 88°C and 99°C depending on altitude and kettle behavior. Measure it.
Pour water directly onto the grounds in a single smooth, continuous motion, filling each bowl to the brim. The goal is complete saturation of all grounds in one pass. Do not pre-wet and wait. Do not stir. Do not tilt the bowl. Every bowl on the table should receive the same pour speed and volume.
Start your 4-minute timer the moment water first contacts the grounds in the first bowl. Pour all bowls in sequence as quickly as practical, ideally within 30 seconds total.
Do not touch the bowls during steeping. Do not agitate. Let the extraction run undisturbed.
While you wait, observe the crust forming at the surface. A healthy crust is dense, relatively uniform, and rises slightly above the bowl rim. Note any unusual foam colors (green tinge, excessive brown froth), oily sheens, or surface irregularities. These are visual signals worth recording, though the olfactory confirmation comes at the break. This is a watching phase, not a smelling phase. Reserve your olfactory attention for the moment the crust opens.
Step 3: Break the Crust and Skim – The Olfactory High Point
The crust break is the single most information-dense moment in the entire cupping session. After 4 minutes of steeping, the floating layer of grounds, foam, and oils has been trapping the most concentrated volatile compounds in the bowl. When you break it, those compounds release in a burst. You have a few seconds to capture the full aromatic profile before it disperses.
Technique is everything here.
Lower your cupping spoon to the back edge of the bowl, not the center. Push the crust forward gently, three deliberate strokes, while keeping your face close to the surface. Inhale through each push. The goal is a controlled, graduated release, not a single violent disruption.
This is the nuance most guides miss entirely: aggressive breaking releases a different volatile profile than slow, deliberate rupture. If you smash the crust with one hard push, the aromatic burst moves past your nose faster than your olfactory system can process it. The result is a flattened, compressed impression of the wet aroma. Three controlled pushes give you a rising gradient of release, from the lightest top-note volatiles to the heavier base compounds.
What you’re smelling for at the break: ferment, which presents as vinegar, alcohol, or overripe fruit; mold, which is earthy, damp, or mushroom-like; chemical off-flavors like phenol (medicinal) or chlorine (bleach-adjacent). Compare what you find against your dry fragrance notes. A defect that was faint in dry grounds and now dominates the wet aroma is a serious signal.
After breaking all crusts in sequence, skim the surface of each bowl clean using two spoons. Remove the floating grounds, foam, and oils completely, working from the edges inward. Do not splash. Leave a clean, still liquid surface. The cups are now ready for tasting.
Here’s a visual breakdown of the full cupping sequence from fragrance to break, showing exactly how professionals structure the sensory flow:
`[Youtube]:
`
Step 4: Multi-Temperature Tasting – Following the Defect Trail as the Cup Cools
Temperature is not just a comfort variable. It’s a defect gate. Different compounds become volatile and perceptible at different temperatures, which means a cup that tastes clean at 70°C can reveal a serious fault by the time it reaches 38°C. Stopping early is the most common and most costly mistake in cupping.
Round 1 – 70°C (hot): Begin tasting when the cup reaches approximately 70°C. At this temperature, acidity dominates the sensory picture. Volatile defects like sharp ferment or harsh sourness are most immediately perceptible here. Use the slurping technique: fill the spoon to its 4–5 ml capacity, aspirate sharply across the full width of the palate in a single inhalation. The aspiration aerosolizes the liquid and drives aromatic compounds retronasally. Swallow or spit. Repeat for every bowl of every sample before moving on.
Round 2 – 55°C (warm): As the coffee cools into this range, sweetness and body become legible. The aggressive acidity of the first round softens, and subtler structural qualities emerge. Baggy, papery, or hessian-like taints often begin to surface here, particularly in coffees that experienced prolonged storage in jute or natural fiber bags. Mark anything that wasn’t present in Round 1.
Round 3 – 38°C (room temperature): This is the defect-revelation zone. Compounds that were masked by heat now dominate. Phenolic medicinal notes, rio-y iodine, extreme asperity (a harsh, sandpaper-like astringency), and ferment all amplify dramatically as the cup cools. Many tasters who stop at 55°C completely miss these. The cup that scored clean in Rounds 1 and 2 can fail here.
Across all three rounds, record observations bowl by bowl. If one cup out of five from the same sample shows a defect that the others don’t, that inconsistency is itself a data point. It suggests a localized bean problem, a contaminated portion of the lot, or a single defective bean that happened to land in that bowl. The causes of defects detected in cupping trace back to specific points in the supply chain, from fermentation errors at origin to moisture damage in transit, and bowl-level inconsistency is often the first visible clue about where in that chain the problem occurred.
Step 5: Identifying and Scoring Defects on the SCA Form
You’ve tasted something wrong. Now the question is how to classify it, record it, and translate it into a number that means the same thing to every professional who reads your form.
Defect Classification and Logging
The SCA cupping protocol recognizes two severity classes:
- Taint: A noticeable but not overwhelming off-flavor. The defect is detectable and identifiable, but it doesn’t obliterate the cup. Deduct 2 points from the total score.
- Fault: An intensely unpleasant defect that dominates the sensory experience and makes the coffee difficult or impossible to drink with any pleasure. Deduct 4 points.
On the SCA cupping form, record the defect category, circle Taint or Fault, and note which cup number(s) it appeared in. Common defect categories include:
| Category | Sensory Character | Typical Cause |
|---|---|---|
| Phenolic | Medicinal, rubbery, antiseptic | Processing contamination |
| Rio-y | Iodine, chemical | Specific regional soil/process interaction |
| Ferment | Vinegar, alcohol, overripe fruit | Over-fermentation at origin |
| Moldy | Damp earth, mushroom | Moisture damage, poor storage |
| Baggy | Hessian, burlap, papery | Prolonged storage in natural fiber bags |
| Sour | Sharp, harsh acidity | Underripe cherry, processing error |
| Bitter/Pungent | Harsh, acrid | Roast damage, primary bean defects |
Here is where a critical rule surfaces that almost no cupping guide mentions. According to Espresso Academy’s equivalence tables, a “partial black” or “partial sour” bean only qualifies as a full defect if the visible damage occupies more than one-third of the bean’s surface area. This threshold matters because it connects the physical green bean inspection to the sensory result on the cupping table. Roasters working from simplified public guides without this threshold will classify a bean with 25% visual damage as a full defect, effectively rejecting three times more lots than the SCA standard intends. Coffees that should pass as specialty get disqualified. The economic consequence lands on the producer.
Score Arithmetic, the Overall Trap, and Cupping vs. Green Sorting
The SCA cupping score is built from 10 attributes, each scored on a 6–10 point scale in 0.25-point increments:
- Fragrance/Aroma
- Flavor
- Aftertaste
- Acidity
- Body
- Balance
- Uniformity
- Clean Cup
- Sweetness
- Overall
Sum the 10 attribute scores, then subtract defect penalties. The result is the Final Score.
One important separation: cupping-based defect detection and visual green-bean sorting are different quality tools. Visual sorting counts physical imperfections in unroasted beans, things you can see with a light table and trained eyes. Cupping catches sensory damage, ferment, phenol, mold, that macroscopic inspection cannot detect. A lot can pass visual sorting cleanly and still fail the cup. Both assessments are required components of a complete quality picture.
The Overall attribute is where beginners consistently freeze. Primecoffea’s documentation captures the contradiction perfectly: the Overall score is supposed to “sum up the properties of all previous attributes,” yet it also carries “significant freedom to express preferences.” In practice, a cupper can have the first nine attributes sum to an average of 8.2, but score Overall as 7.5 if the gestalt experience didn’t cohere.
Here’s a practical decision rule: let the arithmetic average of your nine attribute scores anchor your Overall. If your gut sensory impression differs from that average by 0.5 points or less, follow the arithmetic. If it differs by more than 0.5, trust the gestalt and write the reason in the Notes field. That note is not a weakness in your scoring. It’s the data point that makes your form useful to the next person who cups the same lot.
Troubleshooting: Calibration, Consistency, and the Link to Final Grading
A single well-executed cupping session produces data. A calibrated cupping practice produces knowledge. The difference is whether your scores today mean the same thing as your scores in three weeks, and whether your team reads the same cup the same way.
Calibration Drills and Reliability Tests
The baseline calibration practice is simple: at least two tasters cup the same table silently, record scores independently, then compare. Any attribute where scores diverge by more than 1.5 points gets re-tasted with a brief discussion before finalizing. The goal is not consensus for its own sake. It’s identifying the perceptual gap and understanding its source.
The hidden repeat test is the most honest reliability check available. Place identical samples of the same coffee at two different positions on the cupping table, coded differently so tasters don’t know they’re the same coffee. After scoring, compare the two sets of scores for each taster. Score drift of more than 1 point total between the two identical samples signals calibration failure for that session. Stop. Identify the variable (fatigue, palate saturation, temperature inconsistency) and correct before continuing.
For deeper precision work, the SCAA Judge certification curriculum embeds a structured self-check that runs even when you’re cupping alone: the triangulation drill.
Set up 6 trios of coded cups, each containing 3 bowls: two identical coffees and one odd sample. Use 6 different origins or process types across the six trios. Your task is to identify the odd cup in each trio. Run through all six without discussion or re-tasting. Scoring above 80% correct across multiple sessions indicates your sensory acuity sits at the precision level required for reliable defect work. Run this drill monthly, or any time you notice score inconsistency appearing across sessions.
Specialty Grading Thresholds and Ethical Responsibility
The calibration work in this section connects directly to the grading outcome that controls market access. To be classified as specialty coffee, a lot must:
- Score ≥80 points after defect penalties are applied
- Contain zero primary defects in a 350 g green sample
- Contain no more than 5 secondary defects in the same sample
A score of 79.5 points versus 80.0 points is the difference between commodity pricing and the specialty premium. That premium represents a meaningful income difference for the producer who grew the coffee.
No existing cupping guide discusses this directly. The Nordic Approach frames cupping as “structured feedback,” which is technically accurate and completely insufficient. When you fill out a cupping form, you are making a financial decision for a farmer you will almost certainly never meet. The SCA scoring system embeds a specific set of sensory preferences, developed largely within Western tasting contexts, as the universal standard that controls that farmer’s market access.
Calibration is a technical practice. It is also a fairness practice. Approach it as both.
For a broader view of how defect detection connects to the full quality control system across the supply chain, the back to the complete guide to coffee defects and quality control covers the upstream and downstream context that a single cupping session can’t provide on its own.
Frequently Asked Questions About Coffee Cupping Defect Detection
What is a good coffee cupping score?
A score of 80 points or above on the SCA scale qualifies a coffee as specialty grade. Scores in the 85–89 range indicate excellent quality, and anything above 90 is considered outstanding by industry standards.
What is the 15-minute rule for dry fragrance in cupping?
After grinding, volatile aromatic compounds begin dissipating immediately, so dry fragrance assessment must be completed within 15 minutes of grinding. Beyond that window, the lightest and most reactive aromatics have already escaped, and you’re evaluating an incomplete aromatic profile.
What is a phenol defect in coffee?
Phenol is a chemical compound that produces a medicinal, rubbery, or antiseptic aroma and flavor in the cup. It typically originates from processing contamination or specific microbial activity during fermentation, and it’s classified as a fault, meaning it triggers a 4-point deduction on the SCA cupping form.
What are the four main enemies of coffee beans in storage?
Heat, moisture, oxygen, and light are the four primary degradation drivers. Of these, moisture is the most directly linked to cup defects, since it creates the conditions for mold growth and fermentation errors that show up as musty, baggy, or ferment taints during cupping.
How do you tell the difference between a taint and a fault during cupping?
Intensity is the deciding factor. A taint is detectable and identifiable but doesn’t dominate the cup experience, costing 2 points. A fault is so unpleasant it makes the coffee difficult to drink, costing 4 points. When you’re uncertain, re-taste at 38°C, where faults amplify significantly.
Can a coffee pass visual green sorting but still fail the cupping table?
Yes, and this happens regularly. Visual sorting catches physical imperfections you can see, like black beans, broken beans, or insect damage. Cupping catches sensory damage like ferment, phenol, and mold that leave no visible trace on the green bean. Both assessments are required for a complete quality picture.
How often should a cupping team run calibration drills?
Run the triangulation drill monthly at minimum, and run the hidden repeat test at the start of any session where scores feel inconsistent or where a new taster joins the table. Score drift above 1 point between identical coded samples is a clear signal to stop and recalibrate before making any grading decisions.
Why does ambient room temperature matter for cupping?
Cups at different positions on the table cool at different rates if the room temperature is uneven. Since defects reveal themselves at specific temperature windows (especially 38°C), inconsistent cooling means different cups hit the defect-revelation zone at different times, making bowl-to-bowl comparison unreliable.
References
- Grounding Green Grading | sca.coffee
- The Evolution of the Coffee Taster’s Flavor Wheel | perfectdailygrind.com