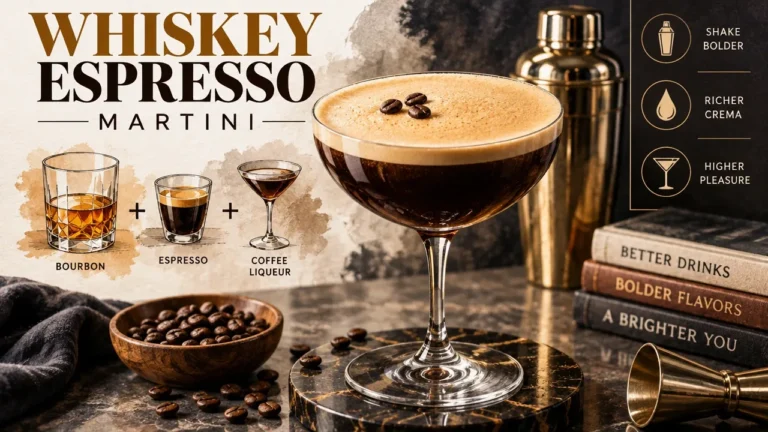

A properly executed whiskey espresso martini is one of the most technically demanding two-minute drinks in a home bartender’s repertoire – and also one of the most frequently botched. The gap between a watery, flat-foamed disappointment and a velvety, crema-crowned cocktail comes down to four variables that most recipes never mention: whiskey sub-category, liqueur residual sugar, coffee thermal handling, and ice agitation mechanics.
Get those four right, and the drink assembles itself. Get even one wrong, and you’ll be troubleshooting a metallic aftertaste or a collapsed foam layer before the glass even hits the table.
Once you have mastered the precise mechanics of cocktail foam, you can easily apply similar temperature and texture principles when making a cozy baileys coffee recipe for your next evening wind-down.
Key Takeaways on Whiskey Espresso Martini Recipe
- Whiskey sub-category determines drink structure: high-rye cuts sweetness, wheated rounds texture, overproof resists dilution.
- Treat coffee liqueur residual sugar as the first sweetness lever to adjust before modifying any other ratio variable.
- Flash-chill fresh espresso before shaking to protect crema lipids and prevent thermal shock from collapsing foam.
- Large, dense ice cubes control dilution during the shake; crushed or wet ice is the fastest route to a watery drink.
- Double-straining with a Hawthorne strainer plus fine-mesh sieve is non-negotiable – ice shards collapse foam within seconds.
- A metallic grain note responds best to stout-cask Irish whiskey plus chocolate bitters, not more sweetener.
Prerequisites: Mise en Place for a Mixology-Grade Whiskey Espresso Martini
Before anything goes into a shaker, the decisions that determine your drink’s outcome are already made – or should be. Mise en place isn’t a restaurant affectation; for a whiskey espresso martini recipe, it’s the bar tool setup that separates a controlled build from a reactive scramble. Two categories of prep matter here: your physical bar tool setup, and your sweetness strategy.
Bar Tool, Coffee Base, and Measurement Setup
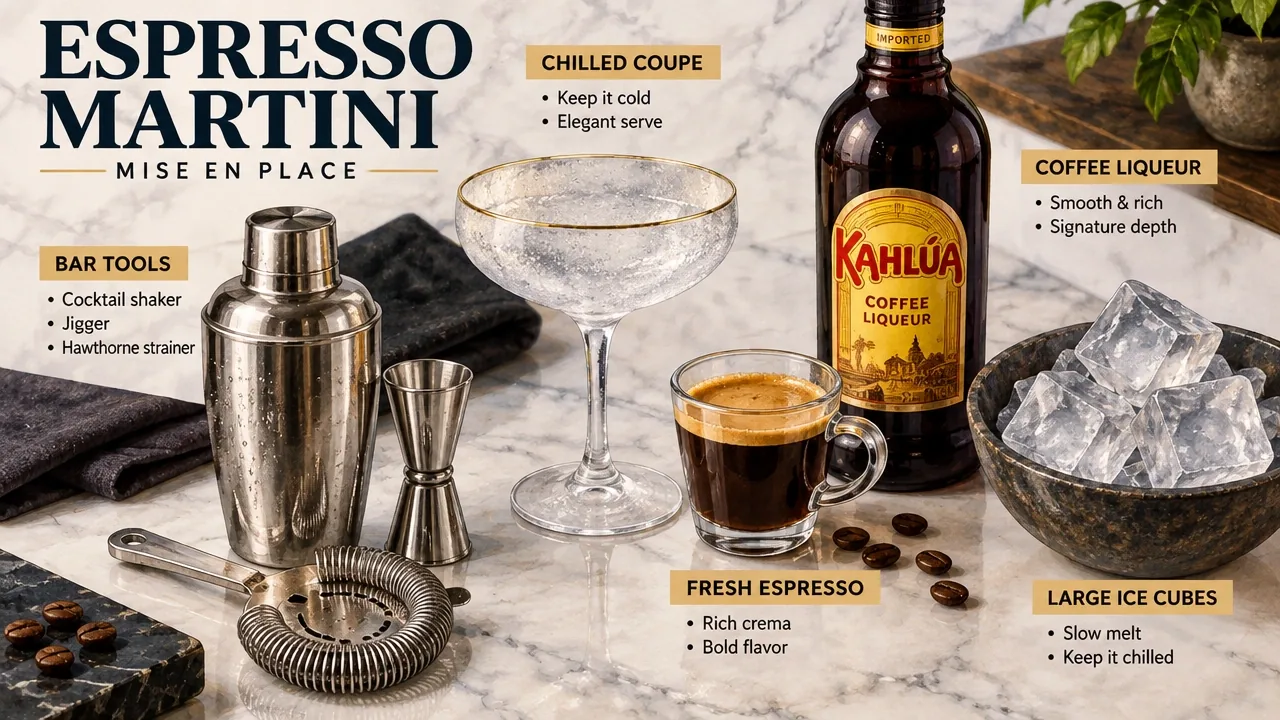
Your equipment list is non-negotiable if you want repeatable results. At minimum, you need a Boston shaker, a Hawthorne strainer, a fine-mesh sieve, a calibrated jigger, a bar spoon, a chilled coupe or cocktail glass, and large dense ice cubes. Add a channel knife or vegetable peeler for expressing orange peel over the finished drink, and a small handful of whole roasted coffee beans for the garnish.
On the coffee side, your best option is a fresh shot of medium-dark roast espresso used within 60 seconds of pulling it. The crema lipids that create foam are most active right after extraction. If you don’t have an espresso machine, cold brew concentrate or cold-drip concentrate are legitimate alternatives with their own flavor advantages – covered in Step 3. Dark brewed coffee cooled to room temperature is an acceptable substitute. Instant espresso is discouraged; the soluble chemistry is different enough from extracted coffee that foam production suffers noticeably.
Because this is a 21+ preparation, measure everything by volume or weight. A jigger that eyeballs “about an ounce” is the fastest route to an unbalanced drink.
Sweetener and Style Decisions
The sweetness decision shapes the entire character of the drink, and it’s worth locking in before you touch the shaker. Your sugar can come from coffee liqueur alone, from a combination of coffee liqueur and simple syrup, from demerara syrup for a warmer, molasses-edged sweetness, or – in a cream variation – from Irish cream like Baileys carrying most of the sugar load.
The target is a drink that is neither cloying nor aggressively bitter. Most blogs frame this as an easy, holiday-friendly recipe; practitioners think about it differently. Before shaking, run a quick mental checklist: How much residual sugar does your chosen coffee liqueur carry? Does your whiskey have any grain bite or metallic edge that will amplify under sweetness? And how will dilution from the shake affect the final balance? Those three questions answered before you build will save you from fixing a drink that was miscalibrated from the start.
The core three ingredients are whiskey, espresso, and coffee liqueur. When someone searches for an “Irish espresso martini,” they’re typically signaling a preference for Irish whiskey as the base – and optionally, Irish cream as part of the sweetener, which changes the style meaningfully. Knowing which version you’re making before you start is the whole point of this section.
Step 1: Pick the Whiskey – Bourbon Sub-Category, Irish Whiskey, or Stout-Cask
Whiskey selection is not a branding decision. It’s a structural one. The spirit you choose determines the backbone of the entire drink – its warmth, its texture, its ability to hold up against both the bitterness of espresso and the sweetness of coffee liqueur.
Base Spirit Structural Differences
The fundamental shift from a classic vodka espresso martini to a whiskey espresso martini is that you’re replacing a neutral grain carrier with one that brings its own chemistry. Bourbon adds vanillin, oak tannin, caramel backbone, and heat – qualities that give the drink depth that vodka simply cannot. But not all bourbons behave the same way in a shaker.
High-rye bourbon delivers a spicy, peppery kick that cuts through sweet coffee liqueurs cleanly – useful when your liqueur of choice leans sugary. Wheated bourbon does the opposite: its softer, rounder mouthfeel integrates gently with espresso and adds a cushioning quality that makes the drink feel more cohesive. Overproof or cask-strength bourbon is the structural choice for a longer shake or a warmer room – the higher ABV provides integrity against the dilution that melting ice introduces over time.
Irish whiskey is the velvety, mellow third path. Its triple-distilled smoothness makes it the natural base for an Irish espresso martini variation, where the spirit should support rather than compete with Irish cream or Guinness-adjacent notes.
Swapping vodka for whiskey isn’t just a flavor upgrade – it changes the structural role of the base spirit entirely. Once you understand that, the next question becomes which sub-category carries the right combination of oak, spice, or softness for your specific build.
Smoke Profile and Pour Baseline
One caveat: heavily peated or smoky whiskey – the Islay Scotch category – can overwhelm the coffee unless you’re deliberately building an Islay variation where smoke and espresso are meant to clash productively. If that’s your goal, go for it. If it isn’t, a heavily smoky malt will make your drink taste like a campfire dissolved in cold brew.
The baseline pour for a single drink is 2 oz / 60 ml of whiskey. Everything else in the ratio is calibrated against that anchor.
Step 2: Choose the Coffee Liqueur and Sweetness Strategy
The coffee liqueur is doing two jobs simultaneously: adding coffee flavor depth and carrying sugar. The problem is that those two jobs are often in tension – the most recognizable brands aren’t always the best-calibrated for a whiskey-forward build.
Residual Sugar and Brand Comparison
Kahlúa is the default for a reason – it’s consistent, widely available, and tastes recognizably of coffee. But its residual sugar is high, and in a whiskey espresso martini where the spirit already has caramel and vanilla notes from the barrel, Kahlúa can push the drink into dessert territory faster than you’d expect.
Mr Black Cold Brew Liqueur sits at the opposite end: lower sugar, higher coffee intensity, and a drier finish that gives whiskey more room to express itself. It’s the practitioner’s choice when the goal is a spirit-forward, coffee-accented cocktail rather than a coffee-forward, spirit-supported one. Borghetti lands somewhere in the middle – Italian, espresso-rooted, with a concentrated coffee character and moderate sweetness. Homemade bourbon coffee liqueurs offer complete control over both sugar level and coffee intensity, and they integrate particularly well with the whiskey base since the grain character is already compatible.
The calibrated baseline is 0.75 oz / 22 ml of coffee liqueur. If you’re using a very sweet liqueur or a flavored coffee whiskey that already carries sugar, reduce or eliminate added simple syrup before you shake. Treat liqueur sweetness as the first lever to adjust – before you touch the coffee ratio or increase the spirit pour.
When standard coffee liqueurs make the drink too sweet, the named single-ingredient fix is Garden County Distillery Cold Brew – a less-sweet cold brew liqueur that adds coffee depth without the syrup weight.
| Liqueur | Sugar Level | Coffee Intensity | Best Pairing |
|---|---|---|---|
| Kahlúa | High | Moderate | Wheated bourbon, Irish cream builds |
| Mr Black Cold Brew | Low | High | High-rye bourbon, spirit-forward builds |
| Borghetti | Moderate | High | Most bourbon sub-categories |
| Homemade Bourbon | Adjustable | Adjustable | Any whiskey, total control |
| Garden County Cold Brew | Low | Moderate-High | Overly sweet builds, drier style |
Cream Variations and Syrup Reduction
If you’re building an Irish cream variation – Baileys, or a Guinness-inspired St. Patrick’s Day version – treat the Irish cream as part of your sweetener budget, not as an add-on. Irish cream carries significant sugar; add it without reducing syrup and you’ll produce a drink that tastes like dessert sauce.
For sweetness modulation, start with 0.25 oz of simple syrup and taste before shaking. If you’re making a Cold Brew Old Fashioned twist – a spirit-forward build that bridges the Martini and Old Fashioned formats – demerara syrup is the right swap: its molasses undertone supports the whiskey’s barrel notes in a way that white simple syrup doesn’t.
Step 3: Prepare the Coffee Base – Espresso, Flash-Chill, or Cold-Drip Concentrate
The coffee base is where most home bartenders lose the drink before the shaker is even sealed. The choice isn’t just about flavor – it’s about temperature management and what that temperature does to your foam.
Fresh Shot Handling and Thermal Control
Pull a fresh shot of medium-dark roast espresso and use it within 60 seconds. The crema layer that forms on a fresh espresso shot is an oil-in-water emulsion, and those lipids are what the shaker turns into foam. Age the shot for five minutes and the emulsion begins to destabilize; shake it over ice from that point and you’re working with degraded raw material.
The advanced problem is thermal shock. Pouring hot espresso directly onto ice does two damaging things simultaneously: it dilutes the drink before shaking begins, and it destabilizes the foam-forming compounds before they can be aerated. The fix is to flash-chill the espresso – pull the shot into a metal tin and set it briefly over an ice bath, or chill it quickly before building the shaker. You’re not trying to freeze it; you’re trying to bring it down to a temperature where it won’t immediately melt your shaker ice on contact.
A peer-reviewed review in Food Biophysics, Neglected Food Bubbles: The Espresso Coffee Foam, establishes that espresso crema is an oil-in-water emulsion in which lipids can destabilize foam via oil spreading at the air/beverage interface, and that temperature influences crema behavior – including increased continuous-phase viscosity on cooling and measurable effects on surface tension and foam stability.
What this means in practice: the physical structure that creates your foam layer is temperature-sensitive from the moment the shot is pulled. Controlling that temperature before the shake isn’t a perfectionist detail – it’s protecting the chemistry that makes the drink work.
Alternative Extraction Methods and Old Fashioned Crossover
When a fresh espresso shot isn’t available or practical, cold brew concentrate is the most reliable substitute. It’s consistent, low-acid, and integrates smoothly with whiskey’s barrel notes. Cold-drip or slow-drip concentrate goes one step further: the extended contact time and cold extraction produce a coffee base with even lower acidity, softer tannins, and a rounder, less aggressive flavor profile.
That flavor profile opens a genuinely interesting crossover: the Cold Drip Old Fashioned twist. Build it with slow-drip coffee concentrate, Angostura bitters, and demerara syrup, and you get a drink that sits between the structure of an Old Fashioned and the coffee intensity of an espresso martini – with none of the astringency that hot-extracted coffee can introduce. Choose cold-drip concentrate whenever you want lower acidity, softer coffee tannins, and a whiskey-adjacent flavor profile that doesn’t fight the spirit.
Instant espresso, for the record, is a different product from a different process. It lacks the lipid content and crema chemistry that make foam possible. Skip it.
Step 4: Lock the Ratio – 2:1:1 Golden Framework vs. 2:1:0.75:0.25
A ratio isn’t a constraint – it’s a repeatable starting point. The two frameworks below cover the full range of whiskey espresso martini styles, from rich and dessert-leaning to dry and spirit-forward.
Core Proportion Formulas
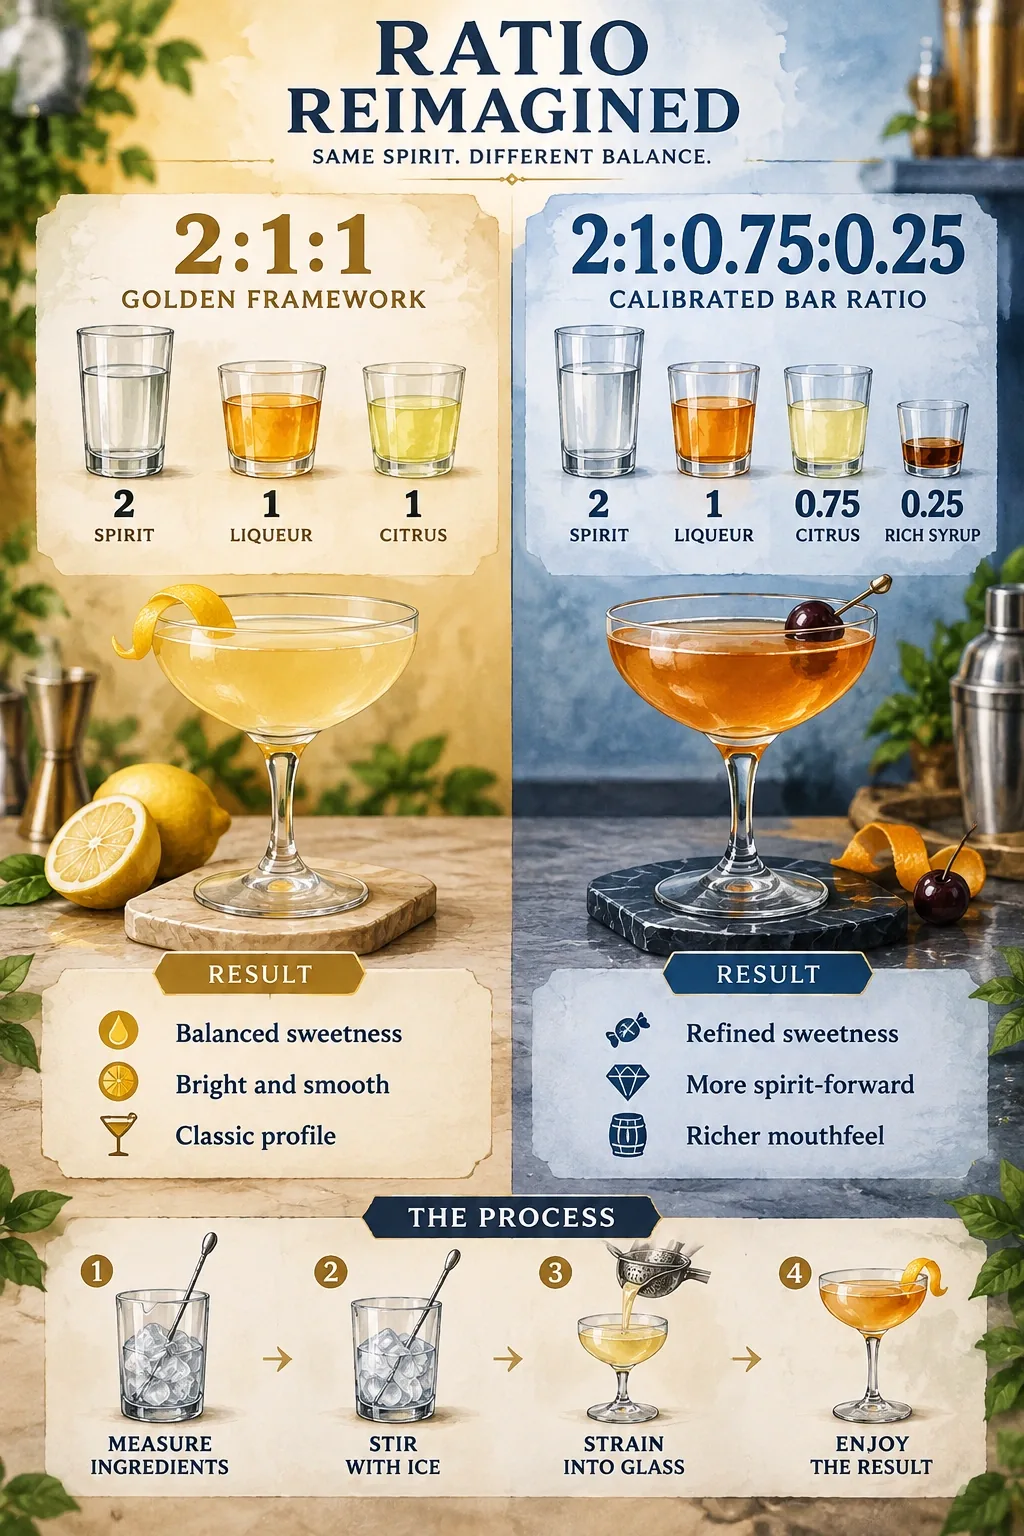
The 2:1:1 golden framework is the intuitive starting point: equal parts fresh espresso and coffee liqueur against a double pour of bourbon. It produces a rich, liqueur-forward drink where coffee sweetness and spirit warmth are in close balance. It’s the right ratio when you want something that satisfies like a dessert cocktail without tipping into milkshake territory.
The calibrated bar ratio – 2 oz whiskey, 1 oz espresso, 0.75 oz coffee liqueur, 0.25 oz simple syrup – is a more precise instrument. By pulling the coffee liqueur back to 0.75 oz and adding a small measured dose of syrup, you give the whiskey more structural presence and the espresso more room to read as bitter and complex rather than sweet and one-dimensional. This is the drier, more spirit-forward version.
Use the 2:1:1 framework when you want a richer, crowd-pleasing cocktail. Use the 2:1:0.75:0.25 ratio when you want the whiskey and coffee to share top billing and the liqueur to play a supporting role.
Batch Scaling and Pre-Shake Tasting
For two drinks, scale the calibrated ratio to 4 oz whiskey, 2 oz espresso, 1.5 oz coffee liqueur, and 0.5 oz simple syrup. Whether you’re building one drink or four, measure by volume or weight – not by eye.
The step most home bartenders skip: taste the build before it goes in the shaker. A 30-second taste at this stage tells you whether the sweetness and bitterness are in the right neighborhood. Correcting ratio imbalances before shaking is trivially easy; correcting them after the drink is diluted, aerated, and in the glass is not.
Step 5: Shake for Emulsification and Crema Physics
Shaking this drink isn’t just chilling it. It’s an emulsification event – you’re using mechanical agitation to disperse coffee oils, air, and sugar into a stable foam matrix. Understanding what the shaker is actually doing changes how you approach every variable.
Ice Agitation and Aeration Dynamics
Use a Boston shaker and fill it with large, dense ice cubes. Not crushed ice, not small cubes from a standard home tray – large, dense ice. The reason is physics: large ice has less total surface area relative to its mass, which means it melts more slowly and gives you more control over dilution while still agitating the liquid hard enough to create foam.
Shake vigorously for 12 to 18 seconds. The target texture is cold, frothy, and velvety – not watery, not icy, not flat. Vigorous means your arms are working; gentle rocking is not shaking.
Joshua Thompson, bartender, sommelier, and part of Dave Arnold’s opening team at Bar Contra in New York City, points out that most home bartenders dramatically underestimate how long to shake. His reasoning: the rate of ice melt slows sharply as the cocktail chills, so an extra five seconds of vigorous shaking adds significant foam without adding meaningful water to the drink.
This matters because the instinct most people have – shake less to add less water – is technically true but practically misleading. The foam you’re trying to build requires sustained mechanical agitation. Once the drink is cold, the dilution rate drops off steeply. Shake through that resistance.
For a visual breakdown of Boston shaker technique, this video covers the mechanics clearly:
Cavitation Control and Thermal Preparation
What’s happening inside the shaker during those 12 to 18 seconds is violent cavitation – the rapid formation and collapse of micro-bubbles that disperses coffee oils, air, and sugar into the liquid structure. This is what creates foam. Over-shaking with small or wet ice causes dilution to outrun emulsification, leaving you with a watery drink and thin foam. Under-shaking leaves the emulsion incomplete and the foam flat.
The practical fix is to pre-chill your ingredients and your glass before building. Cold ingredients going into a cold shaker mean the drink reaches its target temperature faster, which shortens the required shake time and reduces the dilution risk. If your ice is already wet or smaller than ideal, pre-chilling becomes even more important – shorten the shake and compensate with temperature rather than trying to shake longer and hoping for the best.
Step 6: Double-Strain, Garnish, and Seasonal Finish
The shake built your foam. The strain and garnish determine whether it survives into the glass.
Filtration and Aromatic Presentation
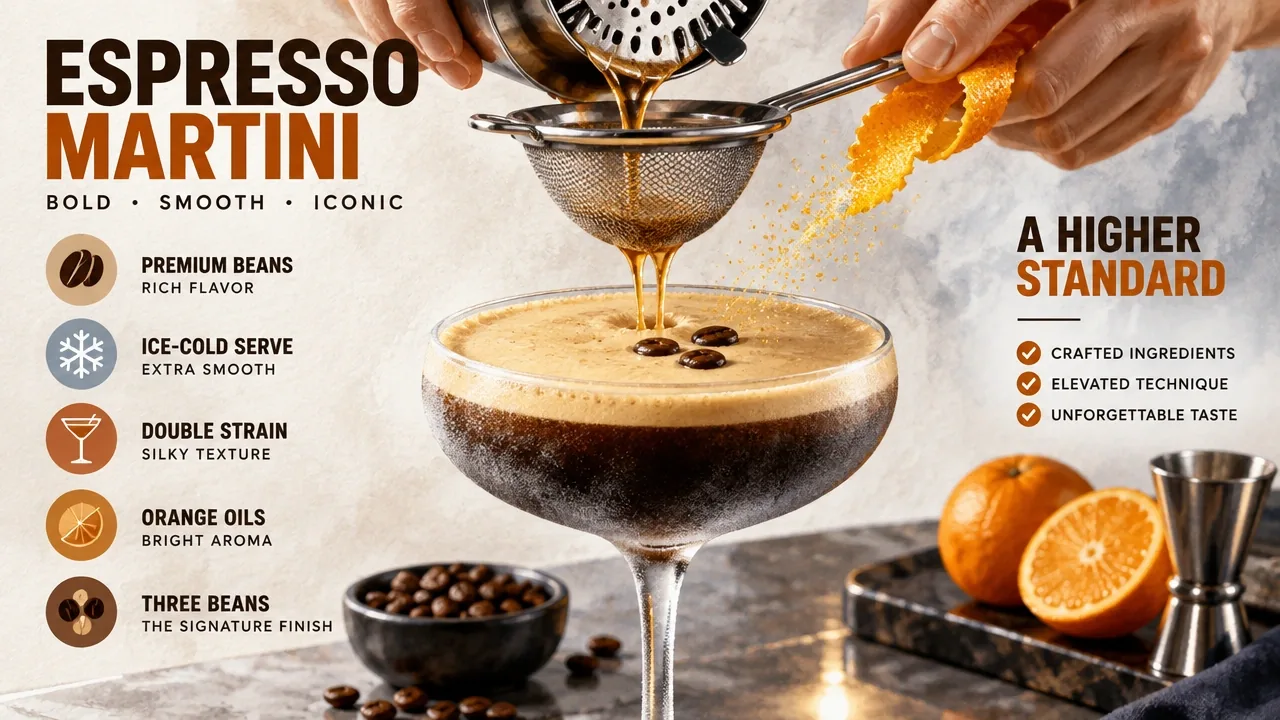
Double-strain every time: a Hawthorne strainer catches the bulk of the ice, and a fine-mesh sieve catches the shards and chips that the Hawthorne misses. Those tiny ice fragments, if they make it into the glass, will collapse the foam layer within seconds. The fine-mesh sieve is not optional for this drink.
Pour into a chilled coupe or cocktail glass. A warm glass will immediately begin warming the drink and destabilizing the foam; pre-chilling takes 60 seconds in the freezer and is worth every one of them.
The garnish ritual follows a specific order: express orange peel oils over the surface first, then place the three roasted coffee beans in the center of the foam. The orange oils add a citrus-aromatic top note that lifts the coffee and whiskey aromas without competing with them. The three beans carry the traditional symbolism of health, wealth, and happiness – and practically speaking, they give the drink a visual focal point. Optional nutmeg grated over the foam adds a warm, spiced note; fresh mint shifts the aroma profile toward something brighter and more herbal.
Winter Service and Cream-Based Adjustments
Cold-weather service opens up a set of variations that the standard recipe doesn’t address. Infusing your whiskey with toasted pecan, cinnamon, or nutmeg before building adds a warming, seasonal dimension that integrates naturally with espresso’s roasted bitterness. A smoky Islay Scotch rinse – coat the inside of the chilled coupe and discard the excess – adds a whisper of smoke and peat without committing the whole drink to an Islay profile.
For an Irish espresso martini, use Irish whiskey as the base and treat Irish cream as a sweetener replacement rather than an addition. Whether you’re adding Baileys or leaning into Guinness-inspired notes, reduce added syrup proportionally – Irish cream is sweet enough that any additional sugar will push the drink past the balance point. Adjust sweetness downward and taste before shaking.
Troubleshooting: Fixing Flat Foam, Over-Dilution, Sweet/Bitter, and Metallic Notes
Every whiskey espresso martini failure has a specific cause. Here’s how to diagnose and correct each one without dumping the drink and starting over.
Aeration and Ice-Control Recovery
No foam is almost always a shake mechanics problem. Run through the checklist in order: Was the shake vigorous enough and long enough? Were you using large, dense ice or something smaller and wetter? Did you double-strain, or did ice shards collapse the foam on the way into the glass? If all three check out and the foam is still flat, the coffee base is the likely culprit – rebuild from Step 3 with a fresh espresso shot or concentrate and re-shake briefly with fresh ice.
Over-dilution is an ice problem. Switch to large, dense cubes, pre-chill both your ingredients and your glass, and shorten the shake duration. Crushed ice and room-temperature ingredients are the two fastest routes to a watery drink.
Palate Balance and Finish Corrections
Too sweet: reduce or eliminate the simple syrup first, then consider switching to a drier coffee liqueur like Mr Black. If you’re using a flavored coffee whiskey that already carries sweetness, omit syrup entirely. As a last resort, increase the whiskey and espresso proportions to dilute the sweetness across a larger volume.
Too bitter or astringent: the fix is usually in the coffee, not the sweetener. Use a fresher shot, or switch to cold brew or cold-drip concentrate – both are dramatically lower in the bitter compounds that hot over-extraction produces. If the bitterness is mild, a barspoon of demerara syrup will round it without making the drink taste sweet.
Metallic grain note: this one requires diagnosis before treatment. The metallic edge can come from three sources – a grain-forward whiskey with an unresolved spirit character, old or stale coffee, or over-extracted espresso. Identify which one is likely, then adjust accordingly. If the whiskey is the source, the most effective single fix is switching to a stout-cask Irish whiskey and adding chocolate bitters; the stout cask aging adds coffee, chocolate, and caramel notes that reshape the finish and reduce grain sharpness. Jameson Caskmates Stout Edition is the named example for this correction.
The rule for troubleshooting: adjust one variable at a time and re-taste. Changing two things simultaneously makes it impossible to know what actually fixed the problem.
Affiliate Disclosure
This post contains affiliate links, meaning I may earn a commission if you make a purchase through these links, at no additional cost to you. As an Amazon Associate, I earn from qualifying purchases. I only recommend products I genuinely believe will add value.

KITESSENSU Cocktail Shaker Set Bartender Kit with Stand | Bar Set Drink Mixer Set with All Essential Accessory Tools: Martini Shaker, Jigger, Strainer, Mixer Spoon, Muddler, Liquor Pourers |Silver
- Made to Last: Upgraded 18/8 stainless steel bartender kit cocktail set is your best bet, which is specially th…
- Raise The Atmosphere: The bartenders will benefit from a stand, allowing you to keep your bar kit set organize…
- Top-Notch Gift: This cocktail mixing set is the best gift everyone at the party will be talking about, it come…
- Bartender's Choice: Whether you want to celebrate or unwind, be stimulated or relaxed, remember or forget. For…
Frequently Asked Questions About Whiskey Espresso Martini Recipe
Which liquor is best for an espresso martini?
It depends on the style you’re building. Bourbon adds oak, caramel, and warmth; Irish whiskey is smoother and works well with cream variations. Vodka is neutral – it lets coffee and liqueur lead, which is great if that’s the goal, but it contributes no structural depth of its own.
What are the three core ingredients in an espresso martini?
The foundation is espresso, coffee liqueur, and a base spirit – traditionally vodka, but whiskey in this build. Simple syrup is optional; it’s a sweetness adjustment, not a structural ingredient.
What is espresso and whiskey called?
There’s no single canonical name for the combination. When built as a shaken, strained cocktail with coffee liqueur, it’s commonly called a whiskey espresso martini. With bitters, demerara, and cold-drip concentrate instead, it crosses into Cold Brew Old Fashioned territory.
Can I make a whiskey espresso martini without an espresso machine?
Yes. Cold brew concentrate is the most reliable substitute – it’s consistent, low-acid, and integrates well with whiskey’s barrel notes. Cold-drip concentrate works even better if you want lower acidity and a softer coffee finish.
Why does my espresso martini taste metallic?
A metallic note usually comes from a grain-forward whiskey, stale coffee, or over-extracted espresso. Try switching to a stout-cask Irish whiskey like Jameson Caskmates Stout Edition and add a dash of chocolate bitters to reshape the finish.
How do I get a thick foam layer every time?
Use fresh espresso within 60 seconds of pulling it, shake vigorously with large dense ice for 12 to 18 seconds, and double-strain through a fine-mesh sieve. Pre-chilling your glass and ingredients also helps by shortening the required shake time and reducing dilution.
What’s the difference between the 2:1:1 ratio and the 2:1:0.75:0.25 ratio?
The 2:1:1 ratio is richer and more liqueur-forward – good for a dessert-leaning cocktail. The 2:1:0.75:0.25 version is drier and more spirit-forward, giving whiskey and espresso more structural presence. Start with whichever matches your intended style, then adjust from there.
Should I use demerara syrup or simple syrup?
Simple syrup is neutral and precise – use it when you want clean sweetness without flavor interference. Demerara syrup adds a molasses warmth that complements whiskey’s barrel notes, making it the better choice for Old Fashioned-adjacent builds or cold-weather service.
References
- Espresso Martini Recipe | seriouseats.com
- Neglected Food Bubbles: The Espresso Coffee Foam | link.springer.com