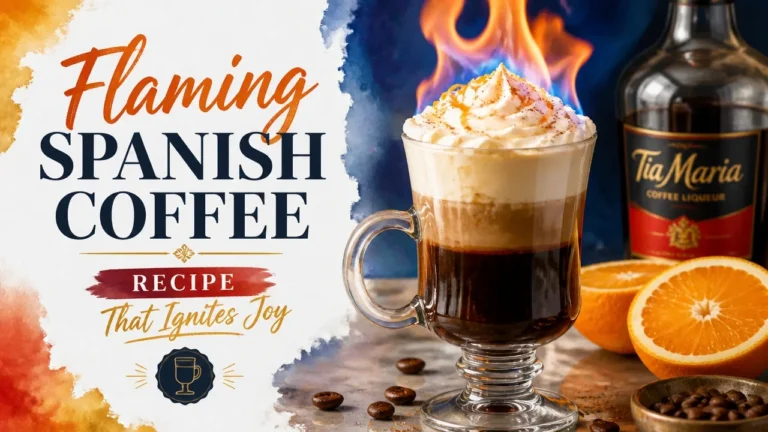

Flaming Spanish coffee is one of those drinks that looks like a bar trick but works on real chemistry. The overproof rum ignites cleanly, the flame caramelizes the sugar rim, the coffee liqueur layers in flavor, and hot coffee kills the fire and balances the whole thing. No pyrotechnics degree required.
What separates a clean execution from a kitchen incident is understanding what each step actually does, not just following a list. Get the glass right, the flame brief, and the extinguish confirmed, and this becomes one of the most satisfying drinks you’ll ever put in front of someone.
Key Takeaways on Making Flaming Spanish Coffee
- Tempered or heat-resistant glassware is non-negotiable; regular glass cracks under the thermal stress of a burning rum flame.
- 151-proof rum is the reliable choice for ignition; lower-proof spirits need preheating and still may not light consistently.
- Keep the kitchen torch moving at 2 to 3 inches to caramelize sugar evenly without burning it or shocking the glass.
- A confirmed flame-out means no blue flicker, no vapor shimmer, and no hiss – all three, not just a smaller flame.
- Hot coffee extinguishes the fire by diluting alcohol below its flammable vapor concentration, not just by smothering.
- Softly whipped cream that flows over a spoon finishes the drink correctly; stiff peaks sit wrong on a hot cocktail.
Jeffrey Morgenthaler, award-winning bartender, author of The Bar Book, and head judge at the San Francisco World Spirits Competition, describes the technique as one of the more brilliant cocktail methods he’s encountered: the heat from burning rum warms the glass for the hot coffee that follows, while simultaneously caramelizing the sugar on the rim. He calls it an early form of molecular mixology that’s still simple enough for any bartender to master.
The insight here is worth sitting with. This drink isn’t theatrical for the sake of it. Every dramatic element – the flame, the swirl, the sugar – is doing mechanical work. Once you see the steps that way, the whole thing clicks.
Prerequisites: Ingredients, Glassware, and Fire-Safety Setup
Before you light anything, your counter needs to be organized in a specific way. The ingredients are straightforward, but the glassware and fire-safety setup are where most home bartenders skip the details that matter most.
Pantry and Bar Inventory
Spanish coffee ingredients break down into two categories: what goes in the glass and what keeps you safe while it gets there.
For the drink itself, you need overproof rum (151-proof is the standard), triple sec, coffee liqueur (Kahlúa is the most common choice), hot fresh coffee, whipped cream, nutmeg, a lemon wedge, and sugar. Rum pours in recipes range from ¾ oz to 2 oz depending on the source. If this is your first time making it, start at ¾ oz. The flame is more controlled, and the drink is easier to manage. Coffee volumes range from 3 oz to half a cup; either works as long as the glass has room.
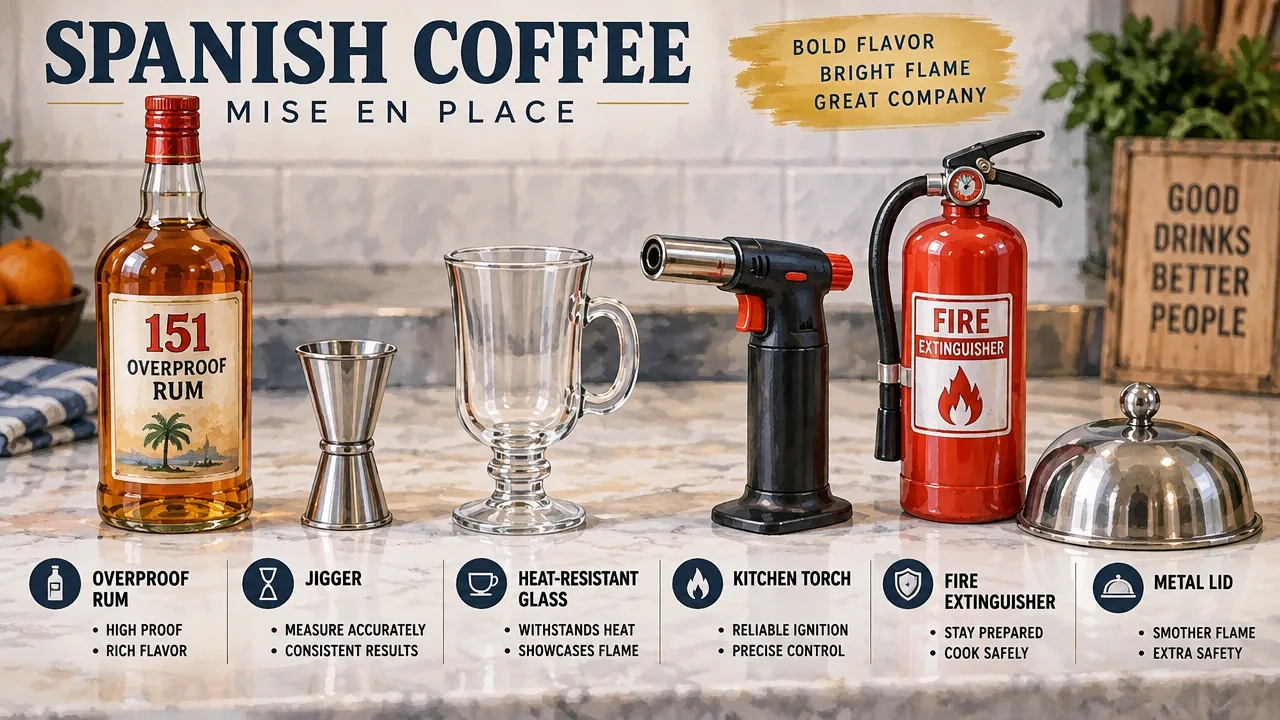
For equipment, you need a jigger, a spoon, a long lighter or utility lighter, and a kitchen torch if you plan to caramelize the rim before igniting the rum. You also need a metal lid or baking sheet within reach for smothering, and a fire extinguisher that you actually know how to operate.
The glassware spec is the detail most recipes skip entirely. You need a tempered heat-resistant glass – a tempered red wine glass, an Irish coffee glass, or a heat-resistant stemmed glass with a wide enough mouth to allow oxygen to reach the flame. Regular drinking glasses are not rated for the thermal stress of a burning liquid. The temperature differential between the flame at the rim and the cooler base of the glass can cause thermal shock and cracking. A wide mouth also matters: a narrow opening restricts oxygen flow and can cause the flame to behave unpredictably.
Emergency Protocol and Consumption Pacing
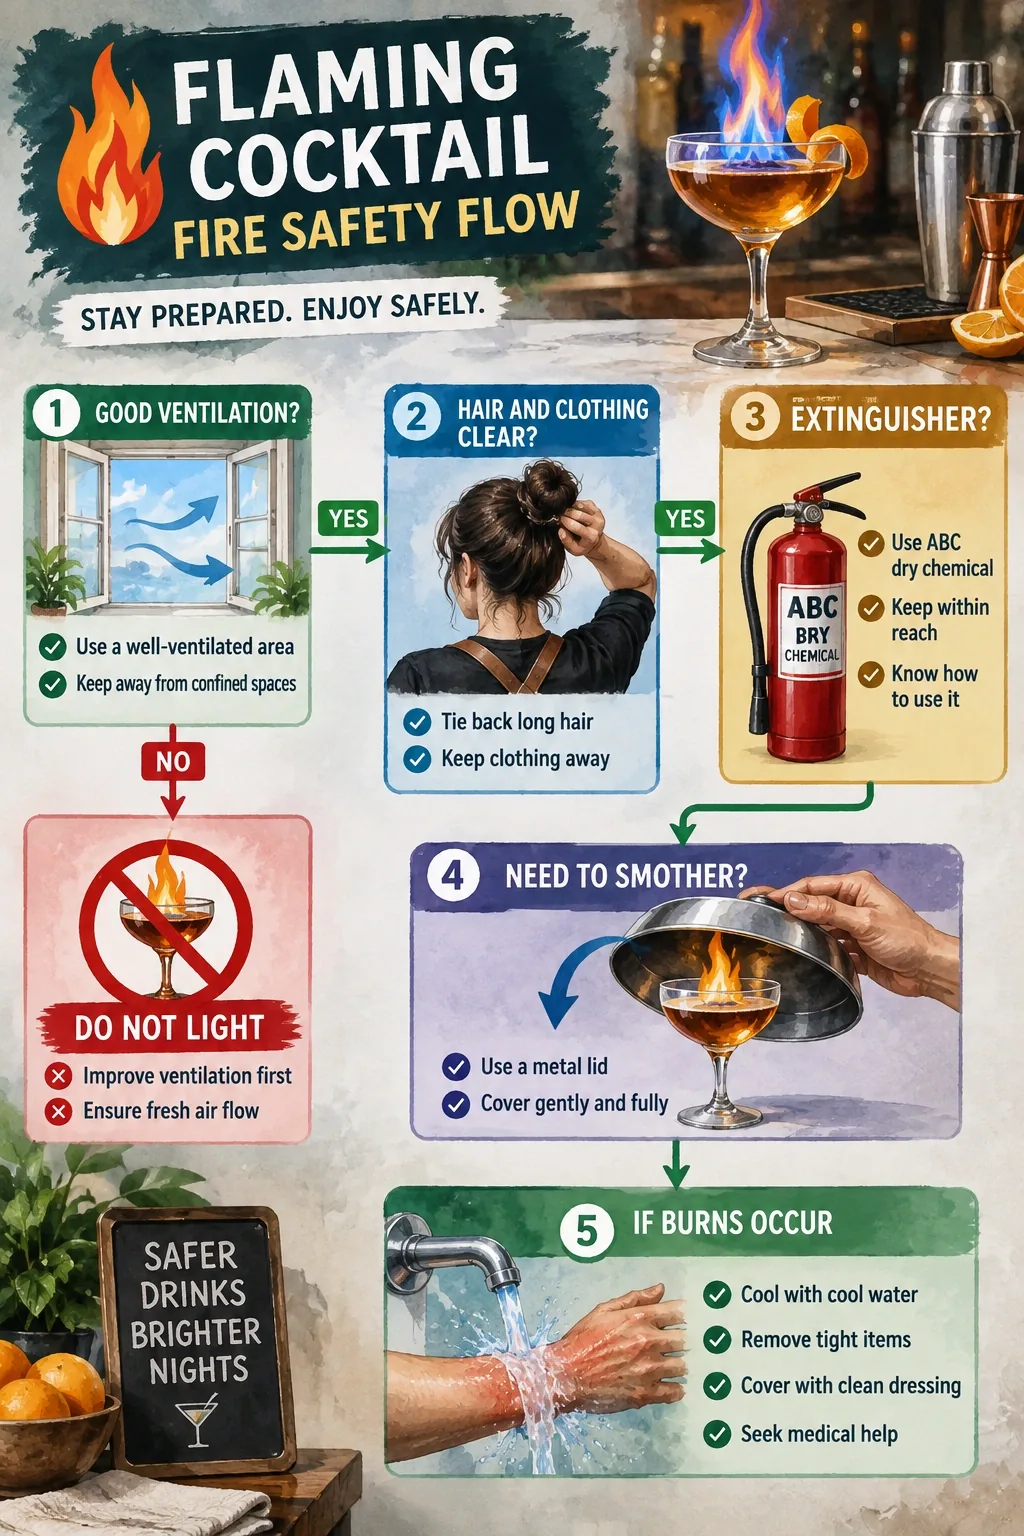
Fire safety setup is not a paragraph you skim. It’s the thing you do before you pick up the lighter.
Tie back your hair. Roll up or remove loose sleeves. Clear the counter of paper towels, bottle labels, or anything flammable within two feet of your workspace. Check the overhead space – open cabinet doors above your prep area are a common hazard nobody mentions. Open a window or turn on the range hood for ventilation, because alcohol vapor can flare when it builds up in an enclosed space.
Place your metal lid and fire extinguisher within arm’s reach, not across the kitchen. Know which type of extinguisher you have. A Class B extinguisher handles flammable liquids; a standard ABC extinguisher also works. Know the PASS sequence: Pull the pin, Aim at the base of the fire, Squeeze the handle, Sweep side to side. If the flame gets away from you, that sequence needs to be automatic, not something you’re reading off the side of the canister.
For burn first aid: cool running water for at least 10 minutes. Not ice, not butter – cool running water. Keep a metal lid nearby as your first line of smothering. The extinguisher is the backup.
On the drinking side: eat something before you make this. Keep water on the counter. Flaming Spanish coffee is a slow-sipping dessert cocktail with a significant alcohol load from overproof rum. It’s not a session drink. Know your limit before you pour the first one.
Step 1: Build the Caramelized Sugar Rim
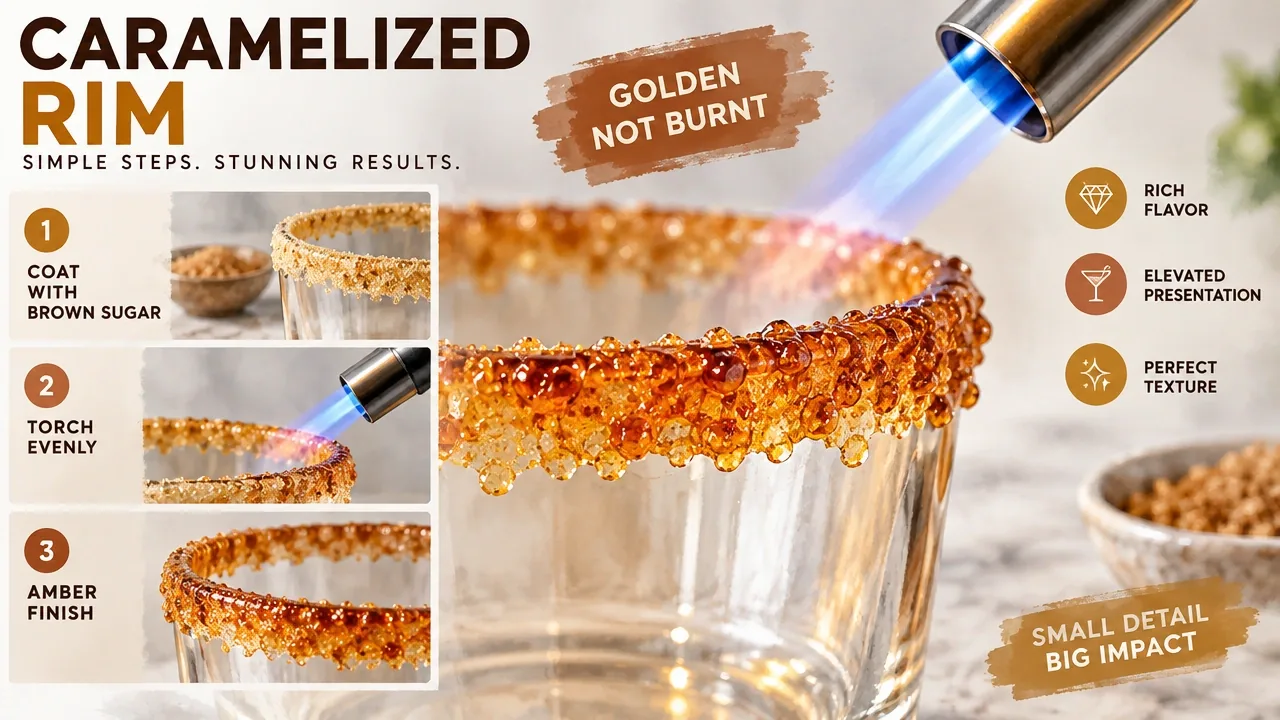
The caramelized sugar rim is not decoration. It’s the structural flavor layer of the drink. When the rum flame licks the rim, it converts the raw sugar into brittle, amber caramel that releases toasted-sugar aroma with every sip. A wet, clumpy, or unevenly coated rim burns in patches, drops sugar into the flame, and produces bitter rather than caramelized flavor.
Run a lemon wedge around the entire rim of your heat-safe glass. You want a thin, even moisture layer – enough for sugar to adhere, not so much that it puddles. Dip the rim into brown sugar or superfine sugar, then tap the glass gently to knock off any loose grains. Loose sugar falling into an active flame is a flare risk.
If you want to caramelize the rim before igniting the rum, use a kitchen torch held 2 to 3 inches from the sugar surface. Keep the torch moving continuously. A stationary torch creates hot spots that either burn the sugar black or concentrate enough heat on one section of glass to risk cracking it. You’re looking for an even amber color and a toasted-sugar smell, not black smoke. If you see black, you’ve gone too far – scrape and re-rim.
If you’re skipping the torch and letting the flaming rum do the caramelization in Step 2, the dry, even sugar coating is still critical. The rum flame caramelizes what it touches; uneven patches give you uneven results.
Once the sugar is caramelized – by torch or by flame – do not touch the rim. Hot caramelized sugar holds heat longer than you expect and will burn skin on contact. Let it set for 30 seconds before adding any liquid.
Step 2: Safely Ignite the Overproof Rum and Swirl the Flame
Igniting overproof rum is the step that makes this drink what it is, and it’s also the step where most accidents happen. The physics are simple: high-proof alcohol produces flammable vapor at room temperature. A 151-proof rum (75.5% ABV) sits well above the vapor concentration needed to ignite. Lower-proof spirits may not light reliably, and forcing it with a cheaper rum is how you end up with a mess and no flame.
Measure your rum and a splash of triple sec into the prepared glass. The triple sec contributes a citrus note and helps sustain the flame briefly. If you’re working with a rum below 100 proof, you can preheat it gently by warming the glass first, but for beginners, 151-proof rum removes that variable entirely.
Tilt the glass to a 45-degree angle. This exposes more liquid surface to air and concentrates the vapor near the rim where you’ll be igniting. Use a long lighter or utility lighter – not a short kitchen match. The extra distance between your hand and the flame matters. Keep your face, hair, and sleeves pulled back before you bring the lighter anywhere near the glass.
Touch the lighter flame to the surface of the rum near the rim. It should catch within a second or two. Once lit, swirl the glass gently so the blue alcohol flame travels around the rim and contacts the sugar coating. Hold the glass by the stem or base, never the rim. If the glass gets warm through the stem, wrap it in a bar towel.
Keep the flame brief. This is not a candle. The longer the rum burns, the more alcohol evaporates off and the hotter the glass gets. If at any point the flame grows larger than the rim of the glass, do not move the glass. Set it down, cover it immediately with your metal lid, and step back. A fire extinguisher handles anything the lid doesn’t.
Step 3: Add Coffee Liqueur to Tame and Flavor the Flame
Coffee liqueur is not an afterthought in this drink. It’s the flavor bridge between the high-proof rum and the hot coffee that finishes the glass, and in some versions of the recipe, it also serves as the first stage of flame reduction.
Measure your Kahlúa (or comparable coffee liqueur) and pour it gently down the inside wall of the glass, or over the back of a spoon held against the rim. The goal is a controlled pour that doesn’t splash the burning rum outward. A sudden, heavy pour into an active flame can cause a brief flare as the new liquid disturbs the vapor layer.
You can add the liqueur while the flame is still active if you want the full visual effect. The coffee liqueur will help reduce the flame by diluting the alcohol concentration in the glass. But for beginners, this step works fine with the flame slightly reduced first – the drink tastes the same either way.
Do not rely on the coffee liqueur alone to fully extinguish the fire. Some recipes list it as the extinguishing agent, and it can work, but the flame-out is harder to confirm visually because the liqueur itself can sustain a low flame. Hot coffee in Step 4 is the clearer, more reliable kill switch. Use the coffee liqueur for flavor and partial flame reduction, then let the coffee finish the job.
If the flame flares when you pour, stop immediately. Pull your hand back, set the glass down, and let the flame settle before continuing. If it doesn’t settle within a few seconds, smother with the metal lid.
Step 5: Extinguish with Hot Coffee and Finish the Presentation
Hot coffee does two things simultaneously in this drink: it terminates the flame and it becomes the body of the cocktail. Understanding why it works as an extinguisher makes the step less mechanical and easier to execute confidently.
A study on vapor flammability above aqueous solutions of flammable liquids found that as water content increases in an ethanol-vapor mixture, the ethanol vapor concentration drops below the lower flammability limit – the minimum concentration needed to sustain combustion. Water vapor acts as an inert diluent, pushing the mixture outside the flammable range.
Hot coffee is mostly water. When you pour it into the glass, the aqueous volume dilutes the alcohol concentration rapidly, which drives the ethanol vapor below the threshold needed to keep burning. The flame doesn’t just get smothered – the fuel supply drops below the point where combustion can continue. That’s why this method gives you a clean, visible flame-out rather than a gradual die-off.
Pour hot fresh coffee slowly into the glass. Watch the flame as you pour. Continue until you see no blue flicker, no shimmer above the liquid surface, and no hiss. That’s your confirmed flame-out. Do not stop pouring the moment the flame looks smaller – a low blue alcohol flame is nearly invisible in daylight. Pour until you’re certain.
Fill the glass to a balanced volume. Source recipes range from 3 oz to half a cup of coffee; use enough to fill the glass to roughly three-quarters full, leaving room for whipped cream. Stir gently to dissolve the caramelized sugar from the rim into the drink.
Top with softly whipped cream. The texture here matters. Whip the cream until it thickens and leaves a trace on the back of a spoon, but stop before it holds firm peaks. It should flow slightly when poured over the back of the spoon, settling into a soft layer on top of the coffee rather than sitting in a stiff mound. Finish with a grate of nutmeg directly over the cream.
Let the drink cool before you sip it. The glass and the liquid can both be significantly hotter than they look. Test the glass by holding it comfortably in both hands – if it’s too hot to hold, it’s too hot to drink. Sip from the edge to confirm the coffee is drinkable, not scalding.
Troubleshooting: When the Flame, Sugar, or Glass Misbehaves
Even a well-prepped setup can produce a flame that won’t catch, sugar that goes black, or a glass that sounds wrong. Here’s how to diagnose and fix each problem without starting over from scratch.
Ignition and Combustion Failures
Ignition failure almost always comes down to alcohol concentration. If the rum won’t light, the first question is proof. Anything below 100 proof is unreliable at room temperature. Switch to 151-proof rum and the problem usually resolves immediately. If you’re committed to a lower-proof rum, warm it by running the glass briefly under hot water before adding the spirit, which raises the vapor concentration enough to catch.
If the rum is the right proof but still won’t light, check whether it’s been diluted. Any water or mixer in the glass before ignition will drop the vapor concentration below the ignition threshold. The glass needs to be dry when the rum goes in.
A flare-up – a flame that suddenly grows beyond the rim – means stop, set the glass down, and cover it with the metal lid. Do not try to blow it out. Do not move the glass across the room. The lid cuts off oxygen and the flame dies within seconds. If the lid isn’t smothering it, use the fire extinguisher. Never use water on an alcohol fire; water spreads burning liquid rather than containing it.
Confirmed flame-out looks like this: no blue flicker anywhere on the liquid surface, no shimmer of vapor above the rim, no hiss. All three. If you see any one of them, the fire is not out.
Thermal Damage and Consumption Timing
Burnt sugar on the rim means the torch was held too close or stayed in one spot too long. The fix is to scrape off the burnt layer with a spoon, re-run the lemon wedge, re-coat with sugar, and start the caramelization again with the torch kept moving at 2 to 3 inches. If you don’t want to re-rim, use a plain sugar coating and let the rum flame do a lighter caramelization – it won’t be as dramatic, but it won’t be bitter either.
A correctly caramelized rim has a specific look: amber color, not brown or black, a toasted-sugar smell with no burnt edge, and a glassy surface. If you see black or smell acrid rather than caramel, the sugar burned.
Glass cracking is a full stop. Set the glass down carefully, do not move the liquid, and discard both the glass and the drink. Glass cracks from thermal shock propagate unpredictably. A cracked glass that holds for 30 seconds can fail completely without warning. Use a tempered or heat-resistant glass from your next attempt forward, and never substitute a regular drinking glass regardless of how thick it looks.
Drinking too soon produces a burnt tongue and a ruined experience. There’s no universal time or temperature spec for this drink across the recipes, so use two simple tests: the glass should feel warm but comfortable to hold with bare hands, and a small sip from the very edge of the rim should be hot but drinkable. If either test fails, wait another minute and try again.
Frequently Asked Questions About Making Flaming Spanish Coffee
What proof rum do you actually need to get a reliable flame?
You want at least 100 proof, but 151-proof (75.5% ABV) is the standard for a reason – it produces enough vapor at room temperature to catch immediately with a long lighter, no preheating required.
Can you make flaming Spanish coffee without a kitchen torch?
Yes. The torch is only needed if you want to caramelize the sugar rim before igniting the rum. If you skip the torch, the rum flame does the caramelization during Step 2 – you just need a dry, even sugar coating to start.
Why does the flame sometimes burn blue and sometimes orange?
A blue flame means you’re burning mostly alcohol vapor cleanly. An orange flame means impurities, sugar, or other residue are combusting. A strong orange flare from the rim usually means excess sugar dropped into the fire – tap off more next time.
What’s the difference between Spanish coffee and Irish coffee?
Irish coffee uses whiskey, no flame, and no caramelized rim. Spanish coffee uses overproof rum and triple sec, ignites the spirits, caramelizes the sugar rim with the flame, and adds coffee liqueur before the hot coffee goes in.
Can you use decaf coffee for the hot coffee portion?
Yes, decaf works fine. The coffee’s role in this drink is thermal and chemical – it extinguishes the flame by diluting the alcohol – not caffeination. The flavor contribution is real, so use a quality decaf you’d actually drink.
How do you know when the caramelized sugar rim is done?
Look for an amber, glassy surface with a toasted-sugar smell and no black edges. If it smells sharp or acrid, or if you see dark brown or black patches, the sugar burned and needs to be scraped and re-done.
Is it safe to make flaming Spanish coffee indoors?
Yes, with the right setup. You need ventilation, a clear counter, no overhead obstructions, a heat-resistant glass, and a metal lid or fire extinguisher within arm’s reach. The flame is brief and contained to the glass – the risk comes from skipping the prep, not from the drink itself.
What type of coffee liqueur works best if you don’t have Kahlúa?
Any coffee liqueur with a clean, roasted-coffee flavor works – Tia Maria and Mr. Black are common substitutes. Avoid anything with added cream or dairy already in it, since those behave unpredictably near an open flame.
References
- Spanish Coffee: A Pacific Northwest Cocktail to Warm You During Winter | jeffreymorgenthaler.com
- Journal of Loss Prevention in the Process Industries – Vapor Flammability Above Aqueous Solutions of Flammable Liquids | digitalcommons.mtu.edu