

Authentic nitro cold brew is one of those drinks that looks deceptively simple – dark coffee, creamy head, that mesmerizing Guinness-like cascade – until you try to make it at home and end up with flat, slightly gassy cold brew that tastes nothing like the café version. The gap between those two outcomes isn’t luck or expensive equipment. It’s a four-link chain: the right gas, a sediment-free base, matched near-freezing temperatures, and a high-shear dispensing path.
Every variable in that chain has a real mechanism behind it. Get them right in sequence and the cascade writes itself. Skip one, and pressure alone won’t save you.
Key Takeaways on How to Make Nitro Cold Brew
- Only 100% food-grade N2 produces authentic nitro; N2O adds sweetness, CO2 adds acidity, and neither delivers the cascade.
- Double-filter your concentrate through mesh then paper – sediment in restrictor micro-holes is the silent killer of cascade quality.
- Matching coffee and gas to near-freezing temperatures (32°F–36°F) is the variable most guides skip and the one that separates good pours from great ones.
- Shaking for 30–60 seconds after pressurizing is mandatory; nitrogen won’t dissolve into coffee through pressure contact alone.
- The cascade is created by the restrictor plate or stout faucet, not the gas – without high-shear dispensing hardware, you’ll get flat cold brew regardless of what’s dissolved in it.
- Kegged nitro under refrigeration lasts approximately 3 weeks; dispensed foam lasts about 2 minutes – don’t confuse the two.
The Four Non-Negotiables Before You Start
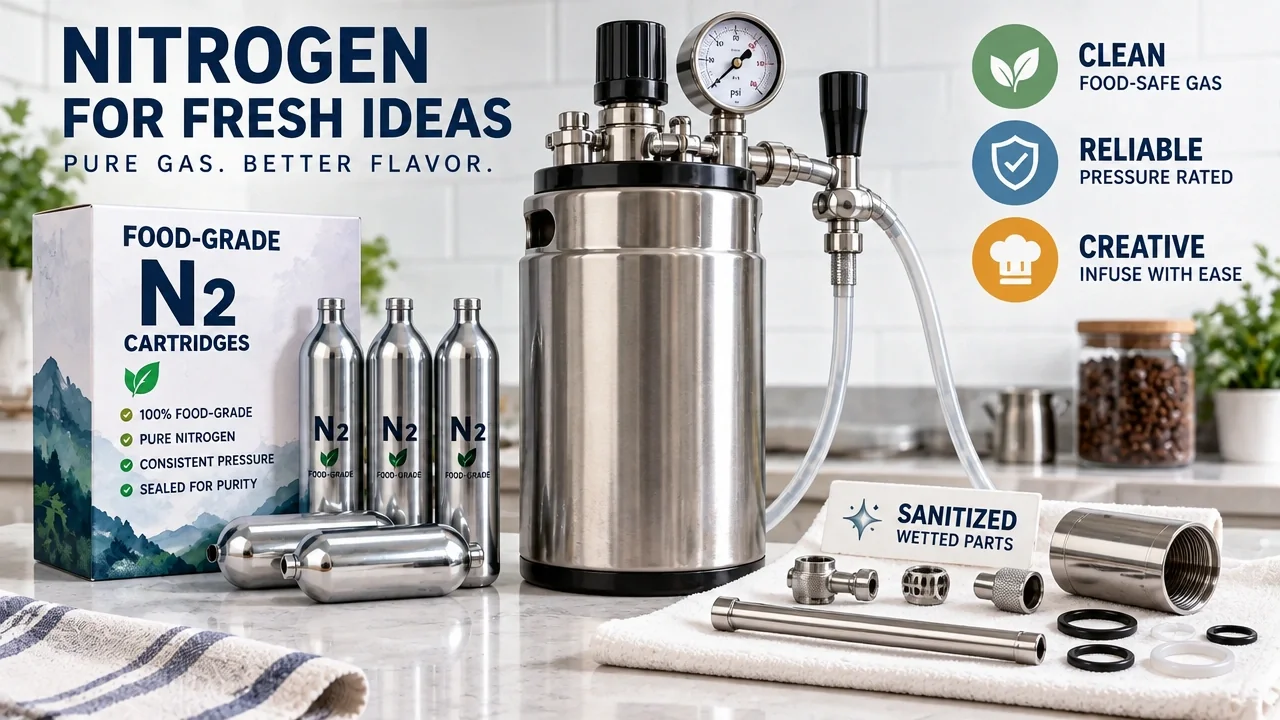
Most beginner nitro guides hand you a shopping list and call it setup. The problem is that the failure usually starts before the gas even enters the picture – with the wrong gas product, an unfiltered base, or components that were never sanitized. Here’s what you actually need, and more importantly, why each one is non-negotiable.
The four prerequisites are: 100% food-grade nitrogen gas, a pressure-rated infusion device, ultra-filtered cold brew concentrate, and fully sanitized wetted components. Remove any one of them and you’re not making nitro cold brew – you’re making a pressurized gamble.
Gas Chemistry: N2, N2O, CO2, and Why the Differences Are Not Subtle
The gas you choose determines the entire sensory outcome, so this deserves more than a label check.
Pure N2 (nitrogen) is the only gas that produces the tight microfoam and slow-cascading bubbles characteristic of nitro cold brew. Nitrogen is poorly soluble in water, which is precisely why it creates fine, stable bubbles rather than aggressive carbonation. That low solubility is also why you need pressure, agitation, and near-freezing temperatures to force it into solution – but we’ll get to that.
N2O (nitrous oxide), sold in standard whipped cream chargers, is far more water-soluble than N2. It’s accessible and cheap, but it imparts a faint artificial sweetness and produces larger, faster-dissipating bubbles. It won’t make the nitro result you’re after. CO2 is worse still – it dissolves readily to form carbonic acid, creating the prickly, fizzy texture that belongs in sparkling water, not a velvety coffee pour. G-mix (a blend of nitrogen and CO2 used for some beers) introduces CO2 chemistry and ruins the texture for the same reason.
Always check cartridge labels and hardware compatibility before purchasing. The right label is “100% food-grade nitrogen” or “N2.”
Understanding how pure nitrogen behaves under pressure reveals the science behind nitro coffee texture and why ordinary carbonation falls short.
The Base Cold Brew Spec
The concentrate going into your device matters as much as the gas above it. The standard ratio is 1 part coarsely ground coffee to 4 parts filtered water (1:4), steeped 12–24 hours, then strained until completely sediment-free. Before charging, dilute the concentrate 1:1 with filtered water, or adjust to taste, and chill thoroughly. The reason for ultra-filtration goes beyond flavor – residual silt and oils can clog the micro-holes in your restrictor nozzle, killing the cascade entirely.
Selecting origin characteristics that survive long extraction requires applying the best coffee beans framework before diluting or infusing your batch.
Pressure Ratings and Sanitation
Never exceed your device’s maximum PSI rating. Nitrogen tanks and cartridges must be handled per manufacturer instructions, and storage areas for N2 tanks require ventilation – nitrogen displaces oxygen, and an enclosed space with a leaking tank is a genuine asphyxiation risk, not a theoretical one.
Sanitation is equally non-negotiable. Modified-atmosphere storage under nitrogen creates a low-oxygen environment that, if spores are present, can theoretically support Clostridium botulinum growth. The community mitigation is straightforward: dishwasher-sanitize all wetted components before use, or use a food-safe chemical sanitizer like Star San. This step takes five minutes and removes a serious risk that most beginner blogs don’t mention.
Step 1: Brew and Clarify a Sediment-Free Cold Brew Concentrate
Cold brew concentrate is the foundation of this entire process, and the filtration step – not the steeping step – is where most home baristas leave performance on the table.
Combine 1 cup of coarsely ground coffee with 4 cups of filtered water. A coarse grind reduces fines that slip through mesh strainers and accelerate clogging downstream. Steep the mixture for 12–24 hours, either at room temperature or in the refrigerator. Room-temperature steeping is faster and extracts more boldly; refrigerator steeping is slower and produces a slightly cleaner, less bitter result. Beyond 24 hours, extraction tips toward bitterness regardless of method.
Once steeped, strain first through a fine-mesh strainer to remove grounds, then a second time through a paper filter, nut milk bag, or multiple layers of cheesecloth. The second pass is the one most people skip, and it’s the hidden upgrade that keeps high-shear dispensing working. Here’s the mechanism: dispensing nozzles and restrictor plates contain micro-holes measured in fractions of a millimeter. Residual coffee silt and oils – invisible to the eye but present after a single mesh strain – accumulate in those holes over multiple pours. The result is a progressively weaker cascade that eventually stops entirely, not because the gas is wrong, but because the dispensing path is obstructed.
After double-filtering, dilute the concentrate 1:1 with filtered water, or adjust the ratio to your preferred strength. Chill the diluted coffee thoroughly before moving to the next step – the temperature question is more consequential than it appears.
Achieving absolute clarity starts at the grinder burrs, making the technique of getting smooth cold brew grind essential for preventing restrictor clogs later.
Step 2: Chill Coffee and Nitrogen to the Same Near-Freezing Temperature
If you’ve ever used the right gas at the right pressure and still poured flat nitro cold brew, temperature mismatch is the most likely culprit. This is the variable that separates a good nitro pour from a great one, and almost no beginner guide addresses it with any precision.
The target is 32°F–36°F (0°C–2°C) for both the coffee and the charging device before you pressurize. The reason is gas solubility physics: nitrogen, like all gases, dissolves more readily in cold liquid than in warm liquid. This relationship follows Henry’s Law – at a given pressure, a colder liquid absorbs more gas.
A study published in the Journal of Chemical & Engineering Data measured nitrogen solubility in water from approximately 1°C to 90°C across a range of pressures, establishing that N2 uptake in water is strongly temperature-dependent. The data confirms that near-freezing temperatures – the 0°C–2°C range – represent the optimal window for maximizing N2 dissolution at practical dispensing pressures.
What that means practically: if your coffee is 45°F when you charge it, you’re leaving dissolved nitrogen on the table compared to coffee at 34°F, even if pressure and shake time are identical. Chill your cold brew concentrate in the refrigerator before charging, and if you’re using a keg or siphon canister, refrigerate that too. Do not attempt to compensate with ice in the serving glass – ice dilutes the coffee and disrupts the foam layer you’ve worked to create. Keep everything cold at the source.
Step 3: Select the Right Equipment Pathway and Load It Safely
Once your concentrate is chilled and your gas is confirmed as 100% food-grade N2, the next decision is which hardware pathway fits your batch size, budget, and local gas availability. There are two main routes, and the right one depends on how much nitro cold brew you actually drink.
Small-Batch and Portable Hardware Options
The most accessible entry point is a stainless steel whipped cream dispenser or the iSi Nitro, both of which accept N2 cartridges. The critical detail: confirm you’re purchasing N2-compatible cartridges, not the standard N2O cream chargers that stock most grocery store shelves. They look nearly identical and are often shelved together. Read the label.
Portable tank-free systems – including the NitroBrew, Nitropress, and iSi Nitro Whip – are legitimate small-batch options that skip the bulk N2 cylinder entirely. They work well for one-to-two serving quantities and are genuinely convenient for travel or counter-space-limited kitchens. Before committing to any of these systems, verify that N2 cartridges (not N2O) are available locally or reliably via mail order. A tank-free system that runs on N2O is a $100 purchase that makes the wrong drink.
Budget reference: a dispenser-style setup with N2 cartridges typically runs under $75 for the hardware.
Keg Systems and Pressure-Rated Capacity
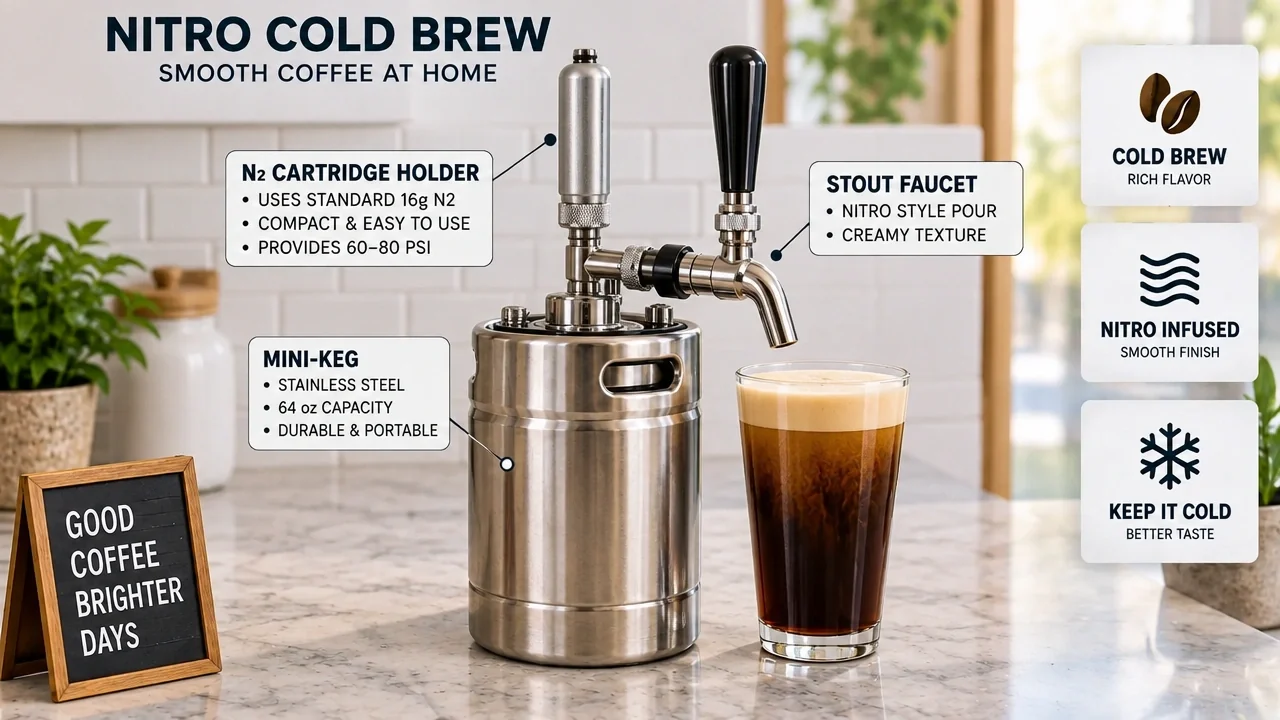
For larger batches, a mini-keg system paired with an N2 regulator, N2 bottle, and stout faucet is the proper setup. Popular options include the iKegger, the GrowlerWerks uKeg Nitro, and DIY kegerator builds using a small Cornelius keg. A mini-keg plus regulator plus bottle plus stout faucet typically comes in under $300 when purchased as a bundle; a used kegerator is another path if you already have the keg and gas.
Fill any device – dispenser or keg – to 80–85% capacity. That remaining headspace is not wasted volume; it’s where the gas lives during pressurization and where agitation happens during shaking. A completely full keg has nowhere for the nitrogen to expand and no room to create the turbulence that forces gas into solution.
Use only pressure-rated components and stay within the manufacturer’s stated PSI ceiling. Do not modify refrigerators or tanks without proper pressure safety controls. N2 tanks displace oxygen – a leaking tank in an enclosed, unventilated space is an asphyxiation hazard. Ventilate any room where nitrogen cylinders are stored.
Step 4: Charge, Pressurize, Shake, Rest, and Re-Hit for N2 Dissolution
This is the step where nitrogen actually enters the coffee – not just the headspace above it. The distinction matters because a pressurized headspace alone does not produce a nitro pour. The gas must be physically dissolved into the liquid, and that requires three things working together: pressure, mechanical agitation, and time at cold temperature.
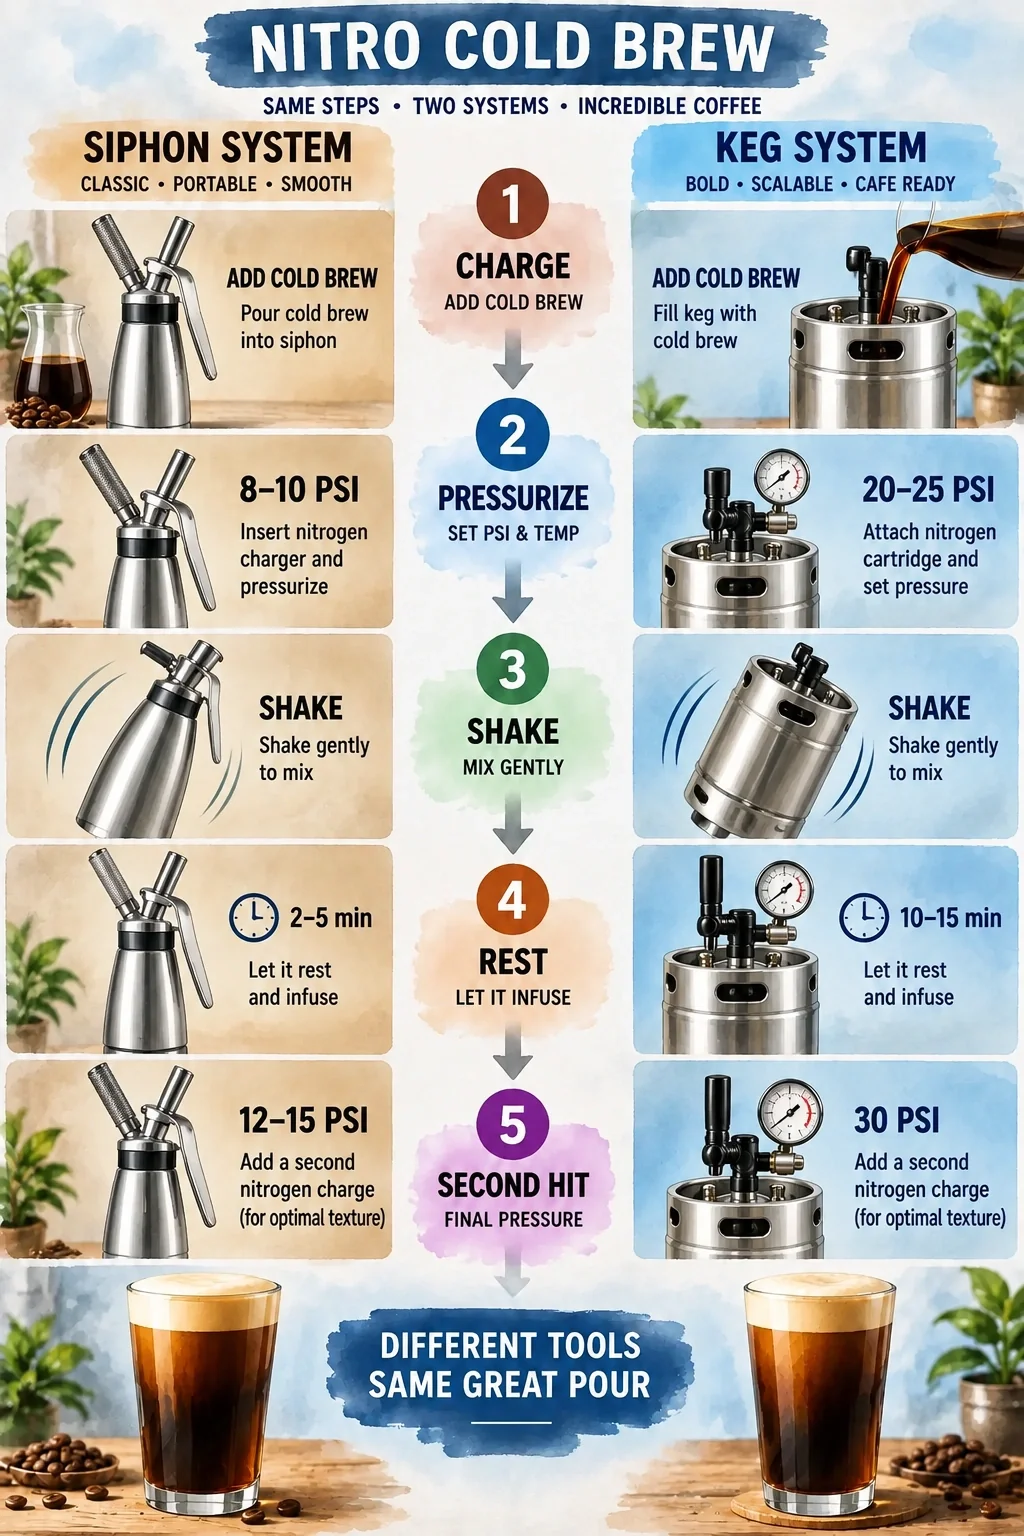
Charge the device with your confirmed 100% food-grade N2. For whipping siphons, follow the manufacturer’s instructions for cartridge count and pressure. For mini-keg systems, the commonly cited pressure range in the home-brewing community is 30–40 PSI as a starting point – but a more effective protocol, used by experienced home nitro brewers, is to pressurize to 45–50 PSI, shake vigorously, rest, and then hit the keg again at 50 PSI after the initial rest period. Most beginner guides either omit the second pressure hit or recommend lower pressures that produce inconsistent results.
After charging, shake vigorously for 30–60 seconds. Nitrogen is poorly soluble in water, which means passive contact between gas and liquid is not enough. Shaking maximizes the gas-liquid interface and physically forces N2 into solution. This is the agitation mechanism that Keg Smiths – a nitro keg system manufacturer – describes from direct product experience:
Keg Smiths explains that nitrogen won’t dissolve into coffee through pressure alone – it requires vigorous shaking for 15–20 seconds to create the gas-liquid contact needed for absorption. After shaking, the keg should rest in the refrigerator for at least one hour, ideally overnight, because colder liquid absorbs gas more efficiently, and that resting period is what converts pressurized headspace into dissolved nitrogen in the coffee itself.
After the initial shake and rest, the second pressure hit – if your system can safely handle 50 PSI – is the workaround for flat, under-carbonated pours that a single charge won’t fix. Rest the device cold throughout: warm liquid holds significantly less dissolved N2, and any temperature rise during the rest period undoes the dissolution work you’ve done.
For siphon systems, allow at least 1 hour of cold rest after shaking. For keg systems, refrigerate and allow 12–24 hours for full equilibrium – overnight is the standard and produces the most consistent results.
Step 5: Dispense Through a Restrictor or Stout Faucet to Build the Cascade
You’ve dissolved nitrogen into cold coffee under pressure. Now comes the step that almost no home nitro guide explains – and it’s the one that determines whether you get a cascade or a flat pour regardless of everything you did correctly upstream.
The cascade and creamy head are not a property of the coffee itself. They’re created by the dispensing hardware. Specifically, a restrictor plate containing micro-holes inside a stout faucet, or an equivalent high-shear dispensing nozzle, is what converts dissolved nitrogen into the visible microfoam cascade. Here’s the mechanism: when pressurized, nitrogen-saturated coffee passes through those tiny holes at high velocity, the sudden pressure drop causes dissolved N2 to rapidly nucleate out of solution as thousands of fine micro-bubbles. Those bubbles rise through the liquid in the characteristic cascading pattern and collect as a creamy head.
Without a restrictor or high-shear nozzle, the pressure drop is too gradual and too uniform. Nitrogen may still come out of solution, but it does so as larger, irregular bubbles – not the dense microfoam that defines the nitro experience. This is the hidden failure point behind “I used nitrogen but still got flat cold brew.”
For keg systems, install a proper stout faucet – a standard beer faucet will not replicate the effect. For siphon systems, use the restrictor nozzle if one is supplied, and never remove it in an attempt to increase flow rate. Open the faucet fully rather than partially; a partially opened faucet changes the shear dynamics and disrupts bubble formation.
Before dispensing, confirm the nozzle path is clean and unobstructed. Dried coffee residue or sediment in the micro-holes will degrade the cascade progressively – this is exactly why double paper filtration in Step 1 pays dividends over time.
Dispense into a chilled glass with no ice. A cold glass slows foam dissipation; ice dilutes the coffee and thermally disrupts the microfoam before you can drink it.
To understand the physics of this cascade mechanism in detail – including why Guinness uses the same stout faucet principle – this video breaks it down visually:
Step 6: Serve, Layer, Store, and Build Advanced Recipes
The pour is the payoff, but how you handle the next 120 seconds – and the next three weeks – determines whether the effort was worth it.
Appreciating the low acidity of these draft beverages deepens when evaluating the cold brew versus iced coffee chemistry that underpins every successful pour.
The Two-Minute Window and Glassware Geometry
Serve immediately after dispensing. The nitro foam has roughly a 2-minute drinking window before it begins to dissipate and the cascade settles. This isn’t a flaw in your technique; it’s the physics of low-solubility gas escaping from a liquid that’s no longer under pressure. Drink it fresh or watch it go flat.
Glassware geometry matters more than most people expect. A tall, narrow glass – think a standard pint or tulip shape – concentrates the cascade and gives the foam a defined head to collect against. A wide, shallow glass spreads the cascade laterally and dissipates the head before it can build. If you want the full visual effect, choose the glass intentionally.
Nitro Espresso Martini and Vanilla Sweet Cream Foam
The same nitro system that makes your morning cold brew can build more complex drinks with one additional step: layering.
For a nitro espresso martini, build your chilled espresso martini base – espresso, coffee liqueur, vodka, simple syrup – then incorporate nitro cold brew as the coffee element rather than straight espresso. Charge the combined mixture with N2 and dispense through the restrictor to preserve the cascade. Serve immediately in a chilled coupe.
For vanilla sweet cream cold foam layering, pour the nitro cold brew base first and let the cascade settle slightly. Then gently float or spoon vanilla sweet cream cold foam onto the surface. Avoid stirring – the visual appeal and textural contrast depend on keeping the layers distinct. The foam sits on the nitro head rather than mixing into it, creating a two-texture drink that holds for the full drinking window.
Elevating after-dinner drink menus with rich dairy foams pairs naturally with masterclasses in espresso vodka recipe perfection.
Refrigerated Keg Longevity and Concentrate Handling
Storage longevity varies significantly by format, and conflating the numbers is a common source of confusion. Kegged nitro cold brew stored under pressure in the refrigerator can last approximately 3 weeks based on community experience – the nitrogen environment slows oxidation. Ready-to-drink nitro that’s been dispensed or transferred to an open container is more conservative: some sources put that window at 3 days. Cold brew concentrate stored separately in the refrigerator keeps for up to 10 days.
The foam life – that 2-minute window after dispensing – is a completely separate variable from shelf life. A keg that’s been refrigerated for two weeks can still pour a perfect cascade; a glass that’s been sitting for three minutes cannot.
Troubleshooting: Fix Flat Pours, Clogs, Wrong Gas, and Pressure Dangers
Every failure in making nitro cold brew traces back to one weak point in the equipment pathway. Here’s how to diagnose which link failed and how to restore it.
Cascade Failure, Charging Medium Errors, and Nozzle Obstruction
A flat pour with no cascade is the most common failure, and it has a diagnostic checklist: verify that you used pure N2 (not N2O, CO2, or G-mix), that the coffee was at near-freezing temperature when charged, that pressure was sufficient, that you shook for a full 30–60 seconds, that rest time was adequate (1 hour minimum for siphons, 12–24 hours for kegs), and that the restrictor or stout faucet is clean and unobstructed.
Wrong gas symptoms are diagnostically distinct. N2O produces a faint artificial sweetness and larger bubbles that dissipate quickly. CO2 creates a prickly, fizzy mouthfeel with carbonic acidity – the opposite of the smooth, velvety texture nitro should deliver. G-mix introduces CO2 chemistry and produces a similar fizzy result. If any of these describe your pour, the fix is straightforward: switch to 100% food-grade N2 and re-charge.
Clogged nozzle symptoms typically appear as a weak, thin stream with no cascade rather than a complete blockage. Re-filter the concentrate through a paper filter before the next batch, disassemble the dispensing nozzle or stout faucet, clean the restrictor micro-holes with a fine brush or soak in warm water, and flush the entire dispensing path before reassembling.
Safety Limits and Success Validation
Over-pressurization is the rare but serious failure mode that beginner guides routinely omit. Never exceed your device’s maximum rated PSI – this applies to both siphon-style dispensers and keg systems. Handle N2 cartridges and cylinders per manufacturer instructions. Store N2 tanks in ventilated areas; nitrogen is odorless and colorless, and a leaking tank in an enclosed space displaces oxygen without any warning. Avoid DIY modifications to refrigerators or pressure vessels without proper engineering controls.
Success indicators are specific and recognizable: a creamy, persistent head that forms within seconds of dispensing; cascading micro-bubbles visible through the glass as the foam rises; a velvety, stout-like mouthfeel with no prickle or fizz; and a complete absence of CO2 tang. If you hit all four, the chain is intact.
The final resolution is this: authentic nitro cold brew at home is not a product of any single variable. It’s a chain – pure N2 + sediment-free concentrate + near-freezing temperature + correct pressure + shake and rest + restrictor dispensing + sanitation and safety. Break one link and the pour goes flat. Hold all of them and you have a café-quality cascade on demand, at a fraction of the cost.
Affiliate Disclosure
This post contains affiliate links, meaning I may earn a commission if you make a purchase through these links, at no additional cost to you. As an Amazon Associate, I earn from qualifying purchases. I only recommend products I genuinely believe will add value.

Royal Brew Nitro Cold Brew Coffee Maker, 64 oz Home Keg Black
- CAFÉ-STYLE NITRO COLD BREW AT HOME: Create smooth, creamy nitro cold brew with a rich, velvety texture from yo…
- 64 OZ STAINLESS STEEL NITRO KEG: Built with a durable 64 oz stainless steel keg and stout creamer faucet, this…
- N2 & N2O CARTRIDGE COMPATIBLE: Use food-grade 2g nitrogen (N2) cartridges for a classic cascading nitro textur…
- SIMPLE BREW-TO-POUR PROCESS: Fill the keg with prepared cold brew, charge with your preferred cartridge, shake…
- UPGRADE YOUR HOME COFFEE BAR: Serve nitro cold brew, iced coffee and other chilled beverages at home, in the o…

NitroPress DS Electric Nitro Cold Brew Coffee & Cocktail Maker Machine
- Café-Style Nitro Cold Brew at Home – Create smooth, creamy nitro cold brew coffee with a stunning cascading po…
- Electric Nitro Coffee & Cocktail Maker Machine – Experience effortless nitro brewing with this electric nitro …
- No Nitrogen Cartridges Required – Built-in air-powered nitrogen infusion technology eliminates the need for di…
- Premium Stainless Steel Construction – Precision-engineered from high-quality stainless steel and designed by …
- Versatile Nitro Beverage System – Go far beyond cold brew coffee with a versatile nitro beverage system design…

VEVOR Nitro Cold Brew Coffee Maker 17 oz Nitrogen Dispenser System, Home Brew Coffee Keg, Portable Nitrogen Infuser with Dispenser and Pressure Relieving Valve, Gift for Coffee Lovers
- Compatible with Multiple Beverages: For the better results, use coffee dispenser with nitrogen. Nitrogen charg…
- Food-Grade Material: The 304 stainless steel tank body resists rust and wear. The nitro cold brew coffee maker…
- Long-lasting Freshness Lock: The vacuum-sealed structure and unique valve pressure relief mechanism maintain p…
- Easy Assembly & Maintenance: No power is needed—simply add ingredients, insert the cartridge, shake, and dispe…
- All-Scenario Use: The compact and portable coffee dispenser fits in the refrigerator, making it ideal for gath…
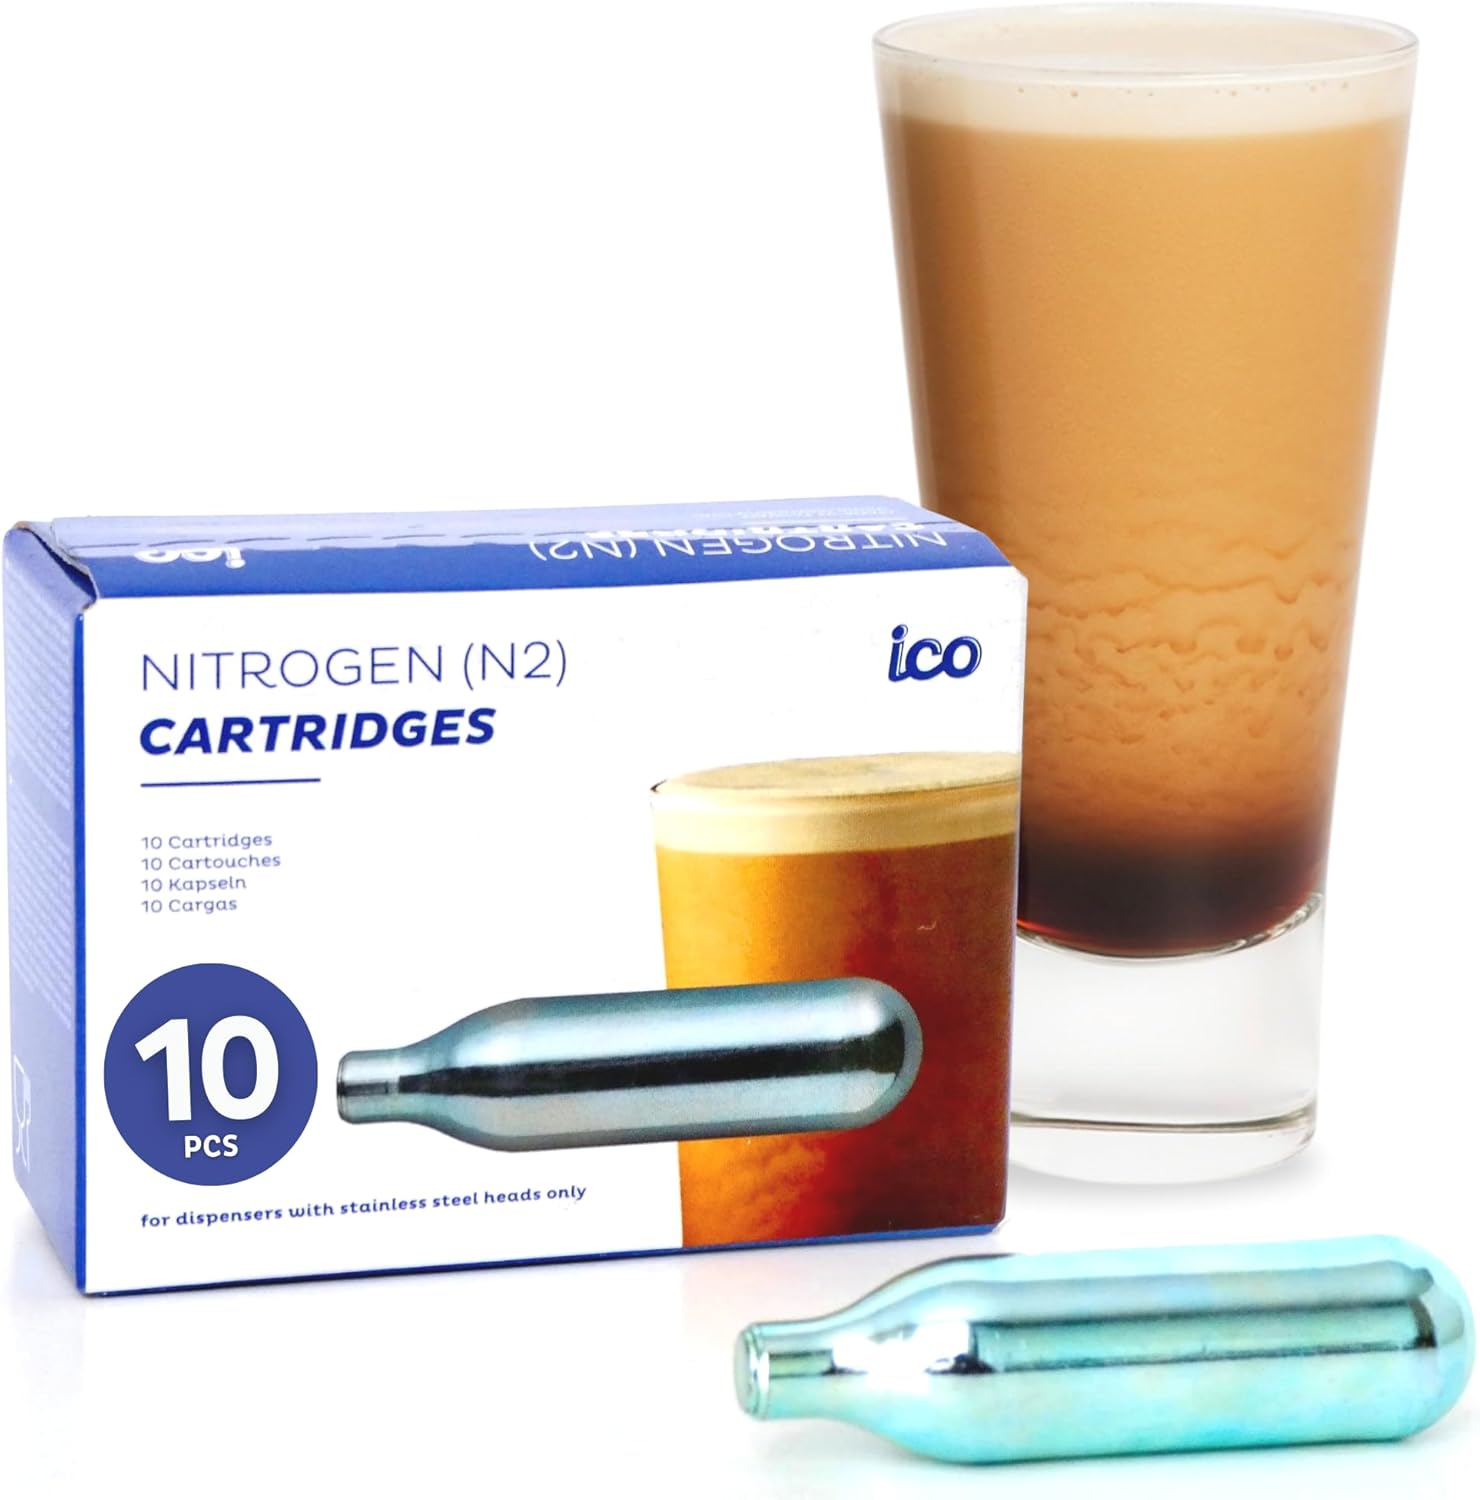
ICO 2g Nitrogen Cartridges (10-Pack) N2 Cartridges | NOT FOR WHIPPED CREAM
- [ULTIMATE NITRO TEXTURE] Transform your home kitchen into a premium cafe. Our 2g N2 cartridges infuse beverage…
- [UNIVERSAL COMPATIBILITY] Designed for seamless use with any standard non-threaded Nitro Cold Brew Maker or Ni…
- [PURE & CLEAN INFUSION] Experience uncompromised flavor. Each charger is filled with pure food-grade nitrogen …
- [VERSATILE BREWING] Beyond coffee, elevate your craft. Use our N2 chargers for nitrogen-infused beer (stouts a…
- [ICO QUALITY ASSURANCE] We prioritize your brewing experience. Our cartridges are hermetically sealed in 100% …
Frequently Asked Questions About How to Make Nitro Cold Brew
What makes nitro cold brew different from regular cold brew?
The difference is dissolved nitrogen gas, dispensed through a high-shear restrictor that knocks N2 out of solution as micro-bubbles. That’s what creates the creamy head and cascading texture – regular cold brew has neither pressure nor a restrictor in the equation.
Can I use a standard whipped cream charger to make nitro cold brew?
Standard cream chargers contain N2O, not N2, which produces larger bubbles and a faint sweetness rather than authentic nitro microfoam. You need cartridges explicitly labeled as 100% food-grade nitrogen for the real result.
Is nitro cold brew healthier than regular coffee?
The nitrogen itself adds no calories, sugar, or nutritional content. The perception of sweetness and creaminess comes from the microfoam texture rather than added ingredients, which is why many people drink it without sweetener – but the coffee base is nutritionally identical to regular cold brew.
How long should I shake the keg or siphon after charging?
Shake vigorously for at least 30 seconds, ideally 60. Nitrogen is poorly soluble, so the shaking is what physically forces gas into solution – pressure alone only fills the headspace.
Why does my nitro pour look flat even though I used nitrogen?
The most overlooked cause is a clogged restrictor nozzle. If sediment or dried coffee is blocking the micro-holes, the high-shear pressure drop that creates the cascade can’t happen. Re-filter your concentrate through paper and clean the dispensing hardware.
How do I know if my pressure is high enough for a good pour?
For mini-keg systems, 30–40 PSI is a common starting range, but experienced home brewers often go to 45–50 PSI with a second pressure hit after resting for more consistent dissolution. If the cascade is weak, insufficient pressure combined with a warm base is usually the cause.
Can I make nitro cold brew without a keg system?
Yes – a stainless steel whipped cream dispenser loaded with N2 cartridges works for single-serving batches and costs under $75. The trade-off is that you’re making one or two servings at a time rather than a multi-week supply.
How do I store leftover nitro cold brew in a keg?
Keep the keg refrigerated and under pressure between pours. Community experience puts keg shelf life at roughly 3 weeks under those conditions. Don’t store dispensed, open nitro cold brew and expect the foam to survive – it won’t last more than a few minutes once it’s in the glass.
References
- Gas Solubility Measurement and Modeling for the Nitrogen + Water System from 274.18 K to 363.02 K | pubs.acs.org
- How to Make Nitro Cold Brew at Home That Tastes Like the Coffee Shop | kegsmiths.com