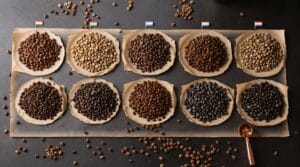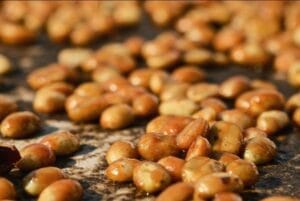

Carbonic maceration coffee is one of the most technically demanding processes in specialty coffee, and also one of the most misunderstood. The flavor complexity it produces doesn’t come from submerging beans in water. It comes from what happens inside an intact cherry cell when oxygen disappears and CO2 takes over.
This guide covers the full lifecycle, from sealing the first tank to pulling the final espresso shot. Whether you’re a producer designing a new lot, a roaster adjusting charge temperatures, or an enthusiast trying to understand what you’re actually tasting, the mechanics here apply directly to your work.
Key Takeaways on Carbonic Maceration Coffee
- CM fermentation is intracellular, driven by the coffee cherry’s own enzymes inside an intact cell under CO2, not by microbial activity on depulped beans.
- Equipment prep and brew-validation setup must happen before fermentation starts, not after; an unevaluable batch teaches nothing.
- Raw material quality determines your ceiling; CM amplifies what’s in the cherry and cannot rescue underdeveloped or inconsistent fruit.
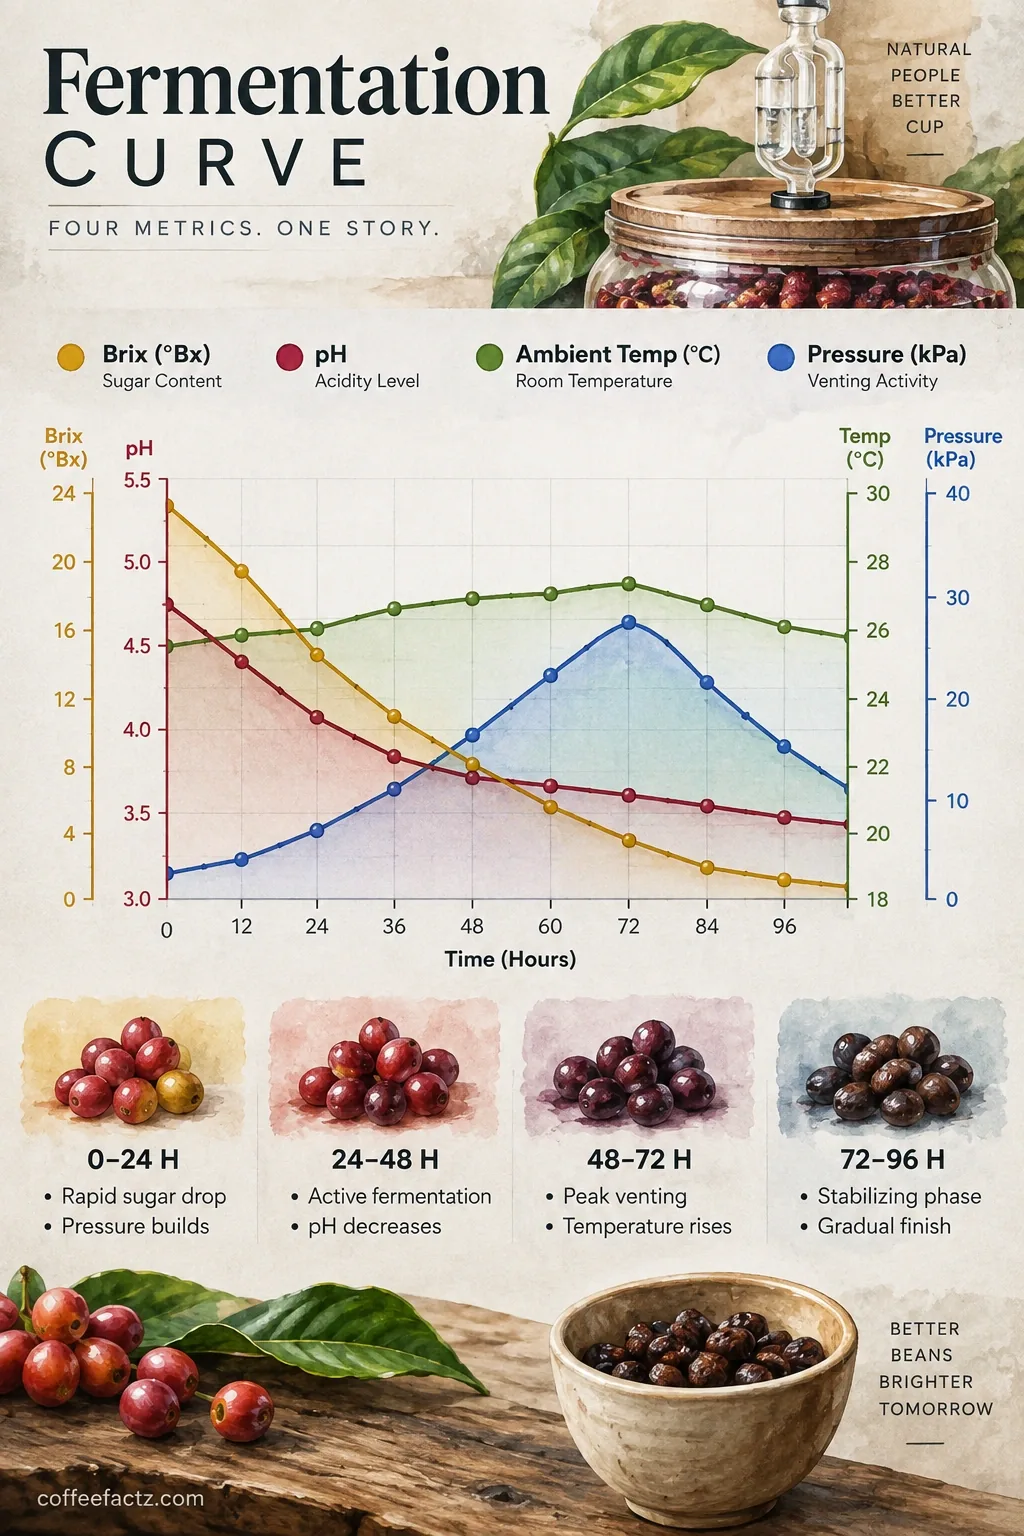
- Build a quantitative fermentation curve tracking Brix, pH, temperature, and pressure at fixed intervals; a single duration number cannot be replicated or troubleshot.
- Roast CM lots with lower charge temperatures and an extended drying phase to account for altered cell porosity and sugar-rich surfaces from mucilage contact.
- The CM label is a process clue, not a flavor guarantee; sell and evaluate by specific lot, variety, and documented sensory profile.
Prerequisites: Build Your Equipment Kit and Brew-Validation Workflow First
Before a single cherry goes into a tank, two things need to be in place: the physical equipment to run a safe fermentation, and a brew-evaluation system capable of telling you what the fermentation actually did. Most CM how-tos skip straight to the science. That’s a mistake. The first failure point practitioners hit isn’t biochemistry. It’s an unlabeled batch they can’t evaluate, or a vessel that wasn’t rated for the pressure it built.
Get both systems ready before you ferment. Then the variables you change actually teach you something.
Physical kit required:
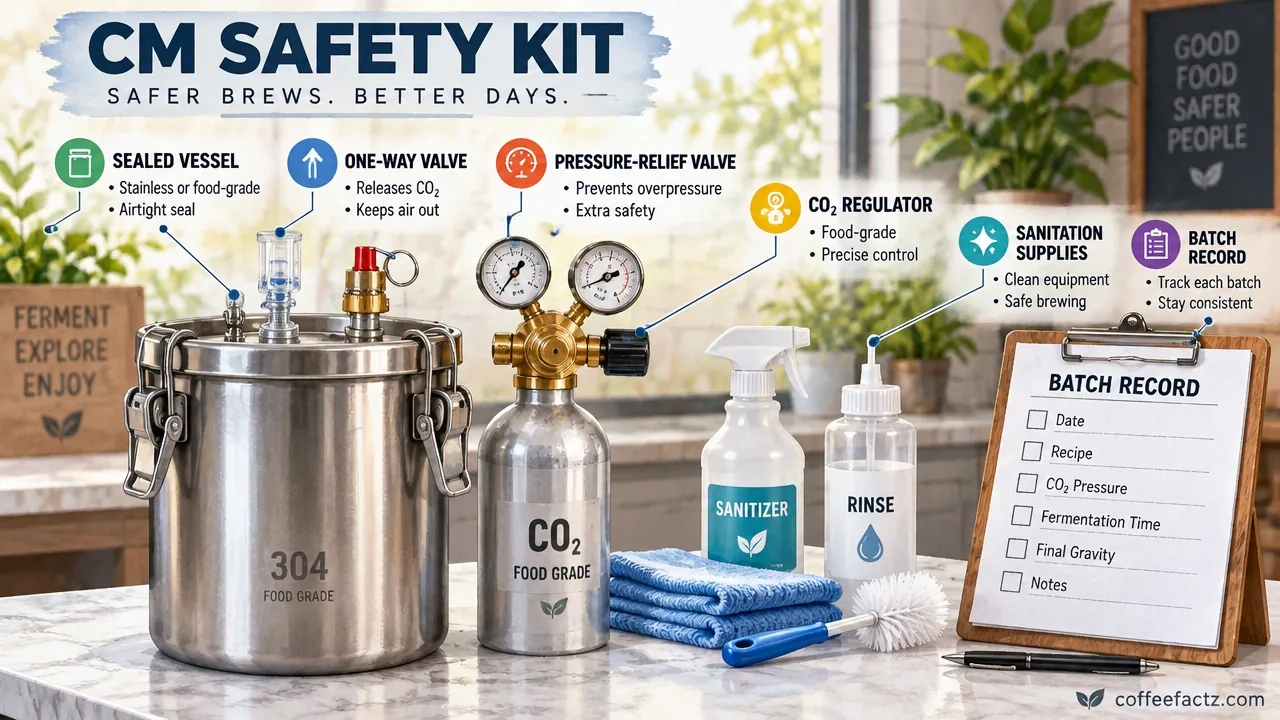
- Sealed fermentation vessel: stainless steel tank, food-grade plastic container, or heavy-duty GrainPro bag with a sealable closure
- One-way valve: allows CO2 to escape without letting oxygen back in
- Pressure relief valve: mandatory; never seal a vessel without one
- Food-grade CO2 source: compressed gas cylinder with a regulator if you’re injecting or flushing; confirm purity grade before use
- Sanitation supplies: food-grade sanitizer, brushes, and clean water for vessel, valves, and lines
Pre-fermentation batch record fields:
| Field | What to Record |
|---|---|
| Batch ID | Unique alphanumeric identifier |
| Variety | Cultivar name |
| Lot / Plot | Field or block of origin |
| Harvest Date | Day cherries were picked |
| Brix at Harvest | Refractometer reading |
| Tank ID | Which vessel this batch occupies |
| Intended Cup Profile | Target flavor descriptors |
| Baseline Evaluation Plan | Brew method, grind setting, cupping date |
The baseline evaluation plan is the piece most producers and enthusiasts omit. If your grinder isn’t calibrated and your brew recipe isn’t locked before fermentation starts, you have no way to isolate what the process changed. A weird cup after fermentation could be the fermentation, or it could be a grind setting that drifted. Dial in your brew workflow first. Treat equipment prep as part of the protocol, not a separate task to handle later.
Step 1: Choose CM vs Standard Anaerobic and Select a Lot Worth Fermenting
Carbonic maceration coffee and standard anaerobic fermentation are not interchangeable terms for the same process. The distinction is biochemical, and it determines everything that follows in the tank.
The Biochemical Distinction and Its Historical Roots
Standard submerged anaerobic fermentation works on depulped beans. The cherry skin and most of the mucilage are removed first. The beans sit in water or in a sealed dry environment, and microbial activity drives fermentation from the outside in. The flavor compounds that develop come primarily from microbial metabolites acting on the bean’s surface and the surrounding liquid.
Carbonic maceration keeps the cherry whole and intact. The CO2-rich sealed environment triggers intracellular fermentation: enzymatic reactions happening inside each cherry cell without microbial help from outside. The cell wall stays intact long enough for the fruit’s own enzymes to break down sugars, alter organic acids, and generate flavor precursors that wouldn’t form under normal aerobic or standard anaerobic conditions. Cell integrity and the CO2 atmosphere are what make this process distinct. Remove either one, and you’re running a different fermentation.
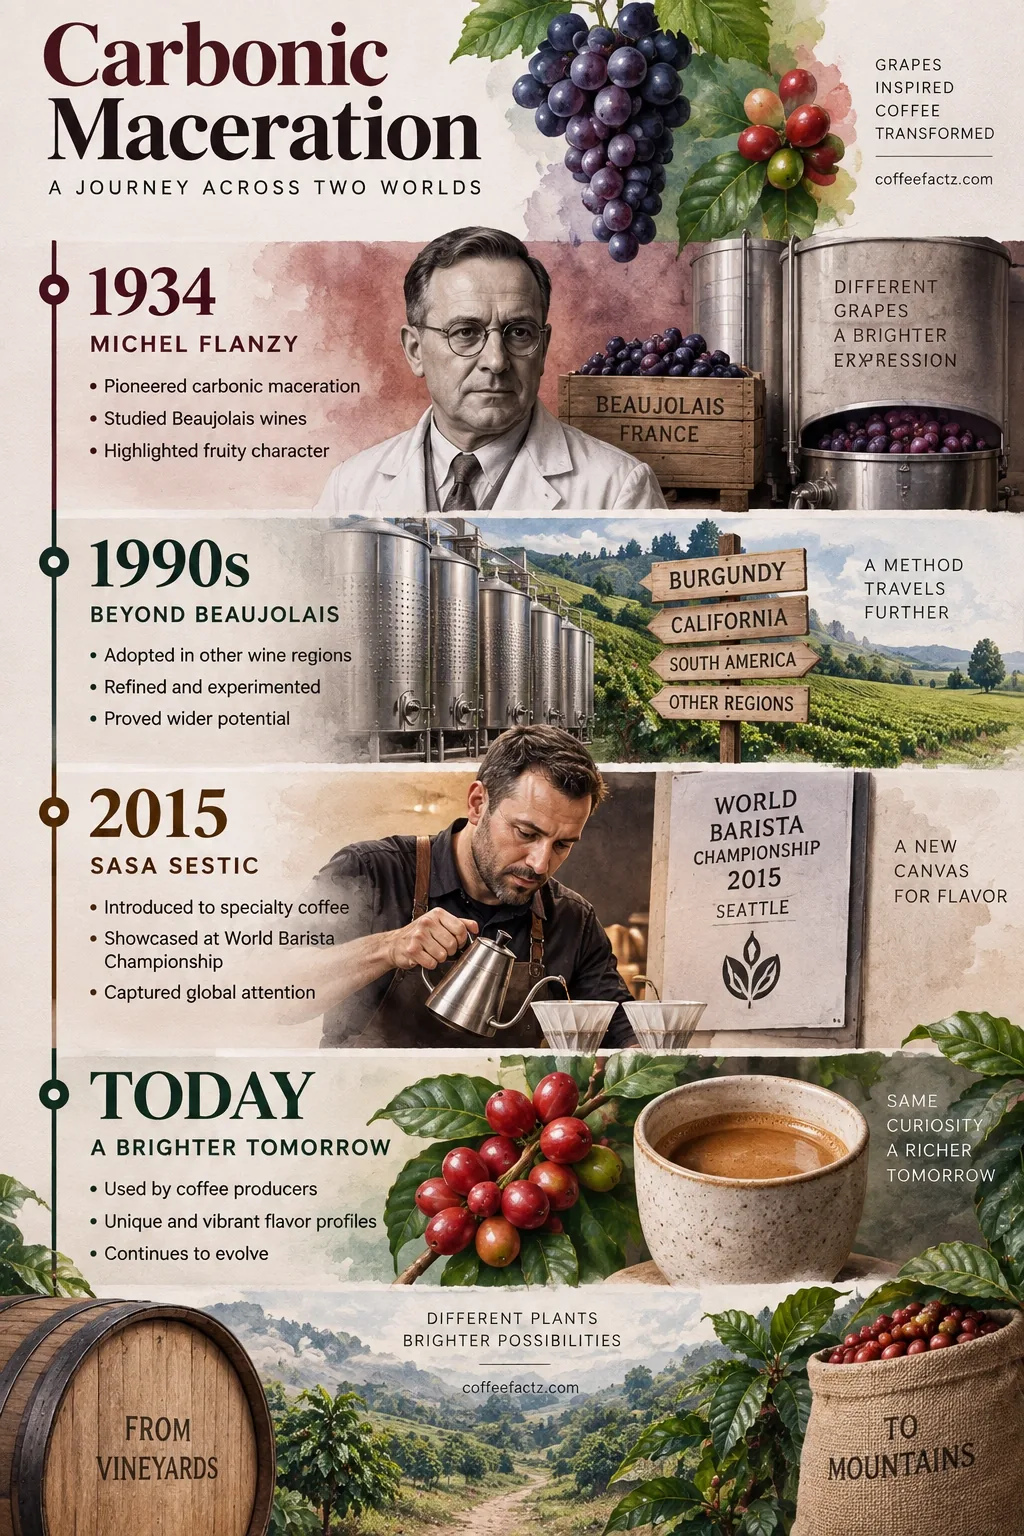
The mechanism has roots in wine, not coffee. In 1934, French researcher Michel Flanzy documented intracellular fermentation in whole grapes held in CO2 atmospheres, work that became the foundation of Beaujolais-style winemaking. Beaujolais remains the reference wine region for carbonic maceration: whole clusters of grapes sealed under CO2, producing wines known for their fresh fruit character and low tannin.
Coffee’s adaptation came in 2015, when Sasa Sestic won the World Barista Championship using a carbonic maceration-processed coffee from Colombia. Sestic’s win introduced the technique to a global specialty coffee audience and set off a wave of producer experimentation that’s still running.
Samo Smrke, Senior Researcher at the Coffee Excellence Center at ZHAW, found that keeping mucilage on depulped beans during fermentation created a richer nutrient environment for microbes, driving more intensive fermentation activity compared to demucilaged processes. Green beans from the mucilage-intact process retained more microbial metabolites and showed measurable differences in amino acid and phenolic profiles, which translated into subtle but detectable differences in floral and fruity intensity in the cup.
This matters for how you interpret CM results. The presence or absence of mucilage, and the degree to which cell integrity is maintained, shifts which biochemical pathways dominate. Whole-cherry CM and depulped anaerobic fermentation are not points on the same spectrum. They’re different systems producing different compound profiles.
Raw Material Quality Screening
Carbonic maceration amplifies what’s already in the cherry. It doesn’t rescue mediocre fruit. The lot you select needs to earn its place in the tank before fermentation begins.
Start with terroir fundamentals: altitude, soil composition, and climate all shape the sugar and acid profile the cherry brings to fermentation. A high-altitude lot from well-drained volcanic soil with a defined dry season gives you a different starting substrate than a low-altitude lot grown in flat, humid conditions. Both can be fermented, but they won’t produce the same cup.
Variety matters equally. Gesha, Bourbon, and Typica each carry different sugar-to-acid ratios and different aromatic precursor pools. Matching variety to your intended flavor target is part of lot selection, not an afterthought.
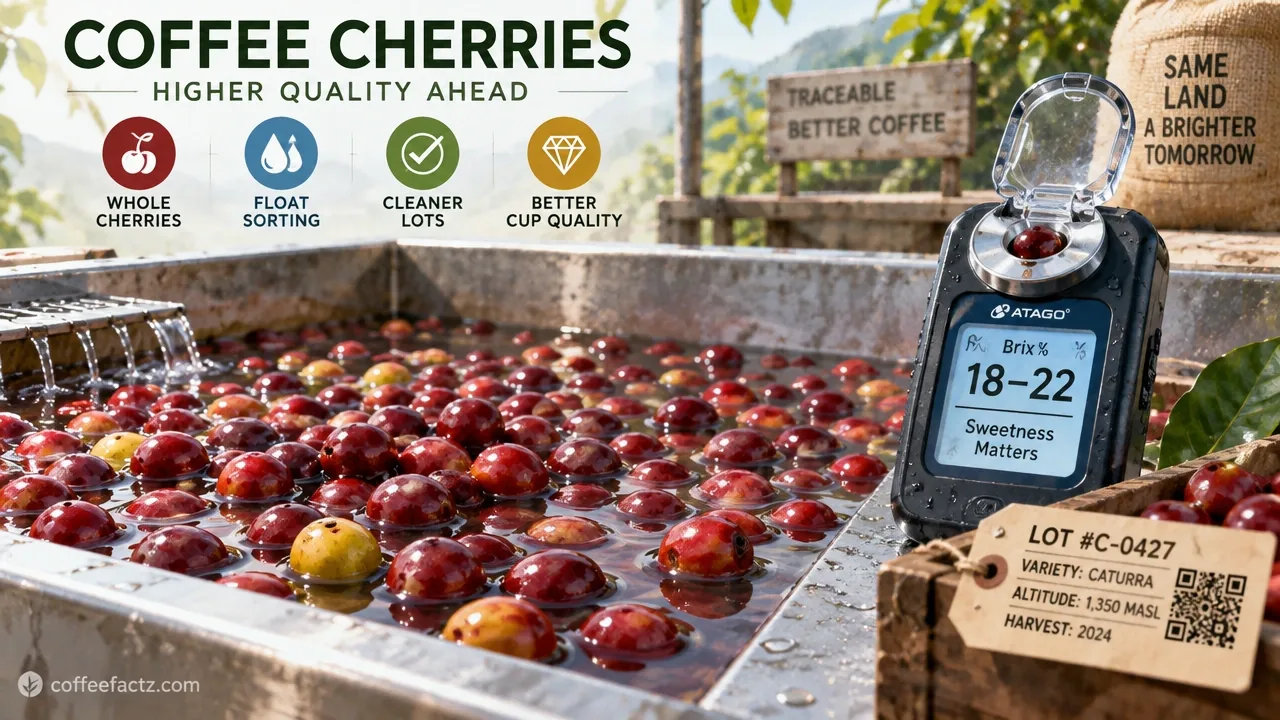
Harvest maturity is non-negotiable. Target a Brix reading of 18-22 at the time of picking. Below 18, the cherry hasn’t accumulated enough fermentable sugar to drive meaningful intracellular activity. Above 22, you risk overripe fruit that ferments erratically.
Run float sorting before loading the tank. Floaters are low-density cherries, often underdeveloped or damaged, and they introduce inconsistency into a process that depends on uniform cell integrity across the batch.
One important note on flavor expectations: the “carbonic maceration” label on a bag is a process clue, not a flavor guarantee. A CM-processed Indian Gesha lot, for example, can present as floral, citrusy, and sweet rather than winey, depending entirely on the variety, terroir, and fermentation conditions. Evaluate each lot on its own terms.
Step 2: Load Whole Cherries and Build the CO2-Rich Sealed Environment
The sealed CO2 environment is the mechanical core of carbonic maceration. Get it wrong here and everything downstream is compromised, either by oxygen contamination killing intracellular fermentation, or by pressure mismanagement creating a safety hazard.
Fruit Handling and Headspace Reduction
Load whole, intact cherries into your vessel. This is not optional. The intracellular fermentation pathway requires intact cell walls. If cherries are split, crushed, or depulped, the process defaults to surface-level microbial fermentation, which is a different system entirely.
Use a sealed stainless tank, food-grade container, or GrainPro bag depending on your scale. Fill the vessel as completely as possible. Headspace is oxygen, and oxygen is the primary enemy of intracellular fermentation. The more air you leave above the cherry mass, the longer it takes to displace, and the greater the risk of early aerobic activity degrading your fruit before the CO2 environment stabilizes.
Handle cherries gently during loading. Dropping bags or compressing the mass to reduce headspace can split fruit. A split cherry in a sealed tank introduces surface fermentation into what should be a controlled intracellular environment.
Gas Displacement and Pressure Regulation
Once loaded, your goal is to displace residual oxygen and build a stable CO2-rich atmosphere. Two approaches work at different scales.
CO2 injection or gas flushing uses food-grade compressed CO2 introduced through a fitting at the base or side of the vessel. As CO2 is heavier than air, it displaces oxygen upward and out through a one-way valve. This is the fastest and most controllable method. Confirm your CO2 is food-grade purity before connecting the regulator. Industrial-grade CO2 can carry contaminants that affect fermentation chemistry.
In lower-resource settings, natural CO2 buildup from the cherries’ own respiration and early fermentation can displace oxygen over time, but this takes longer and carries more early-stage risk.
Valve and pressure management require specific documentation before you seal the vessel:
- Confirm your one-way valve is rated for the pressure range your fermentation will generate
- Set your pressure relief valve to vent before reaching the vessel’s structural limit
- Never seal a vessel without an active pressure relief path
- Record the valve pressure rating, CO2 purity grade, cleaning protocol, and emergency venting procedure in the batch record before loading begins
Commercial CM guides frequently mention sealed vessels and one-way valves but leave out pressure ratings, gas purity specs, and sanitation standards. These aren’t details. They’re the difference between a controlled fermentation and a vessel failure.
Sanitation at loading: clean and sanitize the vessel, all valves, and any gas lines before contact with fruit. Record the cleaning protocol used. Document fill time and fermentation start time. These timestamps anchor every subsequent measurement in the monitoring phase.
Step 3: Monitor the Intracellular Fermentation Curve
Fermentation monitoring is where replication lives. A batch you can’t measure is a batch you can’t repeat. The goal of monitoring isn’t just catching problems. It’s building a quantitative curve that makes the next batch better than this one.
Quantitative Process Metrics
Ambient temperature is your primary control variable. Hold the fermentation environment at 18-20°C. Below this range, enzymatic activity slows significantly and fermentation stalls or extends unpredictably. Above it, microbial activity accelerates and the risk of off-flavors from unwanted fermentation byproducts increases.
Log these metrics at fixed intervals, every 6-12 hours minimum:
| Metric | What It Tells You |
|---|---|
| Temperature (°C) | Enzymatic and microbial activity rate |
| Pressure (vessel gauge) | CO2 buildup; triggers venting decisions |
| Brix | Sugar consumption rate; fermentation progress |
| pH | Acid development; off-ferment early warning |
| Time elapsed (hours) | Anchors all other readings to the timeline |
The Brix drop curve shows you how fast fermentable sugars are being consumed. A steep drop early followed by a plateau is normal. A drop that never slows may indicate oxygen ingress or uncontrolled microbial activity. A curve that barely moves suggests fermentation hasn’t started or temperature is too low.
The pH curve runs in parallel. Expect a gradual decline as organic acids accumulate. A sudden sharp drop in pH, particularly below 3.8, is an early warning for acetic acid production, the precursor to vinegar faults.
Many published CM protocols give only a total duration, 72 hours or 120-140 hours, without pH, Brix, oxygen, pressure, or temperature curves attached. A single duration number without a curve cannot be replicated. Build the curve. Otherwise troubleshooting is guesswork and lot-to-lot consistency is luck.
Intracellular Biochemistry and Safety Checks
Inside each intact cherry, the CO2-rich environment and the absence of oxygen force the fruit’s own enzymes into anaerobic metabolic pathways. The cell wall remains intact but becomes more porous as fermentation progresses. This altered porosity allows flavor precursors, organic acids, and aromatic compounds to redistribute within the cherry’s cellular structure without the disruptive surface exposure of depulped fermentation.
A 2024 peer-reviewed study in Frontiers in Sustainable Food Systems examining whole-fruit enzymatic fermentation found that enzymes degrading cellulose, hemicellulose, and pectin in plant cell walls increased cell wall porosity and released bioactive compounds, with subsequent fermentation driving measurable changes in phenols, flavonoids, amino acids, soluble sugars, and organic acids. The mechanism mirrors what happens inside a whole coffee cherry under CO2: enzymatic breakdown of cell wall structures releases and converts flavor-relevant compounds that would remain locked or altered differently under aerobic or surface-fermentation conditions.
Run these safety and quality checks at each logging interval:
- Off-gas smell: vent a small amount of gas and evaluate. Clean fruit, mild ferment, or early floral notes are positive signals. Vinegar, sulfur, or barnyard notes indicate a problem.
- Visual inspection: check for any visible mold, unusual discoloration, or leakage at valve fittings
- Oxygen ingress check: confirm valve seals and fittings are holding. Any pressure drop without a corresponding venting event suggests a leak.
- Pressure log: record gauge pressure before and after any venting. Pressure that builds faster than expected may indicate temperature has risen above target.
Keep the fermentation log updated in real time. A log filled in from memory at the end of a 72-hour fermentation is not a fermentation log. It’s a reconstruction.
Step 4: Decide the Endpoint and Stop Fermentation
Fermentation endpoint is a decision, not a fixed number. Duration ranges in the literature span 18-96 hours, with 24-72 hours as the most commonly cited window for standard CM protocols. GrainPro bag setups typically run shorter cycles, around 72 hours, because temperature and pressure control are less precise. Stainless tank setups with temperature control and gas regulation can run 120-140 hours while maintaining quality. Farm altitude, mill conditions, ambient micro-climate, cherry variety, and starting Brix all shift where the endpoint actually falls for a specific lot.
Use sensory and tactile checks to find the endpoint, not just the clock.
Positive endpoint signals:
- Floral aromas from vented gas (jasmine, rose, bergamot depending on variety)
- Red fruit character (cherry, raspberry, plum) detectable at the valve
- Panela or brown sugar sweetness in the off-gas
- Baking spice notes in some lots
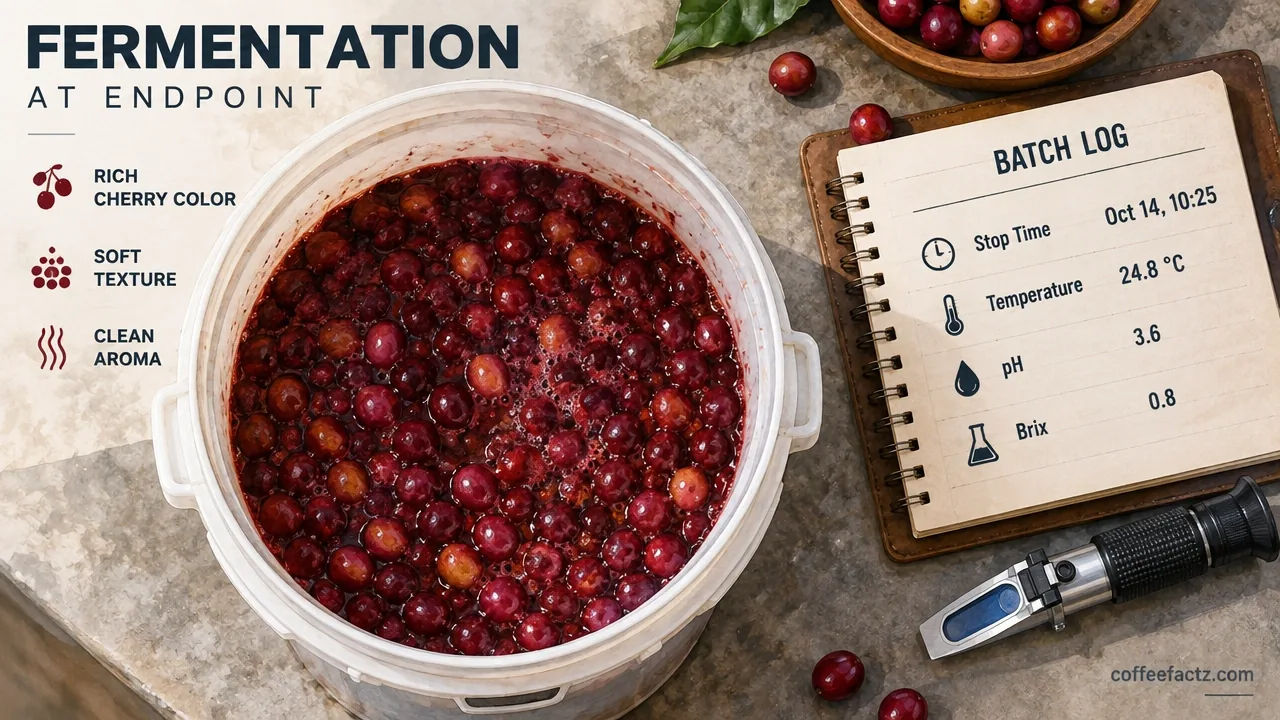
- Cherries feel silky and slightly softened but not mushy when pressed
Stop immediately if you detect:
- Vinegar or sharp acetic sharpness in the off-gas
- Alcohol dominance without fruit character
- Mushy, collapsing cherries
- pH below 3.5 on the curve with no plateau in sight
Winey character is possible in CM lots but not guaranteed, and it’s not always the target. Some producers run CM specifically to produce floral and citrus-forward profiles without any winey ferment note. Define your target profile before fermentation starts and use that definition to judge the endpoint.
Batch decision rules to document at stop:
- Target profile achieved (Y/N) and descriptor notes
- Risk tolerance: if the batch is large, err earlier; if it’s a small experimental lot, you can push further with more monitoring
- Stop time, temperature, pH, and Brix at endpoint
- Tank ID and operator name
These fields in the batch record are what allow you to replicate a successful lot or diagnose a failed one.
Step 5: Stabilize, Wash, and Dry to Buyer-Ready Moisture
Once fermentation stops, the batch needs to move quickly. Cherries sitting in a sealed vessel after the endpoint continue fermenting, just without your oversight. Transfer promptly.
Washing and mucilage removal depends on your intended finish. Some CM protocols wash the cherry fully after fermentation, removing all mucilage before drying. Others retain partial mucilage for an extended honey-style drying. Both are legitimate, but the choice affects the drying timeline and the final cup profile. Document which approach you used in the batch record.
Protect the batch from contamination during transfer. Use clean containers and tools. Don’t let fermented cherries sit on bare ground or in containers that haven’t been sanitized.
Drying targets:
- Final moisture content: 11-12.5%
- Raised bed drying is preferred; it allows airflow above and below the cherry mass, reducing the risk of mold on contact surfaces
- Typical raised-bed drying time: approximately 2 weeks, but this varies with ambient humidity, temperature, and airflow
- Check moisture with a calibrated meter at multiple points in the drying mass, not just the surface
Uneven drying is a common fault. Stir or turn the cherry mass regularly, especially in the first week when moisture loss is fastest. A crust forming on the outside while the interior remains wet leads to cracking and inconsistent moisture readings at milling.
Buyer documentation package:
| Document | Required Fields |
|---|---|
| Fermentation log | Batch ID, start/stop times, temp/pH/Brix curves, endpoint notes |
| Moisture certificate | Final moisture reading, meter type, date |
| Screen size | Post-milling screen distribution |
| Lot / variety | Cultivar, plot, harvest date |
| Process traceability | EUDR compliance data, direct trade transparency notes |
Plot-level traceability is no longer optional for EU market access under the EUDR framework. Build it into the batch record from day one, not as a retroactive paperwork exercise.
Step 6: Roast for Altered Cell Porosity
CM green coffee behaves differently in the drum because the fermentation process has already altered the bean’s cellular structure. The increased cell porosity that drives flavor compound release during fermentation also changes how heat transfers through the bean during roasting. Residual sugars from mucilage contact add additional sensitivity to high early-phase temperatures.
Mario Roberto Fernández, a Coffee Processing Consultant at Café Imports, advises that CM coffees, coated with sucrose, glucose, and sugars from mucilage and cherry skin, need slower roasting at lower temperatures. He recommends targeting around 170°C to 180°C (338°F to 356°F) with moderate drum pressure to avoid scorching the sugar-rich surface.
This is the starting constraint that shapes your entire profile design. Higher charge temperatures than you’d use on a conventional washed lot risk tipping the surface before the interior develops. Rushing the drying phase to save time bakes the bean instead of developing it.
Roast profile framework for CM lots:
- Charge temperature: reduce by 5-15°C compared to your standard washed profile for the same bean density and batch size; the sugar-rich surface scorches faster
- Drying phase: extend it. CM beans carry altered moisture distribution from fermentation. A longer, lower-energy drying phase lets moisture equalize before you push toward first crack. Rushing here produces uneven development.
- Development time: shorten relative to total roast time. CM beans have more pre-developed flavor precursors from intracellular fermentation. Long development times can push floral and fruit notes into flat or baked territory.
- Development time ratio: target a tighter ratio than your washed baseline; the precursors are already further along
Adjustments by bean characteristics:
- High-density, low-moisture beans: can tolerate a slightly higher charge, but still lower than your washed baseline
- Low-density, higher-moisture beans: need a gentler entry and longer drying phase
- Large batch sizes: heat transfer is slower; account for this in your charge temperature and drum speed settings
Always run a sample roast first. A 100g or 200g sample roast at your projected profile settings, cupped against your target descriptors, costs almost nothing compared to a full-batch error. The goal of the sample roast is to check that your floral and fruit notes are present and clean, and that winey ferment character, if present, is in balance rather than dominant.
Run a control lot in parallel. Roast a comparable washed or natural lot from the same origin on the same day using your standard profile. Cup both blind. The delta between the control and the CM lot tells you what the fermentation actually contributed, and whether your roast profile is expressing or suppressing it.
Track these fields for every CM roast:
- Charge temperature
- Turning point (time and temperature)
- Drying phase end point
- First crack time and temperature
- Development time and development time ratio
- End temperature
- Cupping result with descriptor notes
Step 7: Brew, Cup, and Validate by Lot
Sensory validation is where the entire process either confirms or collapses. A CM coffee that cups well proves the fermentation, drying, and roast decisions worked together. One that cups poorly tells you something failed, but only if your evaluation setup is stable enough to tell you where.
Sensory Analysis and Extraction Calibration
Cup using the SCA 80+ framework as your baseline structure: fragrance, flavor, acidity, body, balance, clean cup, and sweetness. Each attribute gives you a specific diagnostic signal.
- Fragrance: floral and fruit intensity at dry and wet grounds; the first indicator of whether intracellular fermentation produced its target precursors
- Flavor: mid-palate complexity; where panela, spice, and fruit register
- Acidity: quality and intensity; CM lots often show softer, rounder acidity than washed lots from the same origin
- Body: CM frequently produces a silkier mouthfeel than comparable washed coffees
- Clean cup: any off-ferment, vinegar, or musty notes score here; a clean cup score below 6 indicates a process fault, not a style choice
- Balance: how well the fermentation-derived notes integrate with the coffee’s inherent character
Before you cup, confirm your evaluation equipment is stable. Grinder calibration matters more here than with conventional lots because CM coffees are often evaluated against a flavor narrative (“winey,” “floral,” “complex”) that can be mimicked by grind inconsistency. A grinder producing excess fines will read as heavy-bodied and muted. A grinder running coarse will read as thin and bright. Neither tells you what the fermentation did.
If you’re using a new hand grinder for evaluation, season it with at least 1 kg of coffee before judging its output. 200g is not enough to stabilize burr surfaces. Treat early shots or cups through an unseasoned grinder as equipment warm-up, not as product evaluation.
Evaluate in both filter and espresso if the coffee will be sold for both uses. CM lots that express beautifully as a filter pour-over can read as overpowering or ferment-forward under espresso extraction pressure. Confirm the profile holds across brew methods before making market claims.
Market Positioning and Batch Communication
Sell by lot and variety, not by process label. “Carbonic maceration” on a bag tells the buyer how the coffee was processed. It does not tell them what it tastes like. A CM Gesha from Panama and a CM Caturra from Honduras are not interchangeable flavor experiences. Position each lot on its specific sensory attributes, supported by the fermentation log data.
Taya Brown, Coffee Quality Specialist at Café Imports, points out that producers can’t benefit from CM experimentation without a short feedback loop between process decisions and cup quality. Without access to cupping labs and the ability to evaluate outcomes, adding CO2 or trying new fermentation steps becomes investment without information. The new terminology and flavor profiles are genuinely exciting, but new processes carry real financial risk, and that risk compounds without a reliable way to know whether the experiment worked.
This is the market communication problem in practical terms. Buyers who purchase a “carbonic maceration coffee” expecting a specific flavor profile and receive something different don’t have a process complaint. They have a communication complaint. Give buyers your fermentation log, endpoint data, cupping scores, and lot-specific descriptor notes. Let the data support the story, not replace it.
A process label is a starting point for a conversation. The fermentation log, the cupping record, and the lot-specific flavor descriptors are what make that conversation credible.
Troubleshooting: CM Faults, Limitations, and Home-Scale Realities
Diagnosing Flavor and Process Faults
No winey flavor is the most common complaint from first-time CM producers, and it’s usually not a process failure. Winey character is one possible CM expression, not a guaranteed output. If your lot produces floral and citrus notes without wine character, check your variety, starting Brix, and fermentation temperature. A CM Gesha at 18-20°C is more likely to express jasmine and bergamot than a CM Bourbon under the same conditions.
Vinegar or sharp acetic notes indicate over-fermentation or oxygen ingress. Check your pH curve. If pH dropped below 3.8 before you stopped fermentation, acetic acid was already accumulating. Check valve seals for any pressure loss that would signal oxygen entry. Vinegar faults don’t improve in the cup. They carry through roasting.
Off-ferment or barnyard character typically signals either contamination from unsanitized equipment or wild yeast/bacterial activity from oxygen ingress early in the fermentation window. Review your sanitation protocol and your vessel sealing procedure.
Pressure or oxygen ingress problems show up in the log as unexpected pressure drops or a pH curve that drops faster than expected. Inspect valve fittings, gaskets, and seals at each logging interval.
Inconsistent duration across batches from the same farm is normal. Ambient temperature, cherry maturity variation, and micro-climate differences between harvest days all shift the fermentation rate. This is why you build a curve rather than following a fixed hour count. The curve tells you where this batch is. The hour count tells you where a different batch was.
Grinder and brew misjudgment as a fault source is underappreciated. A CM coffee cupped on an uncalibrated grinder or with an inconsistent brew recipe produces misleading data. Before concluding that a fermentation failed, confirm your evaluation setup is stable.
Operational Limits and Home-Scale Feasibility
Carbonic maceration has real disadvantages that don’t disappear with enthusiasm.
There is no single standard duration. Results vary by farm, mill, variety, and micro-condition in ways that require real-time monitoring to manage. Equipment burden is significant: sealed vessels, pressure-rated valves, food-grade CO2, calibrated refractometers, and pH meters all add cost and complexity. Sanitation requirements are stricter than standard fermentation because a sealed anaerobic environment that goes wrong produces faults that are difficult to detect until cupping. Over-fermentation risk is higher than in open-tank fermentation because you can’t rely on smell alone to catch a problem early. And the process label carries uncertainty in the market: buyers are still developing frameworks for evaluating CM lots, and a mislabeled or poorly executed CM coffee does reputational damage beyond the single batch.
Home-scale CM is feasible but requires honest scoping. Small food-grade airtight containers, such as sealed fermentation vessels used in home brewing, can hold a few kilograms of cherries. A CO2 cartridge system or aquarium-grade CO2 can displace oxygen if done carefully. Strict temperature control, logging at short intervals, and small trial batches reduce the risk of a total loss.
What a home setup cannot replicate is the pressure control, gas flow precision, and thermal stability of a commercial CM tank. Don’t evaluate home results against commercial benchmarks. Evaluate them against your previous home results. The goal of a home trial is learning, not production-scale replication.
Prioritize safety above all else. A sealed vessel under pressure that fails is a physical hazard. Use equipment rated for the pressures involved, never exceed rated limits, and always maintain an active pressure relief path. Start with the smallest viable batch size. The cost of a failed 2 kg trial is a learning experience. The cost of a failed 20 kg trial is a financial setback.
Frequently Asked Questions About Carbonic Maceration Coffee
Can I perform carbonic maceration at home?
Yes, with strict limits. Small food-grade airtight vessels with a pressure relief valve, food-grade CO2, rigorous sanitation, and close temperature monitoring can support a small CM trial. Don’t compare home results to commercial benchmarks; the equipment differences are too significant.
How long does carbonic maceration take?
It depends on your vessel, temperature, variety, and target profile. Common ranges run 24-72 hours in GrainPro bags and 72-140 hours in sealed stainless tanks. Track your Brix and pH curves rather than following a fixed hour count, because the endpoint is a sensory and chemical decision, not a timer.
What are the disadvantages of carbonic maceration?
The main ones are equipment cost, strict sanitation requirements, no universal duration standard, high over-fermentation risk in a sealed environment, and market uncertainty around what the label actually promises buyers. It also requires a functioning cup-evaluation workflow to generate useful data from each trial.
What wines go through carbonic maceration?
Beaujolais is the reference region. The technique was documented there in 1934 and remains central to Beaujolais Nouveau production. Other light, fruit-forward red wines from the Languedoc and some Spanish regions also use the method, but Beaujolais is where the process was formally established.
Why doesn’t my CM coffee taste winey?
Winey character is one possible expression, not a guaranteed output. Variety, terroir, starting Brix, fermentation temperature, and duration all shape the flavor profile. A CM Gesha at 18°C is more likely to produce floral and citrus notes than wine character. Define your target profile before fermentation and evaluate against that, not against a generic winey expectation.
How is carbonic maceration different from standard anaerobic fermentation?
Standard anaerobic fermentation works on depulped beans submerged in water or held in a sealed dry environment, with microbial activity driving fermentation from the outside in. CM keeps the cherry whole, and fermentation happens intracellularly through the fruit’s own enzymes under CO2. The flavor compound profiles produced by the two processes are measurably different.
How should I adjust my roast profile for a CM lot?
Lower your charge temperature by 5-15°C compared to your standard washed baseline, extend the drying phase to let moisture equalize, and shorten development time relative to total roast time. Run a sample roast first and cup it against your target descriptors before committing a full batch.
What does Brix tell me during CM fermentation?
Brix measures dissolved sugar concentration in the fermentation environment. As the cherry’s sugars are consumed by intracellular enzymatic activity, Brix drops. The rate and shape of that drop curve tells you how actively fermentation is progressing and helps you identify when activity is slowing toward the endpoint.
References
- The Fermentation Effect – SCA News, Issue 10 | sca.coffee
- Understanding the Process: Carbonic Maceration | baristamagazine.com
- Carbonic Maceration Coffees: A Roaster’s Guide | mtpak.coffee
- Changes in the nutritional, flavor, and phytochemical properties of Citrus reticulata Blanco cv. ‘Dahongpao’ whole fruits during enzymatic hydrolysis and fermentation | frontiersin.org