
Making a cortado is one of those deceptively short assignments where every gram counts. Two ounces of focused double espresso, two ounces of silky steamed milk, and a small Gibraltar glass – that’s the entire architecture of a drink that’s been quietly separating serious coffee bars from tourist traps for decades.
The reason most homemade cortados fall flat isn’t bad beans or cheap equipment. It’s ratio drift, wrong glass size, and milk that’s either scorched or piled too high. Fix those three things and you’re not just making a coffee – you’re making an argument for why less is almost always more.
Key Takeaways on Making a Cortado
- A cortado is 1:1 espresso to steamed milk by weight – 22 g each – served in a 4–5 oz glass, nothing more.
- Always pull a double shot, not a single; a single lacks the body to hold up against equal-volume milk.
- Milk temperature should stay at 60–65°C; above 65°C, proteins denature and scorched notes appear.
- Dry foam is a cortado killer – target silky, flat microfoam that pours like wet paint, not a cappuccino cap.
- Glass size isn’t aesthetic: a large mug creates visual pressure to over-pour milk and drift the ratio.
- Taste the espresso shot alone before adding milk – milk cuts intensity but never fixes a bad extraction.
What a Cortado Is, Tastes Like, and What You Need
Before you pull a single shot, you need a clear picture of the target – because a cortado is precise enough that being off by an ounce in either direction produces a completely different drink.
Cortado comes from the Spanish verb cortar, meaning “to cut.” The cortado originated in Spain’s Basque region as a way to soften espresso’s sharp intensity with just enough steamed milk to round it out – without burying it. The ratio is 1:1 espresso to steamed milk: traditionally 2 oz of espresso and 2 oz of steamed milk, served in a 4–5 oz glass. The standard vessel is a small rocks-style glass like the Libbey Gibraltar, which holds the drink without giving the milk room to take over.
The surface should be flat and silky – a thin layer of microfoam with no dry, airy cap. This is not a cappuccino with its foam collar, and it’s not a flat white with its larger milk volume. The cortado sits in its own lane: more espresso-forward than either, with milk that integrates rather than dominates.
The Sensory Profile
The 1:1 ratio does something specific to flavor. It tames the sharpest edges of espresso without drowning the origin character underneath. A light roast in a cortado will still deliver bright acidity, berry, and fruit notes – just softened by a clean, lightly sweet milk backdrop. A dark roast shifts the profile toward deep sweetness, dark chocolate, and roasted hazelnut, with milk amplifying the roundness.
“For people who like espresso-forward drinks, the cortado retains unique or outstanding flavor notes that are accentuated by the sweetness of milk without being diluted by it. For example, the aromatic fruit bomb of an Ethiopian espresso will still be there. It will only be slightly sweetened by milk.” – Aaron Duckworth, coffee professional and seasonal beverage designer at Parisi Coffee in Kansas City, Mo.
That’s the cortado’s core promise: origin clarity with the sharpness cut. Milk adds sweetness; it doesn’t replace the espresso.
Gear and Ingredient Prerequisites
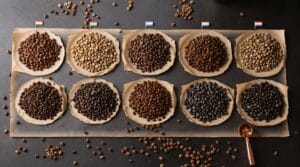
For beans, use specialty-grade Arabica scoring 80+ on the SCA scale, roasted within the last 1–5 weeks, and ground whole immediately before brewing. Stale pre-ground coffee collapses the flavor structure that makes a cortado worth making.
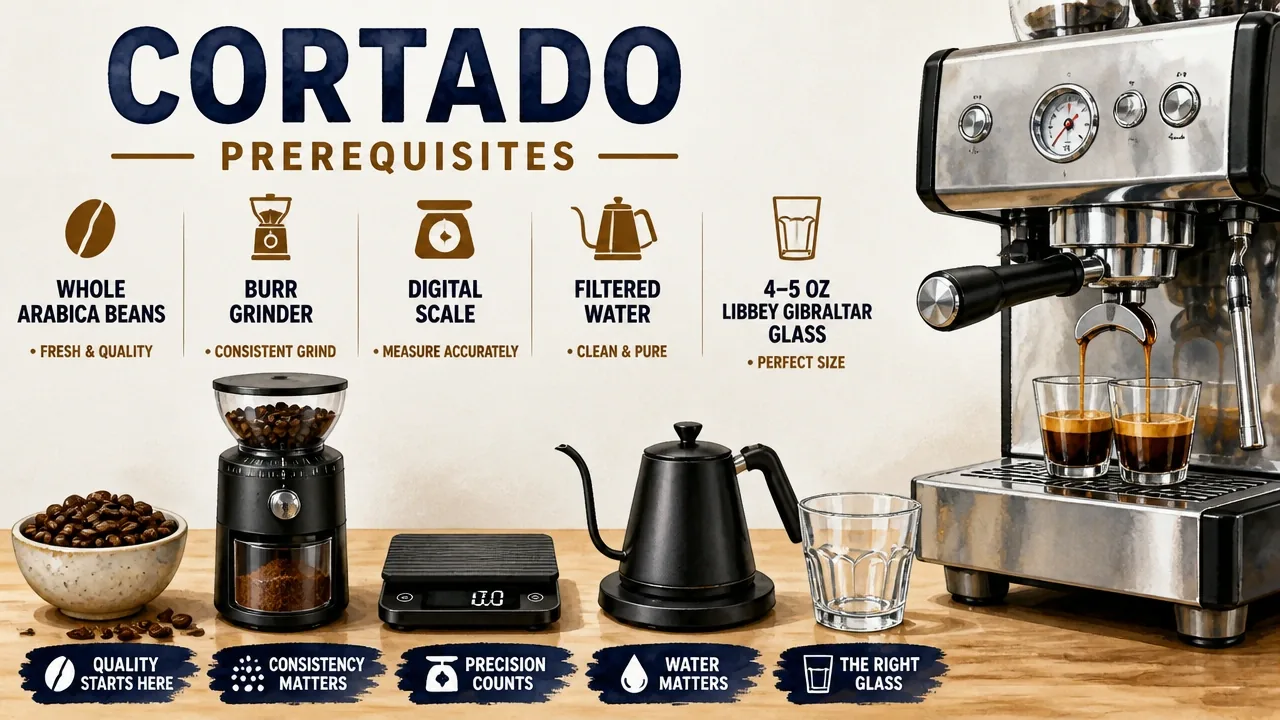
On the equipment side, you need:
- A burr grinder (not blade – blade grinders produce uneven particle sizes that wreck extraction)
- Filtered water with a TDS between 75–175 ppm
- A scale accurate to 0.1 g
- Brew temperature between 195–205°F
- An espresso machine, or a capable alternative (moka pot, AeroPress with Prismo, or French press)
- A milk steamer, frother, or one of several no-steamer methods covered below
One PAA worth settling now: a cortado uses a double shot, not a single. A single shot at 1 oz simply doesn’t have the body or volume to hold up against 1 oz of milk in a meaningful way. The double shot – roughly 2 oz – is the standard foundation.
Here’s a flat-lay of the core tools before you start:
Step 1: Dial In and Pull a Focused Double Espresso
The espresso is the whole game. Milk in a cortado doesn’t rescue a bad shot – it just makes the problem creamier.
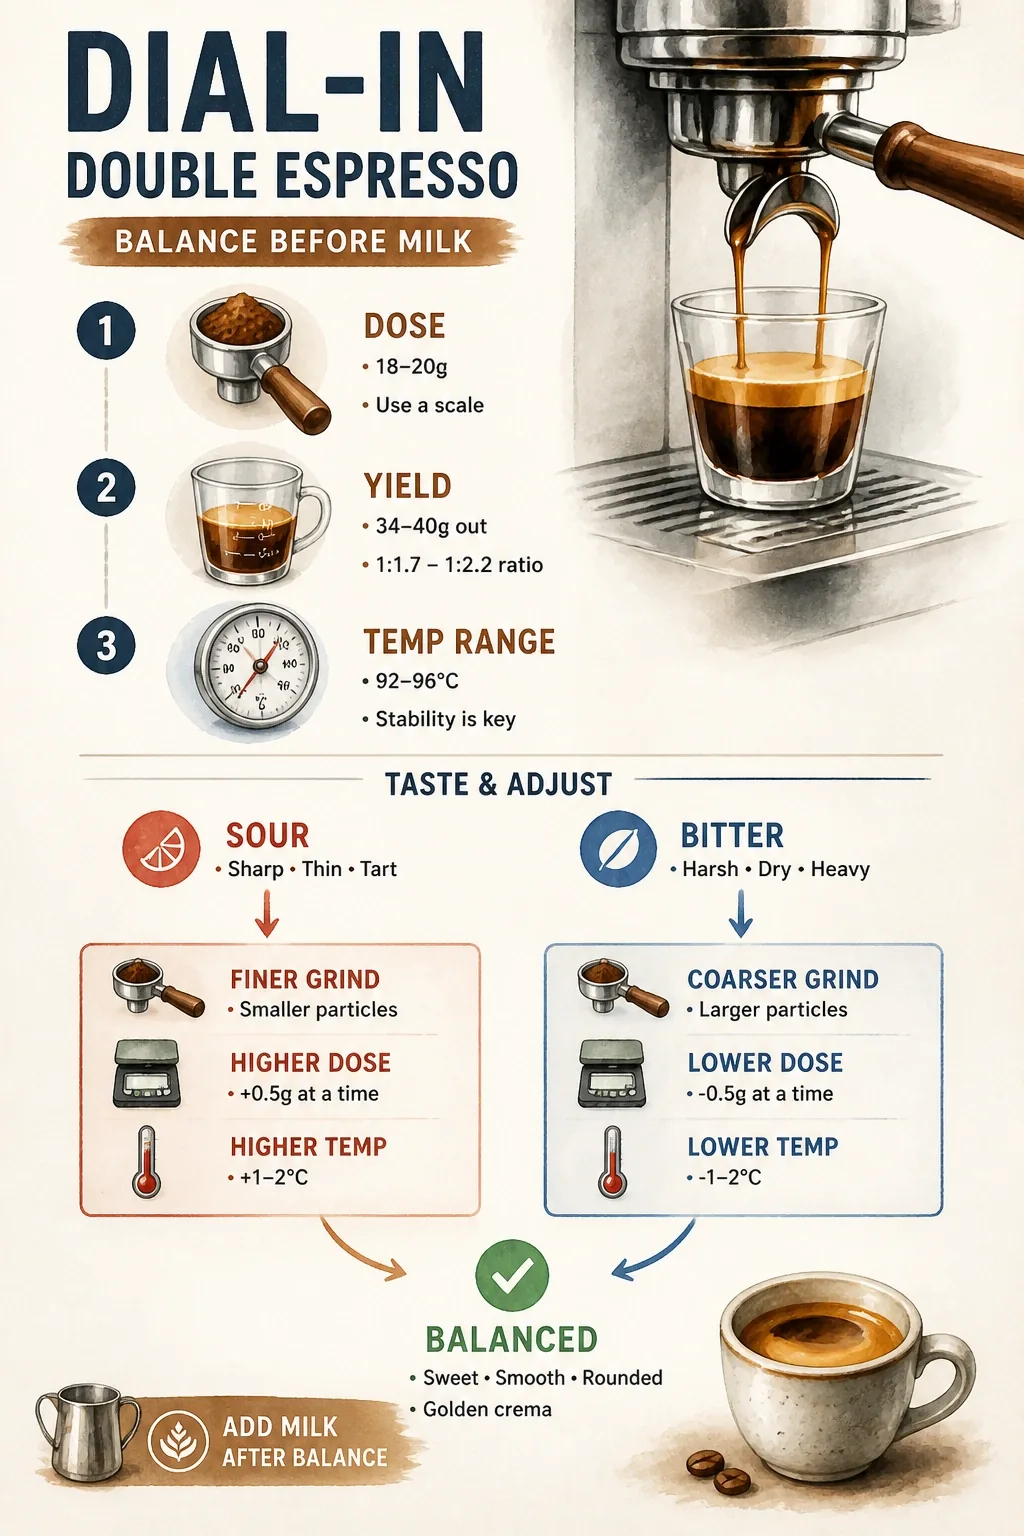
Start with 18 g of freshly ground coffee dialed for a double shot yield of approximately 2 oz. Grind immediately before brewing; oxidation starts the moment the bean is cracked open, and a cortado’s 1:1 ratio gives bad extraction nowhere to hide. Distribute the grounds evenly in the portafilter basket, then tamp with consistent, level pressure. An uneven tamp creates channels where water bypasses the coffee bed, producing sour streaks in an otherwise balanced shot.
Brew with filtered water at 195–205°F and a TDS of 75–175 ppm. Mineral-deficient water under-extracts; overly hard water over-extracts and leaves a flat, chalky cup. Pull your double shot – or a ristretto (a shorter, more concentrated pull) if you want a slightly sweeter, denser espresso base for the variation in Step 5.
Taste Before You Add Milk
This step most home guides skip: taste the shot alone before steaming milk. Sour usually means under-extracted – adjust grind finer, raise water temperature slightly, or extend brew time. Bitter means over-extracted – go coarser, or drop temperature a degree or two. Aim for a balanced shot with sweetness, body, and brightness before milk ever enters the picture, because milk will cut intensity but it won’t fix the underlying extraction problem.
The Dry Glass Rule
Here’s the practitioner detail that separates a proper cortado from a diluted approximation: pull the shot into a dry glass with no water pre-added. A cortado is espresso plus steamed milk, full stop. Adding water to the cup first – a workaround sometimes used in high-volume café settings – produces a diluted, non-traditional drink that loses the very intensity the 1:1 ratio is designed to preserve.
Step 2: Steam or Froth Milk to Silky Microfoam, Not Dry Foam
The difference between a cortado and a poorly executed cappuccino often lives entirely in the milk. Texture is the variable most people underestimate.
Choose Your Milk
Start with cold, fresh whole milk – the fat content gives it the body to stretch into smooth microfoam without collapsing. If you’re going dairy-free, use a barista oat milk specifically formulated to stretch and roll under steam; standard oat milk foams inconsistently and can turn watery.
Fill the pitcher to just below the spout. Too much milk leaves no room for the steam wand to create circulation; too little and the milk heats unevenly.
Steam or Froth Without a Machine
If you have a steam wand, position the tip just below the milk’s surface and introduce a small amount of air in the first few seconds, then submerge slightly to create a rolling vortex. Target 60–65°C (140–149°F). At this temperature, the milk sugars are fully active and the texture is silky without turning grainy.
No steamer? Three reliable alternatives:
- Microwave method: Heat milk for 20–30 seconds until it reaches roughly 65°C, then froth with a handheld frother.
- Stovetop method: Warm milk in a small saucepan over medium-low heat for 2–3 minutes to 65°C, stirring gently, then froth.
- Jar method: Fill a jar one-quarter full of milk, microwave 20–30 seconds, seal the lid, and shake vigorously until foamy. The result is coarser than steam wand microfoam but functional for a home cortado.
In all cases, stop before you hit stiff peaks. Dry, airy foam is the enemy – it sits on top of the espresso instead of integrating with it, and it pushes the texture into cappuccino territory.
The Texture Standard
A cortado’s milk should look like wet paint – smooth, glossy, and pourable. The surface is flat, not domed. There’s no foam collar, no dry cap. Traditional cortados in Spain were sometimes served with no froth at all; modern specialty versions typically expect a thin microfoam layer or skin. Either is correct. What’s never correct is a thick, stiff foam layer that you’d spoon rather than pour.
If you want a visual reference for the steaming technique, this breakdown by two-time Latte Art World Champion Lance Hedrick covers the core mechanics of creating the kind of microfoam a cortado actually needs:
Step 3: Assemble 1:1 and Pour for a Floating Crema
Assembly is where the ratio becomes real. This is also where most volume-based estimates drift – which is why a scale matters more here than most people expect.
The Precision Build
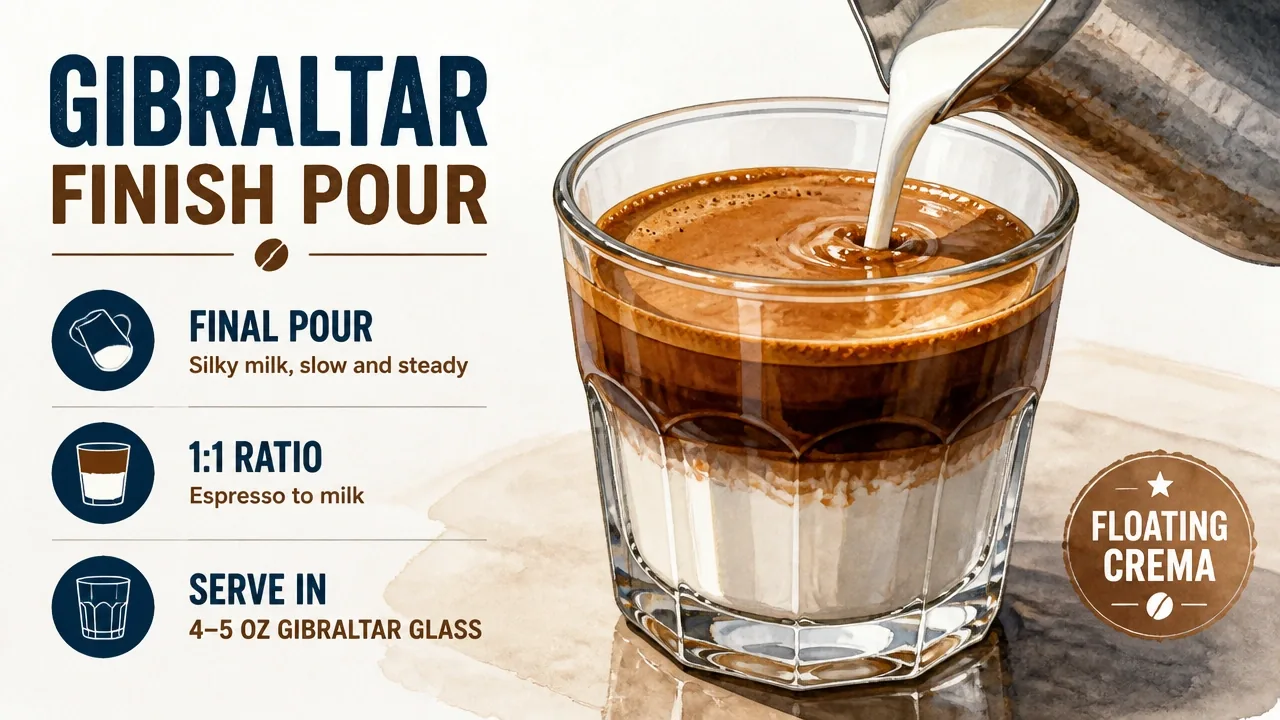
Pour the double espresso first into your dry 4–5 oz glass. Then add the steamed milk slowly, pouring through the crema rather than on top of it. Pouring through the crema allows it to float back to the surface as a thin, golden layer – the visual cue that the drink was built correctly. A standard latte-style pour also works if you’re not chasing latte art; the goal is integration, not decoration.
For precision, use a scale: 22 g of espresso yield plus 22 g of steamed milk hits the 1:1 ratio by weight rather than eyeballing volume. Volume-based pours drift because milk density changes with temperature and foam content. Weight keeps you honest.
Glass Size Is Not Optional
Serve in a 4–5 oz Gibraltar glass, piccolo glass, or demi cup. This is not an aesthetic preference – it’s structural. A large mug forces you to either dump more espresso to fill the visual space or accept a drink that’s swimming in milk. Neither produces a cortado. The small vessel keeps the ratio honest and the drink concentrated.
What Success Looks Like
A properly assembled cortado is balanced: the espresso’s intensity is present but not aggressive, the milk is silky and warm, the surface is flat with a thin crema layer, and the total volume fits comfortably in the palm of your hand. Serve immediately. Crema begins to dissipate within minutes, and the milk-espresso integration is at its best in the first 60–90 seconds after pouring.
Step 4: Adapt Without a Machine – Moka, AeroPress, Nespresso, and Café Constraints
Not everyone has a home espresso machine. The cortado’s 1:1 structure is method-agnostic – what matters is that the espresso component is concentrated, not diluted.
Manual and Capsule Brewing Methods
A moka pot brews at lower pressure than an espresso machine but produces a strong, concentrated coffee that works as the espresso base in a cortado. Use a fine-medium grind, pack the basket without tamping hard, and brew on medium heat. The yield from a 2-cup moka pot is roughly equivalent to a double shot in concentration.
An AeroPress with a Prismo attachment gets you closer to espresso-style pressure and produces a clean, dense concentrate. Use 18–20 g of coffee with 40–50 ml of water, steep briefly, and press firmly. A standard AeroPress without the Prismo can also work using the inverted method with a fine grind and short brew time.
A French press is the weakest substitute – it lacks the pressure to extract the oils and body that give espresso its character – but a very strong, fine-ground steep (4 minutes, then pressed immediately) produces a usable concentrate in a pinch.
For Nespresso or capsule machines, use an espresso-sized capsule setting (not lungo) to pull a concentrated shot into a small cup, then maintain the 1:1 milk structure. The crema will be lighter and the texture slightly different, but the ratio and serving size keep the drink honest. For instant espresso, dissolve the powder in the minimum amount of hot water necessary – typically 20–30 ml – to create a concentrate, then treat it identically to a pulled shot. One recipe circulating online calls for 400 ml of espresso and 40 ml of steamed milk for a cortado – that’s not a cortado, it’s a mug of coffee with a splash of milk. Ignore it.
Retail Ordering Policy Limits
Ordering a cortado at a café or drive-thru introduces constraints that are outside your control. A real cortado is short, equal-milk, no water, and no extra syrup. At a well-trained specialty café, you’ll get exactly that.
At a chain or drive-thru, the reality is messier. A Starbucks cortado is only close to the real thing if it’s built short and equal-milk – but menu sizing, default syrups, and policy-driven liquid additions can push it into flat white territory. If you’re ordering at a location where the menu item is larger than 4–5 oz or where policy requires added liquid in the cup, minimize the added liquid and adjust your expectations. You’re getting a milkier cousin of a cortado, not the drink itself. That’s not a failure of your order – it’s a constraint of the build environment.
Step 5: Signature Variation – Creamy Brown Sugar Oat Milk Cortado
The traditional cortado is a fixed structure. This variation works within that structure and adds a layer of flavor without dismantling the ratio logic underneath.
The Recipe
- 2 shots ristretto (shorter pull, denser, slightly sweeter than a standard double)
- 10 ml homemade brown sugar syrup (equal parts brown sugar and hot water, stirred until dissolved)
- 60 ml barista oat milk, steamed to 55–60°C
Pull the ristretto into a dry glass. Add the brown sugar syrup directly to the hot espresso and stir briefly to integrate – this prevents the syrup from pooling at the bottom. Steam the barista oat milk to microfoam at 55–60°C, slightly cooler than standard to preserve the oat milk’s natural sweetness and prevent it from turning flat. Pour slowly over the espresso to integrate, keeping the texture creamy and the surface smooth.
Flavor and Intent
The brown sugar syrup adds a caramel-adjacent sweetness that complements light and medium roasts without competing with their origin character. Barista oat milk stretches better than standard oat milk and contributes a subtle nuttiness that works with the espresso’s body. The ristretto base keeps the coffee intensity high enough that the drink still reads as espresso-forward – which is the whole point.
Don’t over-sweeten. Ten milliliters of syrup is the ceiling, not the floor. Add less if your roast is already sweet, more only if you’re working with a particularly sharp or acidic bean. And be clear with yourself about what this is: a modern specialty variation, not a traditional cortado. Both are legitimate. They’re just different conversations.
Troubleshooting: Fix Sour, Bitter, Scorched, Foamy, or Wrong-Sized Cortados
When a cortado goes wrong, it goes wrong in specific, diagnosable ways. Here’s the systematic read.
Failure Point Diagnosis
Sour espresso means under-extraction. The grind is too coarse, the water temperature is too low, or the brew time is too short. Fix: grind finer, raise temperature toward 205°F, or extend the pull by a few seconds.
Bitter espresso means over-extraction. The grind is too fine, the water is too hot, or the shot ran too long. Fix: go coarser, drop temperature toward 195°F, or shorten the pull.
Scorched milk means you pushed past 65°C. The science behind this is well-documented: an LSU dissertation on milk foam characteristics found that whey proteins begin to denature at 65°C and are almost completely broken down by 90°C – and that heating milk to 75°C or above causes β-lactoglobulin to release sulfur-containing compounds, producing the cooked, slightly burnt notes that ruin a cortado’s milk. Once you’ve scorched it, there’s no fixing it. Dump it, start with cold milk, and target 60–65°C.
Over-foamed milk means too much air was introduced during steaming. The result is a stiff, dry foam that sits on top of the espresso rather than integrating with it. Fix: introduce less air in the initial phase, keep the wand slightly deeper, and tap the pitcher on the counter after steaming to collapse large bubbles, then swirl to smooth the texture before pouring.
Wrong ratio usually means you eyeballed the milk volume and poured too much. Return to the scale: 22 g espresso yield, 22 g steamed milk. If the numbers are right but the drink tastes milky, check whether your espresso yield is actually 2 oz or whether a long pull diluted it.
Wrong glass is underrated as a failure point. If you pull a proper double shot into a large mug, the visual emptiness tempts you to add more milk to fill the space. That’s how a cortado becomes a latte. Use the right vessel – 4–5 oz – and the ratio enforces itself.
Authentic Drink Standards
A true cortado is 1:1 espresso to steamed milk, 4–5 oz total, silky microfoam, no water, no added syrup unless you’re deliberately making a variation like the one in Step 5. A flat white is larger (typically 5–6 oz with more milk) and produces a milder, milkier cup. They’re related but not interchangeable.
For the final diagnostic, don’t rely on crema alone. Crema fades – how fast depends on roast date, freshness, and the specific bean. A shot from a bean roasted three weeks ago may show thin crema within 15 seconds of pulling; that doesn’t mean the shot is dead. Taste and texture are better diagnostics than crema persistence. If the cup is balanced, the milk is silky, and the espresso comes through clearly beneath the milk’s sweetness, you’ve made a cortado. Serve it immediately, keep the milk on the cooler side of the target range, and resist the urge to pile foam on top.
Frequently Asked Questions About Making a Cortado
Does a cortado have 1 or 2 shots of espresso?
A cortado uses a double shot – roughly 2 oz. A single shot doesn’t have the volume or body to hold a 1:1 ratio in a meaningful way.
What are the exact proportions for a cortado?
It’s 1:1 espresso to steamed milk by weight – typically 22 g of espresso yield to 22 g of steamed milk – served in a 4–5 oz glass for a total of around 4 oz.
Is a cortado basically a flat white?
No. A flat white is larger (usually 5–6 oz) with more milk, which produces a noticeably milder, milkier cup. A cortado is smaller and more espresso-forward; the milk accents the shot rather than softening it significantly.
Is a Starbucks cortado a real cortado?
Only if it’s built short and equal-milk with no added water or syrup. If the menu version is larger than 5 oz or includes default additions, it’s closer to a milky espresso drink than a traditional cortado.
Can I make a cortado without an espresso machine?
Yes. A moka pot, AeroPress with Prismo, or strong French press concentrate all work as the espresso base – just keep the finished drink undiluted and maintain the 1:1 milk ratio.
Why does my cortado taste sour even though I used good beans?
Sourness points to under-extraction: grind finer, raise your brew temperature toward 205°F, or extend the pull slightly. The beans aren’t the problem – the extraction variables are.
How long do I have before a cortado goes flat?
Serve it within 60–90 seconds of assembly. Crema fades quickly, and the milk-espresso integration is at its best immediately after pouring. Don’t let it sit.
What’s the difference between a cortado and a ristretto?
A ristretto is a shorter, more concentrated espresso pull – it’s an ingredient, not a finished drink. A cortado is the assembled drink built on top of a double shot or ristretto, with equal-volume steamed milk added.
References
- Misunderstood Coffee Drinks: The Cortado | baristamagazine.com
- The effects of composition and processing of milk on foam characteristics as measured by steam frothing | doi.org