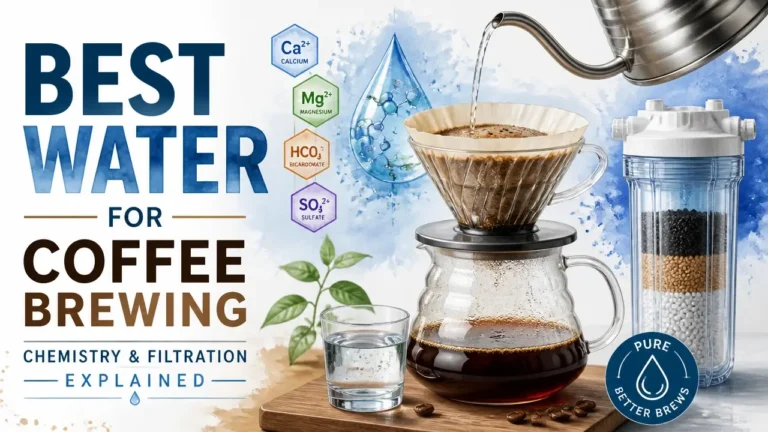

Water chemistry isn’t a footnote in your brew recipe, it’s the recipe. The minerals dissolved in your cup determine whether extraction pulls sweet and balanced or tips into bitter, flat, or sour. TDS, General Hardness, and Alkalinity aren’t lab concepts; they’re the invisible levers behind every flavor decision you make.
Get the water wrong and no grinder upgrade saves you. Get it right (through filtration, remineralization, or a dialed GH:KH ratio) and consistency stops being luck.
The Chemistry of Coffee Water
“Clean” water is the floor, not the ceiling. What actually separates good brewing water from great brewing water is a specific set of measurable chemistry parameters, and your tap water, bottled water, or filtered water either hits those numbers or it doesn’t.
Think of water as a solvent that has a job to do. Its job is to pull the right compounds out of ground coffee (the acids, sugars, and aromatic oils that make a cup worth drinking) while leaving the bitter, astringent ones behind, whether it does that job well or poorly depends almost entirely on what’s dissolved in it before it ever touches the coffee.
That’s where water chemistry parameters come in.
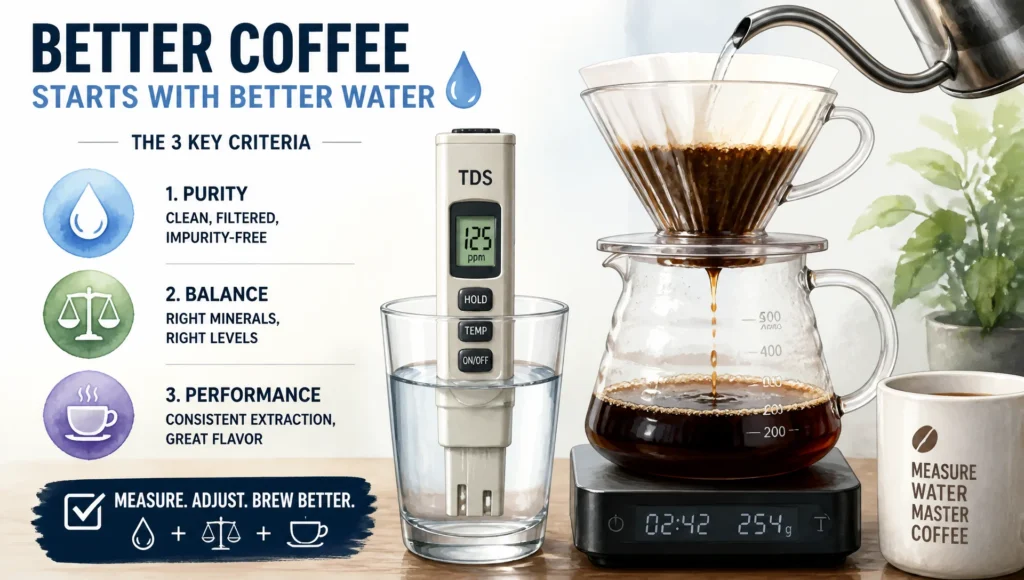
There are four numbers worth knowing:
- TDS (Total Dissolved Solids): The total weight of everything dissolved in your water, measured in parts per million (ppm). Too low and the water is so hungry it over-extracts, pulling harsh compounds alongside the good ones. Too high and it’s already so full it can’t do its job: extraction goes flat and thin.
- General Hardness (GH): Primarily calcium and magnesium ion concentration. These two minerals are your extraction workhorses. Magnesium in particular has a strong chemical affinity for the aromatic compounds in coffee: it actively seeks them out. Calcium contributes body and structure. Without enough of either, the water lacks the chemical grip to pull flavor cleanly.
- Alkalinity (KH): The water’s buffering capacity (its ability to resist changes in pH during extraction). This is the one most people skip over, and it’s a mistake. KH acts like a shock absorber. Too low, and the natural acids in coffee send pH swinging wildly, producing sharp, unpleasant sourness. Too high, and those acids get neutralized before they can contribute brightness and complexity, leaving the cup flat and chalky.
- pH: The resulting acid-base balance after everything else interacts. It’s partly an outcome of KH, not an independent lever, but it still matters as a checkpoint.
The Specialty Coffee Association has published specific targets for each of these:
“The Specialty Coffee Association (SCA) suggests brewing with clean, odor‑free water with 75–150 ppm total dissolved solids (TDS). The organization also recommends water with: Zero chlorine – Calcium hardness between 50–175 ppm – Alkalinity between 40–75 ppm – A pH between 6.5 and 7.5.”
Notice that the SCA guideline gives ranges, not single targets. That’s intentional. Different coffees (different roast levels, origins, and processing methods) respond differently within those windows. A light Ethiopian natural might shine at the higher end of the TDS range where extraction is more aggressive. A delicate washed Kenyan might need softer water to keep its acidity clean and precise. The parameters are a framework, not a formula.
What they collectively tell you is this: coffee brewing water is a chemistry problem, not a cleanliness problem. A water can be perfectly safe to drink and still be a poor extraction medium, either because it’s too soft to carry flavor, too hard to allow it, or too alkaline to let acidity express itself.
Once you have that mental model, every water source you’ll encounter (tap, bottled, filtered, remineralized) can be evaluated against the same objective yardstick. The question stops being “is this water good?” and starts being “where does this water sit relative to the SCA window, and what do I need to do about it?”
Bottled Water’s Real Cost-Benefit
Bottled water is the most straightforward option in coffee brewing, you open it, you pour it, and you’re done. No filters to install, no chemistry to learn. But “bottled water” covers everything from mineral-perfect spring sources to glorified tap water in plastic, and that gap matters more than the label admits.
The appeal is real. According to the Specialty Coffee Association’s 2024 National Coffee Data Trends report, roughly 55% of specialty coffee brewers already use bottled or jug-distilled water instead of straight municipal tap. That’s not a niche habit, it’s the majority of people who care about their cup. The problem is that most of them are picking bottles by brand recognition, not by what’s actually inside.
What the TDS Label Actually Tells You
Total dissolved solids (the TDS number) is the single most useful thing printed on a water bottle, and most people walk right past it. It tells you the combined weight of all minerals dissolved in the water, measured in milligrams per liter (mg/L) or parts per million (ppm). For coffee brewing, you want that number sitting somewhere between 75 and 250 ppm. Below that, the water is too empty to carry flavor compounds out of the grounds efficiently. Above it, the minerals start competing with extraction and you end up with flat, chalky, or bitter results.
The catch is that TDS alone doesn’t tell you *which* minerals are in the water. A 150 ppm reading built mostly on magnesium pulls sweetness and acidity out of a light roast beautifully. The same 150 ppm reading built on sodium sulfates does the opposite. So TDS is your first filter, but it’s not the whole picture.
Why Evian Works and Most Spring Water Doesn’t
Evian sits around 357 ppm (technically above the ideal ceiling) but its mineral profile is dominated by calcium and magnesium bicarbonates, which buffer extraction without introducing harsh off-notes. It works better than its TDS suggests because the *type* of mineral matters as much as the quantity. Volvic, by contrast, comes in around 130 ppm with a gentler mineral presence, which makes it a cleaner slate that plays well across a wider range of roast profiles.
This is where the spring water fallacy trips people up. “Spring water” on a label is a sourcing claim, not a quality guarantee. It means the water came from a protected underground source: it says nothing about mineral content, TDS, or whether those minerals are the right ones for coffee. Some spring waters are excellent. Some are worse for brewing than decent tap water. The only way to know is to look at the mineral breakdown, which reputable brands print on the bottle or their website.
The Hidden Cost That Compounds Fast
Here’s where convenience hits its ceiling. Using premium bottled spring water adds roughly $0.20 or more per 300 ml cup compared to brewing straight from the tap. That sounds trivial until you do the math across a household that brews two or three times a day. The financial cost is manageable for some people (the environmental cost is harder to rationalize). Single-use plastic bottles at brewing volume add up to a meaningful waste footprint, and that friction is worth naming honestly.
Bottled water is a completely legitimate answer to the coffee brewing water problem, but it’s an answer with a ceiling. It works best as a permanent solution for light, occasional brewers, or as a temporary fix while you figure out what your tap water actually needs. If you’re brewing daily at any volume, the cost and waste math eventually pushes you toward something you can run from your own kitchen.
Activated Carbon Filtration: The Low-Friction Tap Upgrade
Activated carbon filtration is the simplest way to close the gap between raw tap water and coffee-ready brewing water: it strips the chemical interference without touching the mineral foundation your extraction depends on. Most tap water already carries a workable mineral profile. The problem is what rides along with it: chlorine, chloramines, sediment, and organic compounds that flatten aroma and muddy flavor before the water even hits your grounds.
This is where a Brita pitcher or an under-sink carbon block earns its place. The Specialty Coffee Association explains the mechanism plainly:
“BRITA uses foodsafe activated carbon made from coconut shells which reduces the organic substances in water that have an unpleasant odor, like chlorine, which is often added to tap water to disinfect it.”
Coconut-shell carbon is porous at a microscopic level (think of it as a sponge with millions of tiny rooms). Chlorine molecules and organic compounds get trapped in those rooms as water passes through. What comes out the other side is the same water, chemically speaking, minus the offenders. Your magnesium, calcium, and bicarbonate levels (the minerals that actually drive extraction) stay put.
That’s the key distinction most people miss. A carbon filter isn’t trying to rebuild your water. It’s trying to stop your municipal water treatment from sabotaging your cup.
For a wide band of tap water across the U.S. and Europe, that’s genuinely enough. If your local municipal water sits somewhere in the SCA’s target range (roughly 75–150 mg/L total dissolved solids, moderate hardness, alkalinity in the 40–70 mg/L neighborhood) then chlorine removal is the only real obstacle between your faucet and a clean, well-extracted brew. A pitcher filter handles that in about 15 minutes with zero setup.
The limitation isn’t the technology. It’s the starting point.
Activated carbon filtration has no mechanism for reducing hardness. If your tap water is genuinely hard (say, 300+ mg/L of calcium carbonate) the filter passes all of that mineral load straight through. You’ll still get scale buildup in your kettle, and you’ll still get the flat, chalky extraction that hard water produces by competing with your coffee’s soluble compounds. Soft tap water presents the opposite problem: carbon filtration preserves whatever low mineral content is there, which may not be enough to pull a full extraction.
Tap water variability adds another wrinkle. Municipal water composition shifts seasonally: utilities adjust treatment chemistry based on source water changes, which means the water coming out of your tap in February isn’t necessarily the same water you had in August. A carbon filter tracks those changes faithfully because it doesn’t correct them. If the mineral profile drifts, your coffee drifts with it.
So the honest answer to the reader question is: yes, for many people, a pitcher filter is enough, and it’s the right place to start. But “enough” depends entirely on what your tap water looks like before it hits the filter. If you don’t know your local water chemistry, your municipal utility is required to publish an annual water quality report. Pull that number first. If your total dissolved solids and hardness land in a reasonable range, a carbon filter is your lowest-friction, lowest-cost path to consistently better coffee brewing water. If those numbers are way off in either direction, you’re going to need a different tool, which is exactly where reverse osmosis and remineralization come in.
Beyond chlorine removal, fine-tuning your water for drip coffee ensures that extraction yields clarity rather than astringency.
Reverse Osmosis Water: The Blank Canvas
Reverse osmosis water gives you the most consistent starting point in coffee brewing water, because it removes everything. Minerals, chlorine, sediment, whatever your municipality decided to put in the pipes this week: gone. You’re not filtering your tap water. You’re erasing it.
The mechanism is straightforward. An RO system forces water through a semi-permeable membrane under pressure. That membrane’s pores are small enough to block dissolved ions (calcium, magnesium, sodium, bicarbonates) while letting water molecules pass through. What comes out the other side is water with near-zero TDS. What gets flushed down the drain is a concentrated stream of everything the membrane caught, which is the wastewater trade-off that catches people off guard. Most home RO systems discharge two to four gallons of wastewater for every gallon of filtered water produced. That ratio has improved with newer systems, but it’s a real cost to factor in.
Distilled water gets you to the same destination through a different route: boiling water into steam and recondensing it, leaving dissolved solids behind. The result is chemically identical to RO water for brewing purposes: zero TDS, zero mineral content, a blank slate.
The ZeroWater pitcher is the countertop version of this idea. It uses a five-stage ion exchange filter to strip TDS down to zero without a membrane or a plumbing connection. Convenient, but the replacement filters add up fast, and the ion exchange resin gets exhausted quicker in hard-water households.
All three methods land in the same place. As the Specialty Coffee Association puts it:
“Reverse osmosis removes all unwanted components from the water.”
That’s the upside. The downside is that “all unwanted components” and “all components” are the same list at zero TDS.
Here’s where the blank canvas stops being an advantage on its own. Minerals aren’t contaminants in coffee brewing water: they’re the extraction mechanism. Magnesium pulls flavor compounds from the grounds. Calcium contributes body. Bicarbonates buffer the acidity of the brew. Strip all of that out, and you’re left with water that technically extracts coffee, but does it poorly. The brew tastes flat, thin, and weirdly sharp at the same time. You’ve eliminated every variable, which sounds like precision, but precision requires something to work with.
The real power of RO or distilled water isn’t in drinking it straight from the filter. It’s in using it as the foundation for blending. Cut it with your tap water at a ratio that brings TDS into the SCA target range, or build the mineral profile from scratch with remineralization salts. Either way, you’re now working with a known quantity, and that’s exactly what makes the next step possible.
Remineralization: Packets, Drops, and DIY Recipes
Remineralization is where coffee brewing water stops being a passive ingredient and becomes something you actively design. You’ve stripped your water down to a blank slate: now you’re putting back exactly what extraction needs, in exactly the right proportions. The two paths here are commercial solutions (packets and drops) and DIY mineral recipes, and they suit very different kinds of people.
Commercial Packets and Liquid Drops
Commercial remineralization solutions are the fastest way to get precision water without owning a scale or memorizing chemistry. The most widely known is Third Wave Water (TWW), a single-use packet you drop into a gallon of distilled or RO water. It dissolves in about 30 seconds and hits a target mineral profile calibrated specifically for coffee extraction.
The practical difference between packets and liquid drops comes down to flexibility. Packets are fixed-dose: one packet, one gallon, done. That’s a feature if you want zero guesswork, and a limitation if you want to dial in something specific. Liquid drops let you do dose titration: you add a little, test, add a little more. That’s useful when you’re working with partially filtered tap water that already has some mineral content, or when you want to experiment with softer or harder profiles across different roasts.
A few honest caveats here. Single-use plastic waste adds up fast if you’re brewing daily (that’s worth factoring in). And shelf life matters: mineral packets can clump or degrade if stored in a humid environment, so keep them sealed and dry. Neither of these is a dealbreaker, but they’re real costs that the packaging won’t mention.
For most people who want consistently excellent water without a chemistry project, commercial solutions are the right call. You get a known GH:KH ratio out of the box, no measuring errors, and a profile that’s been tested against actual coffee. The tradeoff is cost per gallon and the ceiling on customization.
DIY Remineralization: Recipes, Measurement, and Balance
DIY remineralization protocols give you full control over every variable (which is exactly what makes them powerful and exactly what makes them easy to get wrong). The basic toolkit is three compounds: calcium chloride (adds hardness, contributes to body and extraction yield), Epsom salt (magnesium sulfate: enhances brightness and acidity perception), and potassium bicarbonate (raises alkalinity and acts as a buffer against acidity). Each one pulls a different lever in the cup.
The most referenced starting point in the specialty coffee community is the RPavlis water recipe (a minimalist approach that uses just potassium bicarbonate and a small amount of magnesium sulfate, keeping the mineral count low and the buffer controlled). It’s not the only recipe, but it’s a clean baseline that’s easy to adjust from.
Here’s where the GH:KH ratio becomes the actual thing you’re managing. GH (general hardness) is your magnesium and calcium content (the minerals that drive extraction). KH (carbonate hardness) is your alkalinity (the buffer that prevents the brew from turning sharp or sour). Too much KH and you’re muting acidity and sweetness. Too little and your water can’t stabilize pH during extraction. A common target is a GH around 50–150 ppm and a KH around 40–75 ppm, but the right balance shifts depending on whether you’re pulling light, bright naturals or deep, chocolatey washed coffees.
A precision scale (one that reads to 0.01g) is non-negotiable here. These compounds are potent at low doses. The difference between 0.3g and 0.5g of calcium chloride in a liter of water isn’t a rounding error; it’s a measurably different mineral profile. A TDS meter is your verification tool: mix your batch, measure, and compare against your target. TDS alone won’t tell you the GH:KH split (you’d need a proper water test kit for that), but it confirms you’re in the right ballpark and catches mixing mistakes before they hit your brewer.
The video below walks through the physical process (wehing compounds, mixing concentrates, and diluting to final volume) which is genuinely easier to follow in motion than on a page.
Choosing the Right Water Method for You
The right coffee brewing water method isn’t the one with the best chemistry on paper: it’s the one you’ll actually maintain consistently, given your tap, your roast, and how much you want to think about water on a Tuesday morning. Every method we’ve covered works. The question is which one fits your life well enough that you don’t abandon it in three weeks.
The answer starts with three questions. What does your tap water actually do? How much effort are you willing to spend? And what kind of coffee are you brewing?
Once you have settled on a dependable filtration routine, you can reliably find your perfect recipe without second-guessing your fluid foundation.
Decision Framework: Water Source, Roast, and Effort
Start with your tap water. It’s the foundation every other decision branches from.
If your tap is in the SCA target range (TDS between 75–150 ppm, moderate hardness, no chlorine taste) a simple activated carbon filter like a Brita or a basic inline carbon block is probably all you need. You’re already close. You’re just cleaning up the rough edges.
If your tap is moderately hard (TDS 150–300 ppm, noticeable scale buildup on your kettle), the hybrid tier is your sweet spot. A BWT filter jug or Peak Water Jug uses ion exchange to selectively reduce hardness while preserving enough mineral content for extraction. You get filtered consistency without stripping the water bare. No remineralization math required. This is the path most home brewers land on and never need to leave.
If your tap is extremely hard (TDS above 300 ppm, heavy scale, chalky taste), or extremely soft (TDS under 50 ppm, flat and thin), a carbon filter alone won’t save you. Hard water needs genuine mineral reduction: either a dedicated ion-exchange filter or a reverse osmosis system with remineralization. Soft water needs minerals added. Either way, you’re in the RO + remineralization tier.
Now layer in roast preference. This matters more than most people expect.
Light roasts are high-acid, delicate, and extraction-sensitive. They perform best in water with lower alkalinity (KH around 40–70 ppm) so the bicarbonate doesn’t neutralize the brightness you paid for. If you brew mostly light roasts, err toward lower alkalinity in your target profile.
Dark roasts are more forgiving. Higher alkalinity (KH up to 100 ppm) actually rounds out the bitterness rather than amplifying it. If you’re pulling espresso from a dark blend every morning, you have more headroom on alkalinity than a light-roast pour-over brewer does.
Finally, be honest about effort tolerance. The RO + remineralization path gives you the most control, but it also means tracking mineral doses, testing TDS, and occasionally recalibrating. If that sounds like a hobby you’d enjoy, go for it. If it sounds like a chore you’ll skip after a month, the hybrid filter tier delivers 80% of the result with 20% of the work.
Here’s the short version:
- Tap in range + minimal effort → Carbon filter. Done.
- Moderately hard tap + some care → BWT or Peak Water Jug. Reliable, low-maintenance.
- Extreme tap (very hard or very soft) + light roast focus → RO + remineralization. Full control.
- No tap access or travel brewing → Bottled water matched to SCA targets (check the label).
Troubleshooting Common Water-Related Taste Faults
| Taste Fault | Most Likely Water-Chemistry Causes | Corrective Actions |
|---|---|---|
| Flat | Low TDS; low GH; low magnesium; under-mineralized water | Adjust mineral doses upward; blend RO with tap; add a balanced remineralizer; increase magnesium specifically |
| Sour | Low KH; low alkalinity; overly soft water | Increase bicarbonate slightly; blend RO with tap; adjust mineral doses, but don’t overcorrect |
| Over-extracted | High TDS; excessive alkalinity; imbalanced GH:KH ratio; extreme pH | Reduce mineral dosing; blend RO with softer water; lower bicarbonate if it’s running high; rebalance GH:KH |
| Metallic | Extreme pH; excessive dissolved minerals; corrosion in plumbing | Correct pH toward neutral (6.5–7.5); reduce mineral load; descale equipment; inspect older pipes (and do not use vinegar as a descaler if you suspect metallic taste, as it can accelerate corrosion in some systems) |
| Chalky | Imbalanced GH:KH; too much calcium relative to magnesium; high alkalinity | Add magnesium to rebalance; reduce alkalinity if elevated; blend RO with tap; descale if scaling is present |
And the last thing: if you change your roast level, revisit your water target. Moving from a medium-dark espresso blend to a light washed Ethiopian isn’t just a grind adjustment: the water that worked beautifully for one may flatten or sharpen the other. The chemistry that suits your coffee is a moving target, not a set-and-forget calibration.
Key Takeaways on Coffee Brewing Water
- Your water’s mineral content, not its cleanliness, drives coffee extraction and flavor balance.
- A TDS number alone is useless without knowing the calcium, magnesium, and bicarbonate split.
- Carbon filters fix chlorine but ignore hardness; test your tap before assuming a pitcher is enough.
- Never brew with pure RO or distilled water; it’s a blank slate that needs minerals added back.
- Switch roasts? Revisit your water’s alkalinity target or risk muting acidity or amplifying bitterness.
Frequently Asked Questions About Coffee Brewing Water
Q: Can I just add a pinch of baking soda to fix sour coffee?
A: Yes, but only a tiny pinch in the water tank, not the cup. Baking soda raises alkalinity, which buffers acidity. Too much neutralizes all brightness, leaving coffee flat and chalky. Measure carefully; a little goes a long way.
Q: Why does my coffee taste different in summer versus winter?
A: Municipal water treatment changes with seasons, altering mineral content and chlorine levels. Your carbon filter can’t correct these shifts, so extraction changes. Test your tap water periodically and adjust your filtration or remineralization to maintain consistency.
Q: Is it safe to descale my coffee maker with vinegar?
A: Vinegar can corrode metal components in some coffee makers, especially older ones, leading to metallic off-flavors. Use a manufacturer-approved descaler instead. If you already taste metal, descale with a proper solution and check your water’s pH.
Q: What’s the real cost difference between Third Wave Water and DIY minerals?
A: Third Wave Water costs about $1 per packet for a gallon, while DIY minerals cost pennies per gallon. But DIY requires a $20+ precision scale and careful measuring. TWW is convenient but generates plastic waste; DIY is cheaper long-term but demands precision.
Q: How do I adjust my water for a light roast versus a dark roast?
A: For light roasts, keep alkalinity low (40-70 ppm KH) to avoid muting acidity. For dark roasts, you can increase KH up to 100 ppm to smooth out bitterness. Adjust your remineralization recipe or blend ratio accordingly.
Q: Can I use my home water softener for coffee brewing?
A: No. Salt-based water softeners replace calcium and magnesium with sodium, which doesn’t aid extraction and can make coffee taste flat or salty. Use an ion-exchange filter designed for coffee, like BWT, that preserves beneficial minerals.
References
- Something in the Water: How Water Chemistry Affects the Taste of Coffee – Barista Magazine
- 2024 National Coffee Data Trends Specialty Coffee Breakout Report – Specialty Coffee Association
- The Quest for Coffee Perfection – Specialty Coffee Association
- Perfectly Mineralized Water – BWT – Specialty Coffee Association