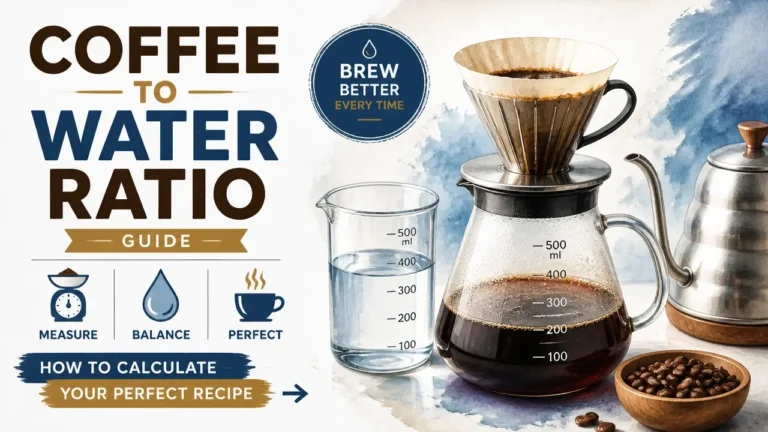

Precise coffee to water ratio calculation is the key factor separating a flat, forgettable cup from one you’d drink twice. Most people blame their grinder or their beans: the culprit is almost always the ratio.
The SCA Gold Cup standard puts the sweet spot between 1:15 and 1:18, but that’s a starting line, not a finish line. French press, cold brew, espresso: each brew method pulls differently, and your palate gets the final vote.
Your Brewing Method and Its Ideal Starting Ratio
Starting ratios for each brew method exist because different brewers extract flavor through completely different physical mechanisms, and the same 1:16 ratio that produces a clean, balanced pour-over would leave your French press tasting thin and watery.
Here’s why that matters. A French press steeps coarse grounds in still water for several minutes. A drip machine pushes hot water through a filter bed in under five. An espresso machine forces pressurized water through a dense puck in about 25 seconds. Each system pulls dissolved solids out of coffee at a different rate and efficiency, so the ratio has to compensate accordingly.
To dial in these starting proportions accurately across different devices, consult a reliable micron ranges and brewing methods reference.
The Specialty Coffee Baseline
The 1:16 ratio (one gram of coffee for every 16 grams of water) is the most widely used starting point in specialty coffee. It sits in the middle of the extraction sweet spot: strong enough to taste like actual coffee, dilute enough that the flavors have room to breathe and separate. If you have no idea where to begin, 1:16 is your launchpad.
That said, even among respected roasters, there’s no single agreed-upon “golden ratio.” Heirloom Coffee Roasters builds its recipes around 1:16. Counter Coffee uses 1:17. Methodical Coffee standardizes at 1:18. All three call their number the broad standard. That honest disagreement isn’t a problem: it’s permission. It means the right ratio is the one that tastes good to you, and 1:16 just happens to be the safest place to start that conversation.
Method-Specific Starting Points
Each brew method below has a starting ratio calibrated to how that brewer actually works, not arbitrary tradition.
| Brew Method | Starting Ratio | Why It Works as a Starting Point |
|---|---|---|
| French press | 1:15 | Slightly stronger ratio suits immersion brewing and helps balance the fuller body and longer steep time. |
| Drip machine | 1:16 | A classic middle-ground ratio for automatic drip that usually produces a balanced, clear cup. |
| Pour-over | 1:16 | Works well for controlled extraction and highlights clarity, acidity, and sweetness. |
| Cold brew concentrate | 1:8 | Strong enough to brew as a concentrate, since it’s typically diluted before drinking. |
| Espresso | 1:2 | Standard espresso brew ratio for a concentrated, intense shot with proper extraction. |
Cold brew looks extreme at 1:8, but remember: you’re not drinking it straight. That concentrate gets diluted with water or milk before it hits your glass, so the final cup ends up closer to a normal strength. Espresso’s 1:2 reflects the opposite logic: pressure-assisted extraction is so efficient that you need far less water to pull a complete, balanced shot.
None of these numbers are laws. They’re the most reliable place to start for each method, calibrated by how each brewer extracts, and your palate gets the final vote.
How to Calculate Your Perfect Coffee Dose
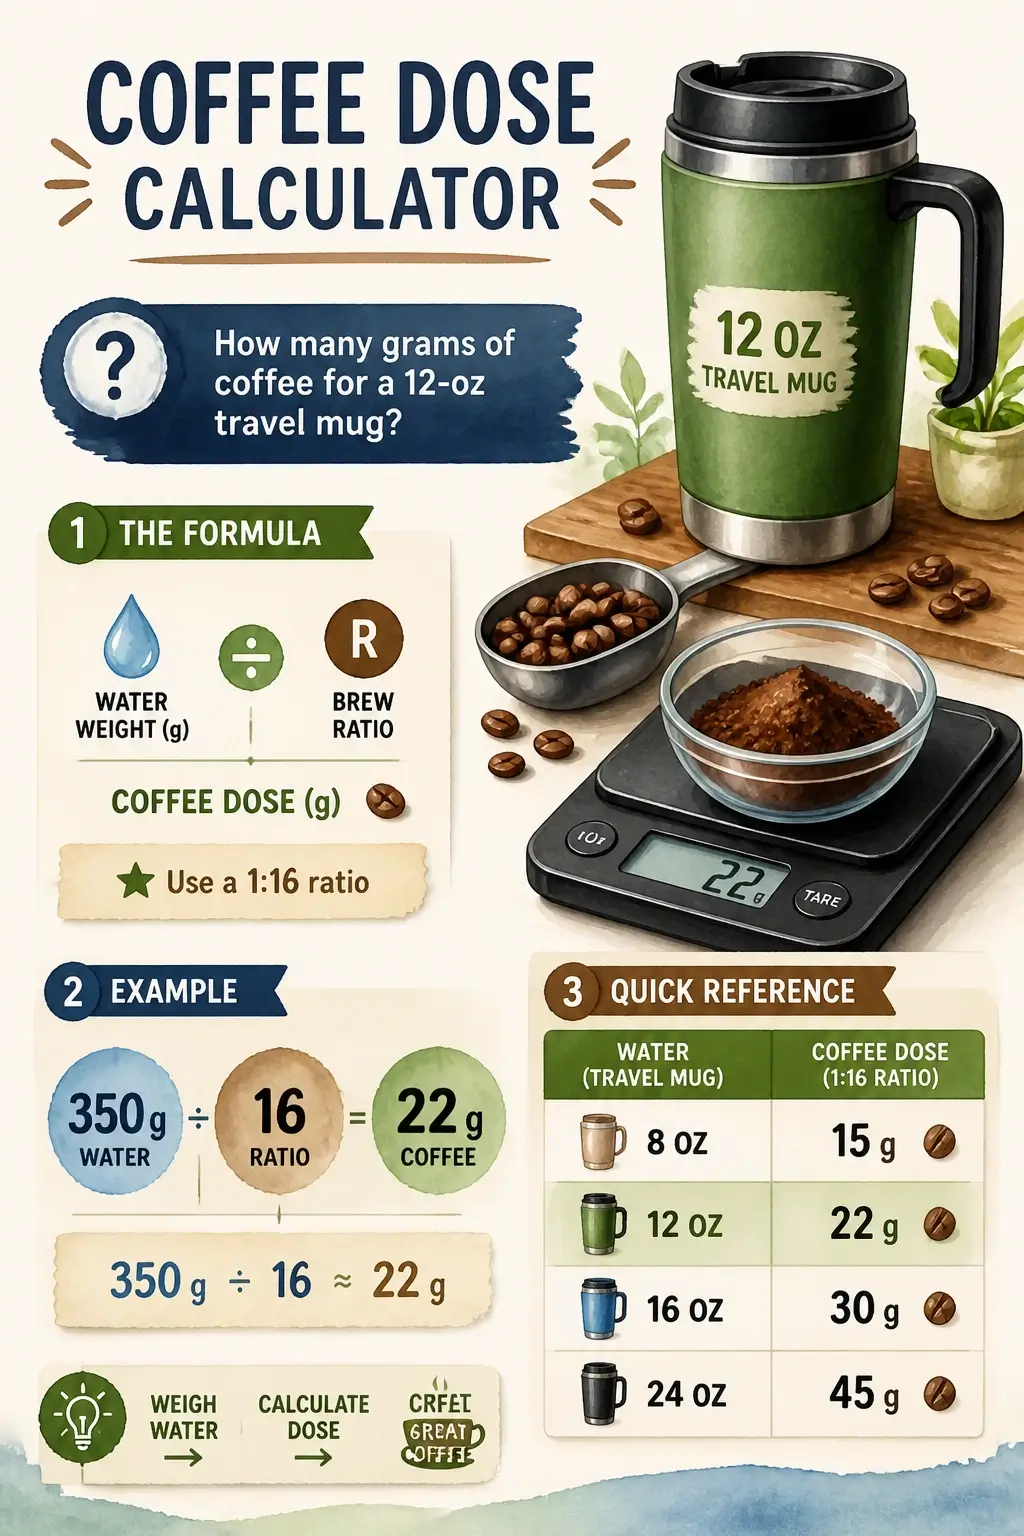
Coffee dose calculation comes down to one simple division: take your target water weight in grams, divide by the ratio number, and you have your exact dose. That’s the whole formula. Everything else is just plugging in your numbers.
Here’s why we work in grams instead of ounces: 1 milliliter of water weighs exactly 1 gram, which means volume and weight are the same thing for water. Your 12-ounce travel mug holds roughly 350 ml of water, so your target water weight is 350 g. No conversion needed.
The Formula, Worked Live
For a 1:16 ratio, the math looks like this:
350 g ÷ 16 = 21.9 g → round to 22 g of coffee
That’s it. You’re not solving for anything exotic. You’re just asking: “If water is 16 parts, what’s 1 part?” Division answers that instantly.
If you’re brewing French press at 1:15, the same 350 g of water gives you:
350 g ÷ 15 = 23.3 g → round to 23 g of coffee
Swap the ratio number, same process. The formula never changes: only the divisor does.
One habit worth building early: always weigh your coffee and water as two separate steps using your scale’s tare function. Zero the scale with your empty brewer on it, add grounds, note the weight, tare again, then add water to your target. This keeps the two measurements clean and prevents the most common measuring mistake: accidentally combining them.
Quick-Reference Table at 1:16
If you’d rather skip the math entirely, use this. These numbers are calculated at a 1:16 baseline, which works well for drip machines and most pour-over brewers.
| Brew Size | Water Weight | Coffee Dose |
|---|---|---|
| Single Cup (~8 oz) | 240 g | 15 g |
| Travel Mug (~12 oz) | 350 g | 22 g |
| Large Mug (~16 oz) | 480 g | 30 g |
| Small Pot (~24 oz) | 720 g | 45 g |
For French press at 1:15, divide each water weight by 15 instead of 16 (you’ll add roughly 1-2 grams to each dose). For cold brew concentrate at 1:8, divide by 8. The table changes; the logic doesn’t.
The infographic below walks the full sequence visually, from water volume, through the formula, to the finished dose, if seeing the steps laid out helps the numbers click faster.
Now that you’ve got your numbers locked in, the next step is the actual weigh-and-brew process, where small slips in technique can still throw off a perfect recipe.
Weigh, Grind, and Brew: The No‑Fail Process
Precise weighing and brewing process turns your coffee to water ratio calculation from a number on paper into a repeatable cup. Most people skip the tare step between grinding and pouring: that one oversight quietly adds grams of error every single morning. Here’s how to do it right, start to finish.
Setting Up Your Scale and Grounds
Place your empty brewer or carafe on the scale and press tare to zero it out. From here, you have two options: weigh your whole beans directly into the grinder basket before grinding, or grind first and pour the grounds into your filter until the scale reads your target coffee weight. Either works: the key is that the scale sees your actual dose, not an estimate.
Grind matters here more than most people expect. A burr grinder gives you even, consistent particle size, which means water moves through the grounds at a predictable rate. Blade grinders chop randomly (some dust, some chunks) and that uneven mix extracts at different speeds simultaneously. If you’re just starting out, a consistent pre-ground from a good roaster is a perfectly reasonable baseline while you build the habit.
Match your grind to your method:
- Medium for drip and pour-over
- Coarse for French press
- Fine for espresso
Water Temperature and the Pour
Once your grounds are in place, tare the scale again: this zeros out the brewer’s weight so you’re measuring water only. Then heat your water to around 200°F. No thermometer? Boil it and let it sit for 30 to 45 seconds. That small wait drops it right into the sweet spot.
Pour slowly and deliberately until the scale hits your target water weight. If your brewer is too bulky to sit on the scale during the pour, measure the water separately in a pitcher on the scale first, then transfer it. Same result.
If your method calls for it (pour-over, French press), start a timer the moment water hits the grounds. Brew length is part of the equation. A French press sitting for 6 minutes instead of 4 will taste completely different at the exact same ratio.
The 2025 World Brewers Cup Champion starts his process before a single gram of coffee is weighed:
“Step One: Place the dripper upon a glass carafe and gram scale. Set your filter in place and pre‑wet and pre‑heat the brewer using 80ml of 205º water. Pre‑heating ‘makes a massive impact on flavor.'”
That pre-heat step matters because a cold brewer pulls heat out of your water the moment it lands: which drops your brew temperature below the target range and slows extraction before it even gets started.
For a visual walkthrough of the full weighing, grinding, and pouring sequence, tare timing, pour speed, grind consistency, this video covers the physical mechanics in real time:
Video: Your Pour‑Over Coffee Road Map
How Roast Level Shifts Your Ratio
There’s one variable that can quietly sabotage an otherwise solid ratio, and it has nothing to do with your technique: roast level.
Dark roasts are physically more porous than light roasts: the extended heat during roasting breaks down the bean’s cellular structure. That means hot water moves through them faster and pulls flavor compounds out more aggressively. At a standard 1:16, a dark roast can easily tip into harsh and over-extracted. Nudging the ratio toward 1:18 gives the water more room and softens that edge.
Light roasts are denser. The cell walls are still largely intact, so extraction is slower and harder. At 1:16, you might get a thin, underwhelming cup that tastes sour or flat (not because your ratio is wrong in principle, but because this bean needs more contact). Try 1:15 to compensate.
Move one part at a time. The difference between 1:16 and 1:17 is subtle but real: jumping straight from 1:16 to 1:14 makes it impossible to know which adjustment actually fixed the problem.
Now brew it, and taste it black. If something’s still off, the next section breaks down exactly what the flavor is telling you, and which number to move.
Taste Your Coffee and Adjust the Ratio
Taste-based ratio adjustment is how a starting number becomes your number, and it starts with one rule: taste the coffee black before you add anything to it.
Milk, cream, and sugar don’t fix a bad ratio. They mask it. You need to know what the coffee actually tastes like on its own so you can diagnose what’s off and move in the right direction.
If it tastes too strong or bitter: your ratio is too concentrated. Keep your coffee dose exactly where it is and increase the water: move from 1:16 to 1:17 or 1:18. You’re diluting the extraction slightly, which pulls the intensity back and smooths out that harsh edge.
If it tastes weak, watery, or sour: you don’t have enough concentration. Either reduce the water (try 1:15 or 1:14) or nudge the coffee dose up by a gram or two. Either way, you’re increasing the ratio of coffee to water.
Here’s the part most people skip: change only one variable at a time. Move the water or the coffee, not both. If you shift two things at once, you won’t know which one fixed it, and you’ll be guessing again next time.
The reason small ratio changes matter more than they seem is that the coffee to water ratio calculation is doing two separate jobs at once. It controls strength (that’s the mouthfeel and intensity you feel in your mouth). And it controls extraction (the balance between sweet, acidic, and bitter compounds pulled out of the grounds). Shifting the ratio even by a point or two moves both dials simultaneously, which is why a single gram of water can flip a cup from flat to balanced.
Brew the adjusted cup. Taste it black again. Repeat until it lands where you want it.
One thing worth knowing before you chase the ratio too hard: sometimes bitterness or sourness isn’t a ratio problem at all. It’s a grind size or water temperature problem, and no amount of ratio tweaking will fix that. The next section covers exactly how to tell the difference.
Troubleshooting Sour or Bitter Coffee
You dialed in your coffee to water ratio calculation, but the cup still tastes off. Here’s the thing: ratio is only one lever in a system of three. Grind size, water temperature, and brew length are all pulling flavor in the same direction, and when any one of them is out of range, they’ll override your ratio entirely.
Think of it this way: your ratio sets how much material is available to extract. But grind size, temperature, and time control how fast and how deeply that extraction actually happens. A perfect 1:16 ratio with a grind that’s too coarse is like having the right amount of tea leaves in a bag you never fully opened.
Sour and Bitter Coffee Causes
Sour coffee is under-extraction: your brew pulled the bright, acidic compounds out of the grounds but didn’t get far enough to pull the sweeter, balancing ones. The usual suspects, in the order you should check them:
- Coarse grind setting — less surface area means slower extraction. This is the most common cause and the easiest to fix first.
- Low water temperature — water below about 195°F doesn’t have the energy to dissolve the compounds that round out a cup. Ideal range is 195–205°F.
- Short brew time — water moved through the grounds too quickly to do its job.
- Ratio too water-heavy — too much water for the coffee dose dilutes the extraction before it completes. (If you’re already at 1:17 or wider, this might be contributing.)
Bitter coffee is over-extraction: the brew kept pulling after the good stuff was gone and started dissolving the harsh, astringent compounds. Check in this order:
Mastering these foundational extraction flaws forms the core of any comprehensive coffee extraction guide designed to elevate your daily brewing accuracy.
- Fine grind setting — more surface area means faster, deeper extraction. The most likely culprit.
- High water temperature — water above 205°F extracts aggressively and scorches delicate compounds.
- Long brew time — the grounds stayed in contact with water longer than needed.
- Ratio too coffee-heavy — too little water concentrates the extraction and amplifies bitterness.
Quick-Fix Path for Ratio Troubleshooting
Effective coffee extraction troubleshooting follows a simple rule: fix the cause, don’t just mask it. Adjusting your ratio to compensate for a grind problem is like turning down the volume instead of fixing the speaker: it gets quieter, but it still sounds wrong.
If it’s sour: try a finer grind first. A half-step finer on your grinder increases surface area and lets the water extract more completely in the same amount of time. If that doesn’t fully resolve it, extend your brew time slightly before touching the ratio again.
If it’s bitter: try a coarser grind first. This slows extraction down and keeps the brew from pulling past the sweet spot. If bitterness persists, shorten the steep before adjusting your ratio.
Here’s where brew length becomes the under-appreciated co-conspirator: even a textbook 1:16 ratio can’t save a cup that brewed in the wrong time window. A pour-over that drains in under 2 minutes is almost certainly sour, because the water moved too fast for full extraction. A French press that steeps for 8 minutes will turn bitter regardless of how precise your ratio was. Pair your ratio with a target brew time and use grind size as the dial that keeps you inside that window:
- French press: 4–5 minutes
- Pour-over: 3–4 minutes
- Drip machine: around 5 minutes
If your pour-over is finishing in 90 seconds, grind finer, not to change flavor directly, but to slow the flow rate so the water spends the right amount of time doing its job. Once you’re inside the target window, your ratio adjustments will actually land the way they’re supposed to.
Keep a quick log as you make changes: even a few lines in your phone’s notes app. Write down what you changed, in which direction, and what it tasted like. When you’re adjusting grind size, brew time, and ratio in the same session without tracking it, you’ll lose the thread fast. One variable at a time, one note per session, and you’ll find your cup faster than you think.
Lock In Your Personal Recipe for Consistent Great Coffee
Thorough coffee recipe documentation is the only thing standing between a cup you loved once and a cup you love every morning. The moment you taste something that works, stop. Before you rinse the brewer, before you move on, write it down. That single habit is what separates people who occasionally make great coffee from people who make it reliably.
Write down everything: coffee weight, water weight, grind size setting, brew time, water temperature, and which brewer you used. All six. Miss one and you’ve got a partial map. The grind size especially tends to vanish from memory: it feels obvious in the moment and becomes completely mysterious three days later.
Where You Store It Doesn’t Matter
A dedicated coffee journal is great if you’re into that. A note in your phone works just as well. A sticky note on the bag of beans is honestly fine too. The format isn’t the point: the point is that the information exists somewhere outside your head, in a place you’ll actually find it tomorrow morning.
How Your Baseline Recipe Evolves
Once you have that baseline recipe locked in, consistency across all your variables is what reproduces the taste. Same grind, same weights, same temperature, same timing, and the cup shows up the same way. When you switch to a new bag of beans, even the same roast from the same roaster, expect a small drift. That’s normal. You’re not starting over, you’re adjusting from a known position, which is a completely different thing.
This is where an experimenter’s mindset pays off. As beans age through a bag, or when you try a new origin, tweak one variable at a time (usually grind size first) and note what changed. If it goes sideways, your baseline recipe is right there waiting. You always have somewhere to return to.
And here’s the thing worth sitting with: no peer-reviewed study has ever defined one ideal coffee-to-water ratio for all drinkers. The Specialty Coffee Association’s Gold Cup standard sits at roughly 1:18, and it’s widely cited as a benchmark, but it’s a recommendation built on aggregated preference data, not proof that your palate should agree with it. Plenty of people find it thin. Plenty find it perfect. The SCA would tell you the same thing.
What you just did (tasting carefully, adjusting deliberately, noting what worked), that is the process the pros use. The coffee to water ratio calculation gave you the framework. Your tongue made the call. Write down what it decided, trust it, and make that cup again tomorrow.
Key Takeaways on Coffee to Water Ratio Calculation
- Your tongue, not a chart, decides the final ratio — start at 1:16 and adjust one variable at a time.
- Roast level silently changes how fast coffee extracts, so dark roasts often need a wider ratio than light roasts.
- Weigh everything in grams: ‘cups’ on brewers are inconsistent and sabotage your math.
- Taste your coffee black before adding anything, or you’ll never diagnose what the ratio actually needs.
- Document your winning recipe immediately — grind size and brew time evaporate from memory within days.
Frequently Asked Questions About Coffee to Water Ratio Calculation
Q: Does the ‘cup’ marking on my coffee maker actually hold 8 ounces of water?
A: Rarely. Most coffee makers define a ‘cup’ as 5-6 ounces, not the standard 8. If you dose by those markings without weighing, you’re brewing at a much lower water volume than expected, which ruins your ratio. Always use grams on a scale, not the carafe lines, to avoid this silent error.
Q: Should I adjust my ratio as my coffee beans get older?
A: Yes, slightly. As beans stale, they off-gas less CO2 and extract faster. If your usual ratio starts tasting hollow or flat, increase your coffee dose by a gram or two, or nudge your grind finer to compensate for the diminished resistance and flavor.
Q: Can my tap water’s hardness throw off my carefully calculated ratio?
A: Absolutely. Hard water with high mineral content over-extracts coffee, making it taste harsh even at a perfect 1:16. Conversely, distilled or overly soft water under-extracts, tasting flat. Your ratio assumes neutral water; if your water is extreme, adjust the grind, not the ratio, first.
Q: What’s the one ratio mistake even careful brewers keep making?
A: Changing both the coffee and water amounts at the same time while troubleshooting. You can’t know which variable fixed the problem. Always move only one factor per brew—either the dose or the water weight—and taste before making the next change. That’s the fastest path to your ideal cup.
Q: Why does my iced coffee taste weak even when I use the same ratio as hot coffee?
A: Ice dilutes the brew as it melts, so your final cup ends up weaker than intended. The fix: brew at a stronger ratio (around 1:12 to 1:14) to account for that dilution, or brew directly over ice using less total water to leave room for the melt.
Q: My brewer’s 2-cup setting says 10 ounces, but my 1:16 math gives a different dose. Which do I trust?
A: Trust the grams. Coffee maker ‘cups’ are a guessing game—some measure 4 ounces, some 6. A 10-ounce setting is actually two 5-ounce ‘cups.’ Weigh the water yourself to guarantee your ratio is accurate, regardless of what the machine claims.
References
- How To Brew Coffee Like The 2025 World Brewers Cup Champion – sprudge.com