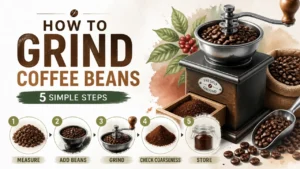
Grinding coffee with Ninja is genuinely possible, but the blade doesn’t crush beans the way a burr grinder does. It shatters them. That one mechanical difference changes everything: the fill level, the timing, the shaking, and what you can realistically brew afterward.
This guide walks through each step in order, explains the physics behind each move, and tells you honestly where the ceiling is. By the end, you’ll know whether your specific Ninja can do this, how to get the best cup it’s capable of producing, and when it makes more sense to stop.
Key Takeaways on Grinding Coffee with Ninja
- Ninja blades shatter beans by impact, not compression, so the realistic output ceiling is a coarse, uneven grind suited for French press and cold brew only.
- Verify your specific model has an Extract or pulse control before loading a single bean; if the manual doesn’t support dry grinding, that’s your answer.
- Fill the jar no more than 1/4 to 1/2 cup of beans; overfilling creates a static mass the blade can’t reach, producing boulders and dust simultaneously.
- The pulse-and-shake cadence (two to three seconds on, shake, repeat) is the only mechanism that re-presents unbroken beans to the blade and separates fines from larger pieces.
- Heat is the invisible flavor killer: stop when the jar wall feels warm, the aroma turns bready, or the grounds feel damp and clumpy.
- Sieving out fines before brewing is the single highest-return step most guides skip; fines extract faster than the rest of the bed and drive bitterness while the bulk of the coffee under-extracts.
Before You Load a Single Bean: Verify What Your Ninja Can Actually Do
The Ninja sitting on your counter may or may not be capable of grinding coffee beans, and the answer depends on your specific unit, not the brand name on the front. Before you drop a single bean in the jar, spend two minutes confirming you have the right tool.
Blade Output Feasibility and Model Verification
Blade output feasibility is the first thing to settle. A Ninja blade will break down whole beans. That part is true. But the mechanism is impact, not compression, so the realistic output ceiling is a coarse, uneven grind. You will not get espresso-quality powder. You will not get the consistency a pour-over demands. What you can get, with the right technique, is a rough-cut grind that works for French press and cold brew.
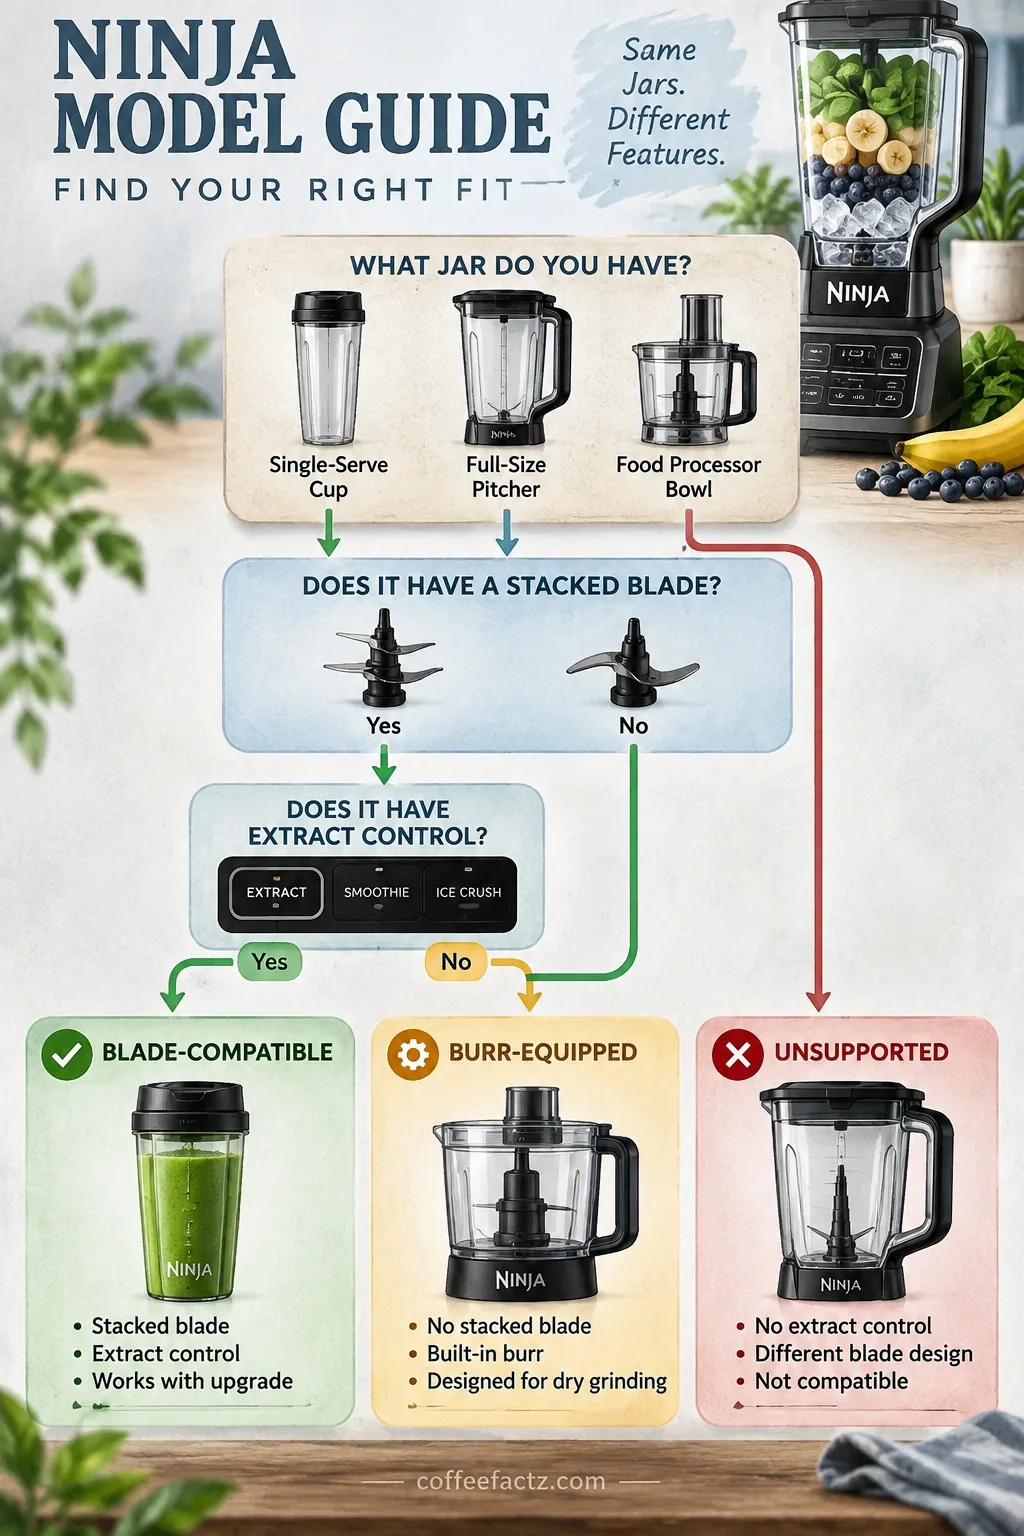
Now verify your specific model. Three types of Ninja units are in common circulation:
- Full-pitcher models with a stacked blade assembly running up the center of the jar
- Single-serve or personal-cup models that attach a blade directly to the cup
- Mini choppers with a separate bowl and a top-mounted blade
All three can fracture a bean. Not all three are equal for this job. The personal-cup and mini chopper formats give you less control over bean movement and heat dissipation. The full-pitcher format, especially one with an Extract function or pulse control, is the most capable of the three.
Here’s the gate check: pull up your manual or find your model number. Confirm two safety checks. First, does your unit have an Extract function, a pulse mode, or any control that lets you run the motor in short, manual bursts? Second, does the manual mention dry ingredient processing at all? If the manual doesn’t support it and you have no burst control, that’s your answer before you waste beans.
The highest-value pre-check you can run right now: place the empty jar on the base, lock it, and trigger one short burst with your hand on the lid. If you cannot stop the motor within two to three seconds on your own terms, you cannot execute the pulse protocol this method requires. Stop here.
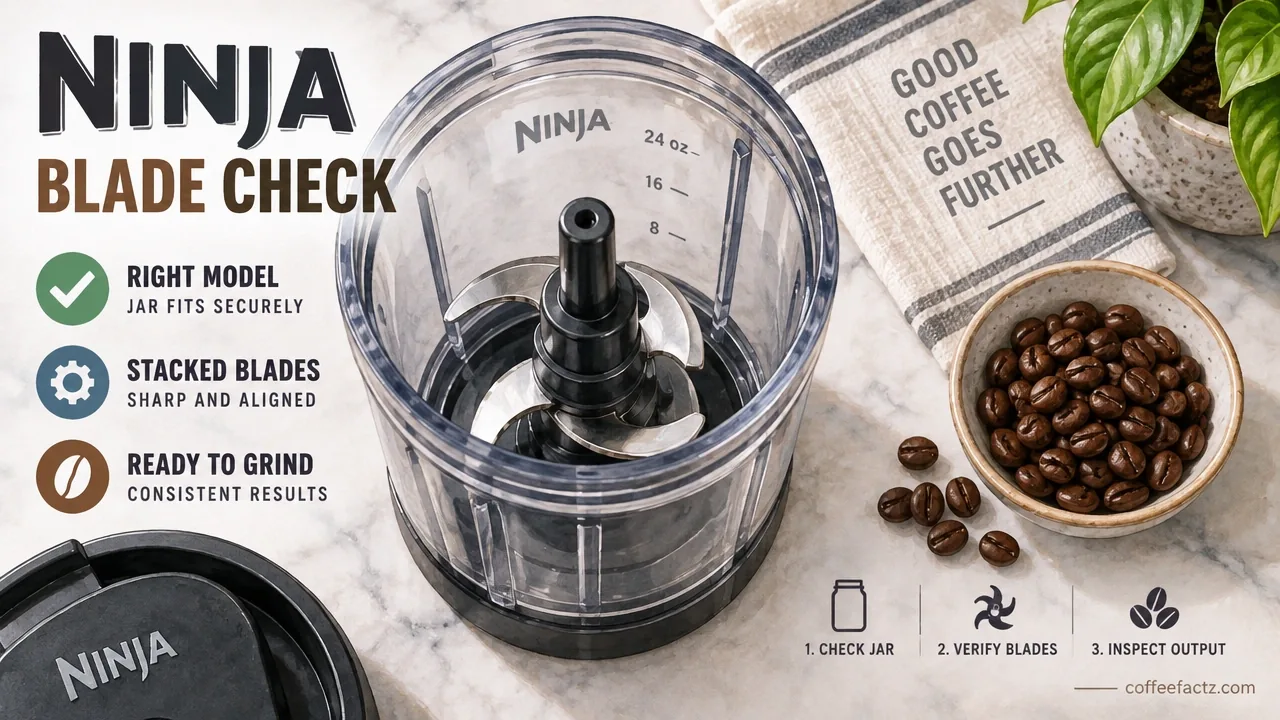
Where an Extract function does exist, community testing consistently shows it’s the right control for processing beans. Not the smoothie preset. Not the ice-crush cycle. Those run longer than one pulse and remove your hands from the process entirely.
Ninja Kitchen Support, the official manufacturer support documentation for Ninja products, states: “For best performance press either HIGH or Start/STOP to grind your ingredients.”
That’s the manufacturer telling you which controls to use. High or Start/Stop for manual bursting. Not a preset program.
Scope Disambiguation and Safety Baseline
One important scope note: if your Ninja is a burr-equipped espresso machine rather than a blade blender, this entire guide does not apply to you. You already have a real grinder built into the unit. Running beans through a separate blade jar on a burr machine would damage it. Check your model before proceeding.
For everyone with a standard blade unit, here’s the safety baseline before anything else.
Use whole beans roasted within the last two to four weeks. Older beans have already lost much of their volatile aromatics, so you’re starting behind. Never run the jar empty. Blade spin with no load generates pure friction heat and accelerates wear on the motor bearings. And treat the stacked blades as knife-sharp at all times. Unplug the unit before reaching into the jar. Every time.
One more thing: never copy a fill number from a video shot with a different jar. Two Ninja units wearing the same model badge can carry different jar geometries, and the fill limit is a property of your jar, not the brand. Confirm it yourself.
Step 1: Charge the Jar Small (The Fill Numbers Contradict Each Other – Here’s the Rule That Wins)
The starting load for grinding coffee with Ninja is no more than 1/4 to 1/2 cup of whole beans, and never above the halfway point of your jar. Start at the smaller end of that range on your first batch.
The reason is mechanical. At high RPM, the blade needs beans to collide with other beans, not with the jar wall. That bean-on-bean collision is what re-presents each piece to the blade face at a new angle so it gets struck again. When you pack the jar too full, the beans compress into a static mass. The blade spins in the center of that mass, churning the same beans repeatedly while the ones at the top and edges never move. The result is a mix of powder at the blade face and intact boulders everywhere else. Both at once.
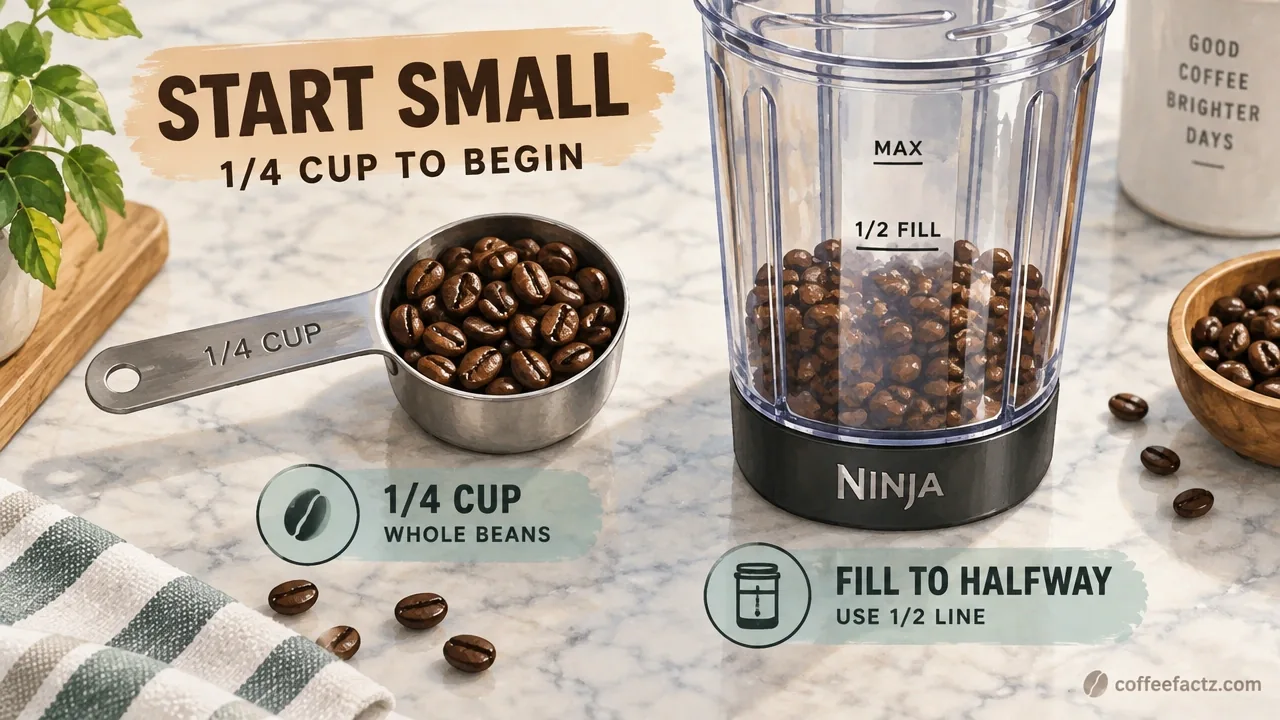
Now, about the conflicting fill numbers you’ll find online. Some manufacturer Q&A threads report success filling the jar up to two-thirds. Two separate appliance-brand how-to guides cap the load at “never more than halfway” and “1/4 to 1/2 cup.” Those are not the same number, and both claim to be correct.
Here’s how to resolve it. The two-thirds figure comes from a single user report in a Q&A thread. The smaller numbers come from formal instructions written by appliance brands. Weight the instructions over the anecdote. Treat 1/4 to 1/2 cup as your default. Treat two-thirds as an experiment you try after a successful first batch, not before.
The underfill failure is less obvious but worth knowing. Too few beans means the blade partly spins in open air on each pass. The beans that do get struck absorb repeated impacts without enough fresh material rotating in, which adds friction heat rather than reducing particle size. Too little is its own problem.
Before each batch: lid locked, jar fully seated, and a clear counter space within arm’s reach. You’ll be setting the jar down between every pulse. That’s not optional. It’s the method.
Step 2: Pulse and Shake – The Working Protocol Most People Skip
Run the motor for two to three seconds. Stop. Lift the jar and shake it or tap it firmly on the counter. Set it back down. Pulse again. Repeat.
That’s the entire cadence. It reads simple. Most people skip it anyway because it feels slower than just holding the button down, and it is slower. That trade is deliberate, and the next section explains what you’re buying with those extra seconds.
The shake is doing real mechanical work. When you stop the motor, the partially broken pieces settle. Larger chunks sink toward the blade face. Finer dust rises and separates. When you shake the jar, you re-present unbroken beans to the blade and separate finished dust from still-chunky pieces so those pieces aren’t struck over and over. Pulsing without shaking just re-cuts the same boulders and bakes the same dust into the same corners.
If a layer of bean chunks clings to the jar wall above the blade between pulses, scrape it down before the next burst. Those pieces are not getting ground where they are.
Here’s the physics behind why this matters. At high RPM, the Ninja blade doesn’t crush beans. It strikes them. Each bean shatters along whatever internal crack it happened to present to the blade at that moment, so particles land across a wide size range in a single hit. A burr grinder sets a fixed gap between two abrasive surfaces and compresses every particle toward one target size. That mechanical difference, not technique, is why blender-ground coffee is inherently inconsistent. You’re not doing anything wrong. The tool shatters; it doesn’t crush.
Where an Extract function exists on your unit, use it as your short-burst control rather than any fixed preset. Presets run longer than one pulse cycle and take your hands out of the process.
The stop condition for this step: no intact beans remain and the pieces look uniformly chunky. Don’t chase a specific texture here. That belongs to Step 5. For now, just confirm everything has been broken at least once.
One useful indicator: when you shake the jar at the end of this step, the grounds should tumble and pour freely. Grounds that clump and hold their shape are already damp with released coffee oils. That’s a heat signal. Move to Step 3 before continuing.
Step 3: Break the Heat Cycle Before the Oils Break Down
Friction heat is the invisible failure mode in blade grinding, and it’s the reason blender coffee often tastes flat, bready, or oddly bitter even when the grind looks acceptable. The fix is a deliberate cooling pause built into the protocol, not an afterthought.
The executable rule: cap every burst at two to three seconds. Between bursts, set the jar down on the counter and let the jar wall return to room temperature to the touch before the next pass. Don’t hold the jar in your hand between pulses. Your hand is warm, and you’re trying to let the jar cool.
The smell test is your most reliable sensor. Pick up the jar and smell it. It should smell like the bean bag. Roasty, sweet, a little earthy. If you detect baked bread, toast, or a hot-appliance smell, you’ve already pushed past the safe line. Stop. Let the jar cool fully. Shorten your next burst.
Two easy mistakes to eliminate before you start. First, never grind immediately after a hot wash cycle on the jar. A warm jar adds to the thermal load before you’ve run a single pulse. Second, never run the motor continuously. Continuous running converts blade friction directly into the bean surface with no recovery window.
There’s an important trade-off to name here: a finer grind requires more blade contacts, and more contacts means more friction heat. Chasing a finer grind in a Ninja is self-defeating. You buy a smaller particle size at the cost of the flavor compounds you were grinding to preserve in the first place.
The mechanism behind that trade-off is worth understanding. Blade grinding is an impact process. Energy dumps into the particle surface as friction heat on every strike. Burr grinding is a slow compressive crush that puts far less energy into each individual particle. Same beans, same target size, different amount of heat pushed into the oils. That’s the flavor gap between blade and burr output, and it’s separate from the consistency gap.
No published source provides a temperature threshold, a particle-size distribution, or a motor-strain limit for this specific process. That data doesn’t exist in any brand guide. So this step works with sensory signals instead of specs.
A study published in Applied Sciences applied controlled heat to coffee beans immediately before grinding and analyzed the resulting volatile organic compounds. The heated beans showed a significantly elevated level of hexanal, a compound associated with stale, flat flavor notes and the kind of accelerated aging that degrades a coffee’s aromatic profile. The authors described the effect of the heat treatment as comparable to accelerated aging of the bean itself.
That finding maps directly onto what happens inside a blade jar during a long, uninterrupted grind run. The four sensory proxies to watch for:
- Jar wall warm to the touch
- Aroma shifting from roasty-sweet to baked or bready
- A visible oil sheen or condensation on the jar wall
- Grounds that feel damp and clumpy rather than dry and free-running
Any one of those signals means stop and cool before the next pulse.
Step 4: Sift the Fines Out – The Step Nobody Tells Beginners
Fines are the powder-fine dust that coats the inside of the jar wall, drifts into the lid seal, and disappears between your fingers when you rub the grounds. They are a natural byproduct of blade grinding, and they are the main reason blender-ground coffee tastes simultaneously thin and harsh.
The separation step is simple. Pour the grounds into the finest-mesh sieve or kitchen strainer you own. Shake it gently over a bowl. The dust falls through. The usable grounds stay in the sieve. The whole thing takes under a minute.
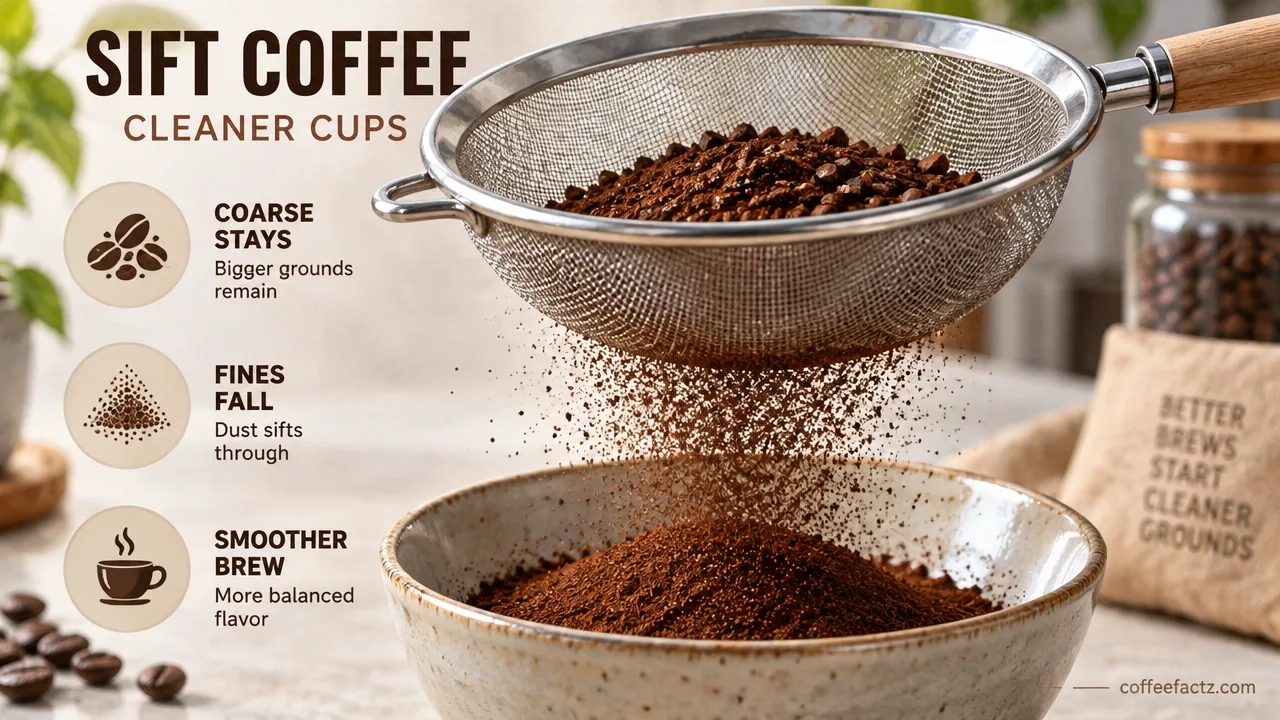
Here’s why it matters at the chemistry level. Fines extract far faster than the rest of the particle bed. When you brew a cup containing both fines and coarser grounds, the fines hit their extraction peak and turn bitter while the bulk of the coffee is still under-extracted and thin. You get both problems in the same cup at the same time. That’s not a brewing error. That’s the signature complaint of blender-ground coffee, and sieving is the only fix.
With any paper-filter method, fines create a second problem: they clog the paper and stall the brew entirely. If your drip or pour-over is running slower than usual, fines in the grind are the first thing to check.
Rule out fines before you change anything else in your recipe. Before you add more coffee, adjust your water temperature, or extend your brew time, sift first and brew again. The result will tell you whether the problem was extraction or particle size.
Sieving is also a diagnostic tool. If the sieve catches more dust than usable grounds on your first batch, the problem isn’t the sieving. Your load size or burst length is off. Go back and fix that before sieving harder next time.
One honest caveat: sieving reduces the bitterness penalty. It does not convert blade output into burr output. The remaining grounds are still uneven in size. But removing the worst end of that range makes a real, tast-able difference in the cup.
Step 5: Match the Grind to the Brew – Your Realistic Ceiling
The Ninja grind you’ve just produced has a ceiling, and knowing it before you brew saves you from blaming the wrong variable.
Start with texture vocabulary. Coarse breadcrumbs is the target texture for French press and cold brew. Fine sea salt or sand grit describes the coarser end of a medium grind. Flour is what a quality espresso grinder produces. That texture is not reachable with a blade. Don’t treat it as an aspirational goal. Treat it as a hard boundary.
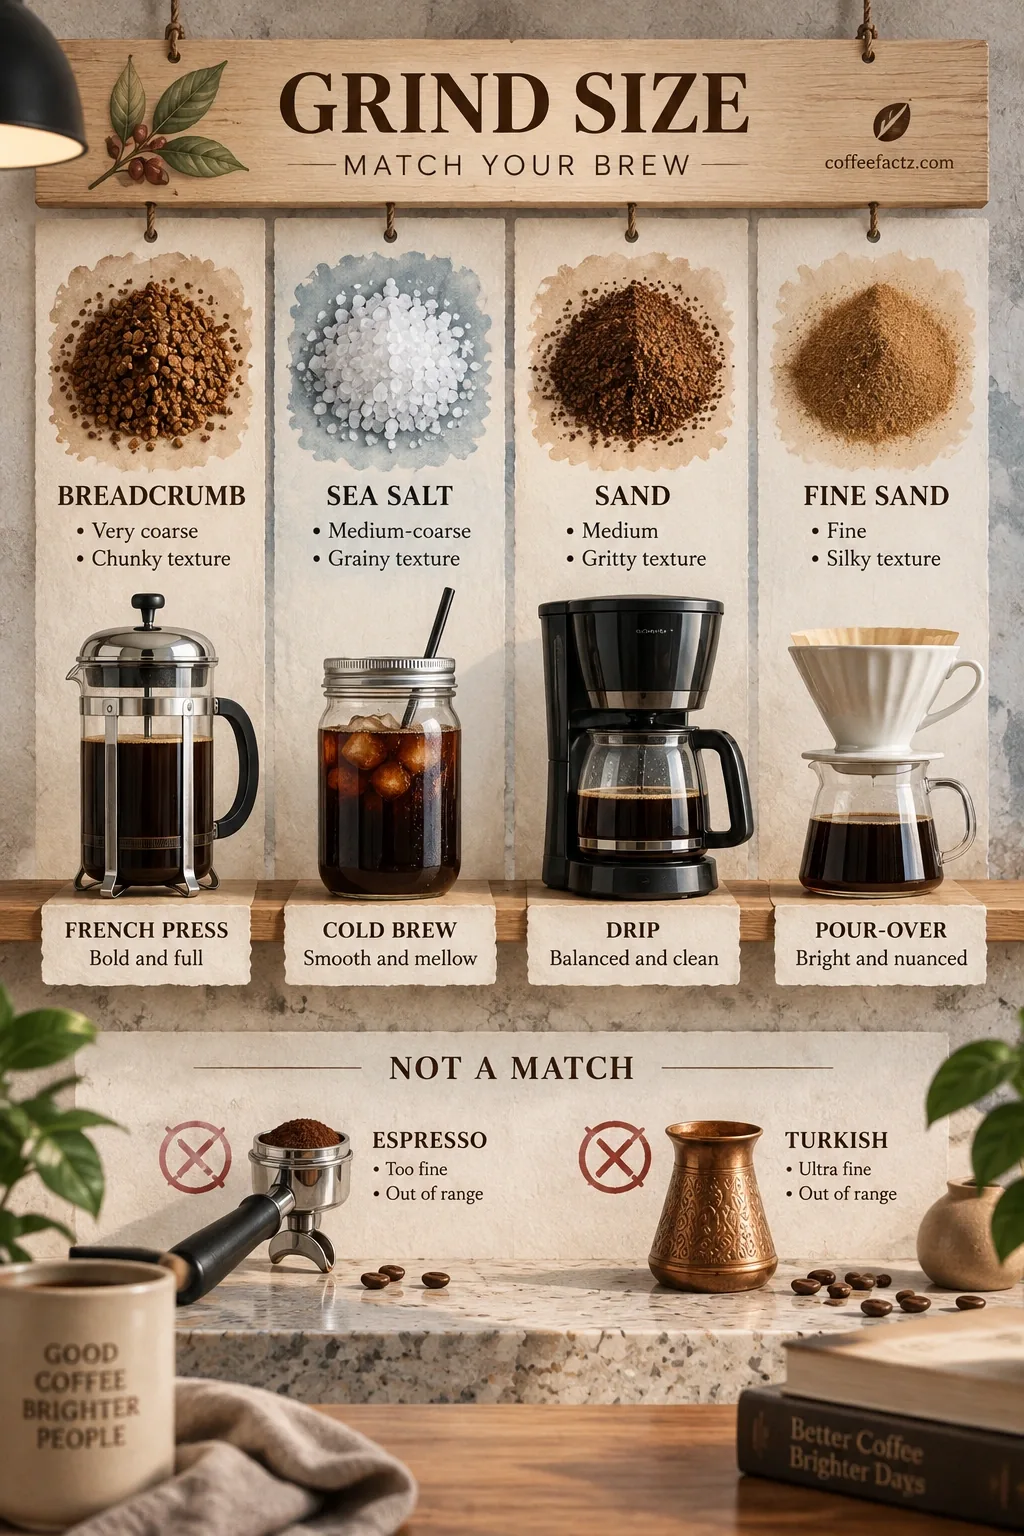
Here’s the honest brew-method map:
| Brew Method | Blade-Ground Result | Verdict |
|---|---|---|
| French press | Coarse, forgiving, immersion-based | Recommended |
| Cold brew | Coarse, long steep masks inconsistency | Recommended |
| Drip coffee | Possible at the coarse end, still uneven | Proceed with caution |
| Pour-over | Possible only at coarse end, flow rate issues | High difficulty |
| Espresso | Requires particle consistency a blade cannot produce | Off the table |
| Turkish coffee | Requires near-flour fineness | Off the table |
French press and cold brew are the targets. They use immersion brewing, which means the coffee and water sit together for a controlled time rather than relying on precise, even extraction through a particle bed. That forgiveness is what makes them compatible with blade-ground coffee.
Now fix the supporting variables so grind problems stay diagnosable. Start at a 1:15 coffee-to-water ratio by weight. Water temperature at 195-205°F, or about 30 seconds off a full boil. And use a digital scale instead of scoops.
On the tablespoon question: one tablespoon versus two tablespoons per cup is a conflict that appears everywhere, and the reason it conflicts is that tablespoon volume varies with roast level, grind coarseness, and bean density. A coarse blade grind fills a tablespoon differently than a fine burr grind. The scale removes that ambiguity entirely. It’s the single fastest upgrade you can make to this process.
Finally, before you conclude that the method is the problem, taste your Ninja-ground coffee against the same beans ground by a proper grinder, not against a stale pre-ground bag. The freshness gain from grinding whole beans, even imperfectly, is real. Make sure you’re comparing the right things.
Troubleshooting: Diagnose the Cup, Then Decide Whether to Keep Going
When the cup still tastes wrong after following the protocol, the fix is almost always in the grind, not the recipe. Start with the cup, work backward to the jar.
Flavor and Particle Symptoms
Taste diagnosis is the fastest signal. Sour or thin means the particle bed was too coarse and uneven. The water moved through without extracting enough. Fix: pulse slightly longer on the next batch, and make sure you’re shaking between every burst so fresh pieces reach the blade.
Bitter or harsh means two things happened: fines made it into the brew, and heat likely pushed the oils past their threshold. Fix: sift more carefully before brewing and shorten your burst length. Check the four sensory proxies from Step 3 on your next batch.
Both at once, sour and bitter in the same cup, is the classic blender signature. It’s not two separate problems. It’s one particle-size distribution that’s too wide: the fines over-extract and the boulders under-extract simultaneously. Sieving addresses the fines end. Better redistribution between pulses addresses the boulder end.
Texture diagnosis from the jar gives you a second read. Surviving whole beans after the process mean either the jar was underfilled or you didn’t shake between pulses enough times. Mud pooling at the bottom of the jar means you overran the motor and drove heat into the grounds. Banded or inconsistent color across the grounds means the batch was too large for the blade to reach everything.
Equipment Strain and Threshold Criteria
Motor strain is a separate signal from grind quality. If the motor sounds labored, if you smell something hot and electrical rather than coffee, or if the blade feels like it’s wobbling on the post, stop immediately. Let the unit cool completely. Reduce your load before the next attempt. Running the blades dry, or running them through a load that’s too dense, damages the unit. This appliance was not designed to be a coffee grinder, and treating it like one has limits.
Now the decision rule. If your target brew is medium-fine, espresso, or pour-over, there is no technique that gets you there from a blade jar. The ceiling is real, and no amount of additional pulsing will change the underlying physics. The dominant advice in owner communities after repeated failed attempts is to stop and get a proper coffee grinder. The appliance-brand guides say the same thing: burr is the long-term solution.
That’s information, not a failure. The failure pattern worth naming is this: identical inputs on the same Ninja machine don’t reproduce the same grind from batch to batch. A blade has no gap setting to return to. There’s no reference point. Reproducibility is what you’re actually giving up when you use a blade instead of a burr, which is why the exit is a grinder rather than a better technique.
Where the Ninja still earns its place is specific and real. Coarse-only, immersion-brew-only, small-batch use where the alternative is supermarket pre-ground. The freshness gain from grinding whole beans on the day you brew, even imperfectly, can outweigh the consistency cost. French press and cold brew are the legitimate wins. Not “blender coffee is as good as a grinder.” That claim isn’t honest, and it isn’t what this method delivers.
Frequently Asked Questions About Grinding Coffee with Ninja
Can I grind coffee beans in my Ninja blender?
Yes, but the blade shatters beans rather than crushing them, so you’ll get a coarse, uneven grind that works for French press and cold brew. It won’t produce the consistency espresso or pour-over requires.
Can you use a mini chopper to grind coffee beans?
You can, but the small bowl limits bean movement, which means less bean-on-bean collision and less control over heat buildup. Keep loads very small, pulse in two-second bursts, and expect coarser, less even results than a full-pitcher unit with an Extract function.
Why does my Ninja-ground coffee taste bitter even though it looks fine?
Fines are almost always the cause. The powder-fine dust that coats the jar wall extracts far faster than the rest of the grounds and turns bitter before the bulk of the coffee has properly extracted. Sieve the grounds through a fine-mesh strainer before brewing and taste again.
How do I know if my Ninja is getting too hot during grinding?
Four signals: the jar wall feels warm to the touch, the aroma shifts from roasty-sweet to baked or bready, you see an oil sheen or condensation on the jar wall, or the grounds clump and feel damp instead of dry and free-running. Any one of those means stop and let the jar cool fully.
Is it 1 or 2 tablespoons of coffee per cup?
The conflict exists because tablespoon volume changes with grind coarseness and bean density. A coarse blade grind fills a tablespoon differently than a fine burr grind. Use a digital scale and a 1:15 coffee-to-water ratio by weight instead; it removes the ambiguity entirely.
Why does my coffee taste both weak and harsh at the same time?
That’s the classic blade-grind signature. Fines in the particle bed over-extract and turn bitter while the larger chunks under-extract and taste thin, both in the same cup. Sieving out the fines before brewing and pulsing with more frequent shakes in the next batch addresses both ends of the problem.
How do I dial in a better grind with my Ninja?
Reduce load size first, then shorten burst length, then sieve more carefully. Those three adjustments, in that order, fix most problems. If the result is still inconsistent across batches, that’s not a technique failure; a blade has no gap setting to return to, so reproducibility is the fundamental limit of the tool.
When should I stop trying and just buy a coffee grinder?
If your target is medium-fine or finer, or you’re trying to brew espresso or pour-over, the ceiling is real and no technique changes it. If you’re happy with French press or cold brew and the freshness gain from grinding whole beans outweighs the consistency cost, the Ninja is still a legitimate tool for that specific use case.
References
- For best performance press either HIGH or Start/STOP to grind your ingredients | support.ninjakitchen.com
- Effects of Coffee Bean Thermal Treatments on Particle Size Distribution and Espresso Bioactive Compounds | flore.unifi.it